Browsed by
Tag: fermentation

Fermenting Eco-enzyme

Fermenting Eco-enzyme

Why did I start fermenting eco-enzyme? Ever since I read about zero waste lifestyle, we have been trying to practise it. But I can tell you, that it is EXTREMELY difficult. Hehe. Although I wouldn’t say that we can totally do it now, but we have cut a lot of waste by changing some of our living habits. So better than nothing lah… every little bit of effort counts, IMHO.

One of the initiatives we had started quite a long while back (I kept wanting to post about it but had been procrastinating…. as usual…) was fermenting eco-enzyme (EE) aka garbage enzyme. It makes use of food waste that would otherwise be thrown away, so why not, just put it to good use? It’s natural, healthy and organic (everyone uses this word, so ya… must follow the crowd.)

EE has multiple uses. It can be used as cleaning detergent, laundry cleaner (especially for people with sensitive skin like my DD), floor cleaner, stain remover, vegetable cleaner,  plant fertiliser and pesticide.Not only that, it is extremely easy to do. Everyone who knows me, knows that I’m extremely lazy… can only do the easy stuff. So if I can do it, most people can, it’s a matter of whether you want to make the effort or not. So here goes….

What do you need for Eco-Enzyme (EE) :

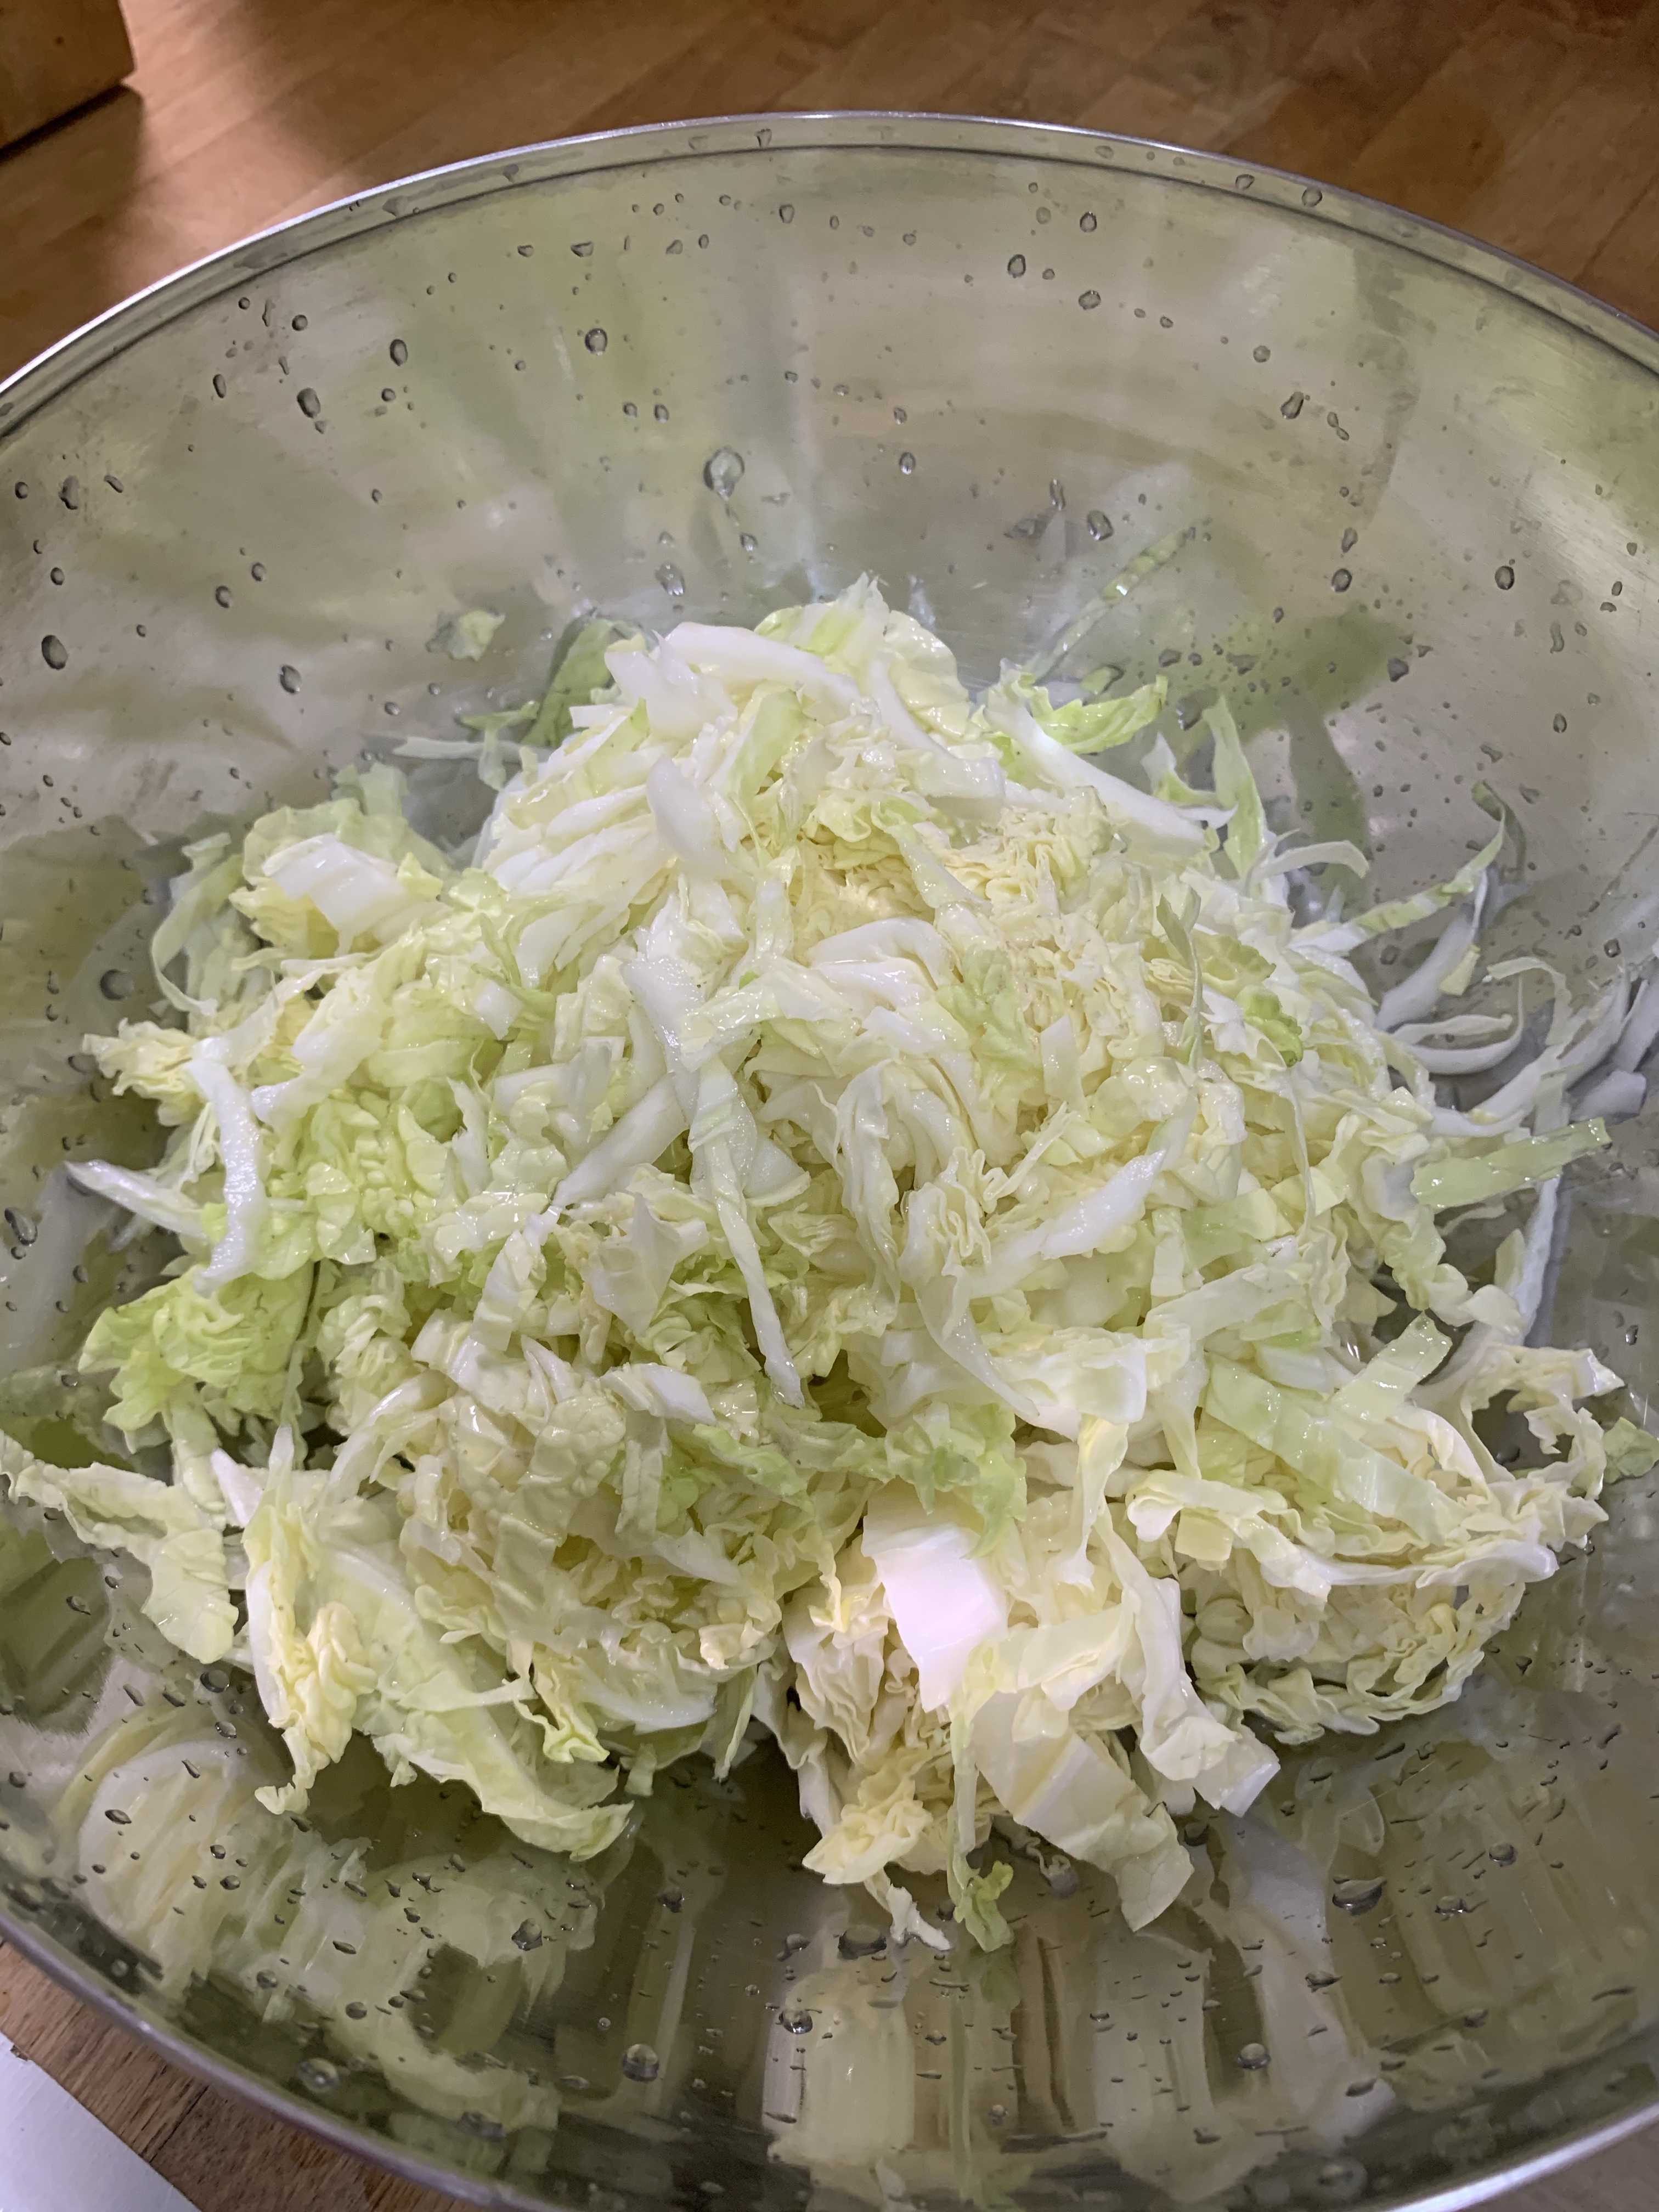
  • Fruit peels (I don’t use vegetable ends because I don’t like the smell…) I like to use a mixture of fruits, since we eat all kinds of fruits everyday. So that’s not a feat for me. Citrus peels give it a nice fragrant.
  • leftover herbs (i like the smell…)
  • Sugar – I use the cheapest white sugar for economical reasons. I’m not going to drink it anyway and the bacteria aren’t picky.
  • Plastic container – I use a 3L container (those used to contain CNY goodies). Some people use super huge ones. But I find it more manageable to use smaller ones. You will get about 2L of EE at the end of the day
  • Waterproof marker
  • Measuring cup

Have you got them? You are set to go!

Steps to fermenting eco-enzyme (EE)

Proportion of Ingredients

Sugar : Peel : Water = 1 : 3 : 10

1. Make markings on the container

There are lots of ways to do this. Some people go by weight; some people mark down on paper and divide it out accordingly. I use the volume of water. It’s not like an extra ml more or less will make a huge lot of difference. That’s me lah. So, using a measuring cup, I measure out the water (about 2150ml for a 3L container), pour it into the container, make a marking on the water level using my waterproof marker. Then sugar (about 210ml) and finally peel (640ml).

2. Pour out the water until it reaches the water mark.

3. Scoop in the sugar until it reaches the sugar mark.

4. Put in the peels until it reaches the peel mark. I usually start a new container with just water and sugar and add the peels along the way. Once it reaches the peel mark, I will start another container.

Fermenting Eco-enzyme

5. Cover the container loosely so that the gas created during fermentation process can escape through the gap. We want to produce vinegar, not alcohol, at the end of the day. Label the production date so that you will know the age of the EE.

Fermenting Eco-enzyme

6. Stir everyday for the first few weeks. Some fruit peels tend to produce kahm yeast, so stirring helps the buildup.

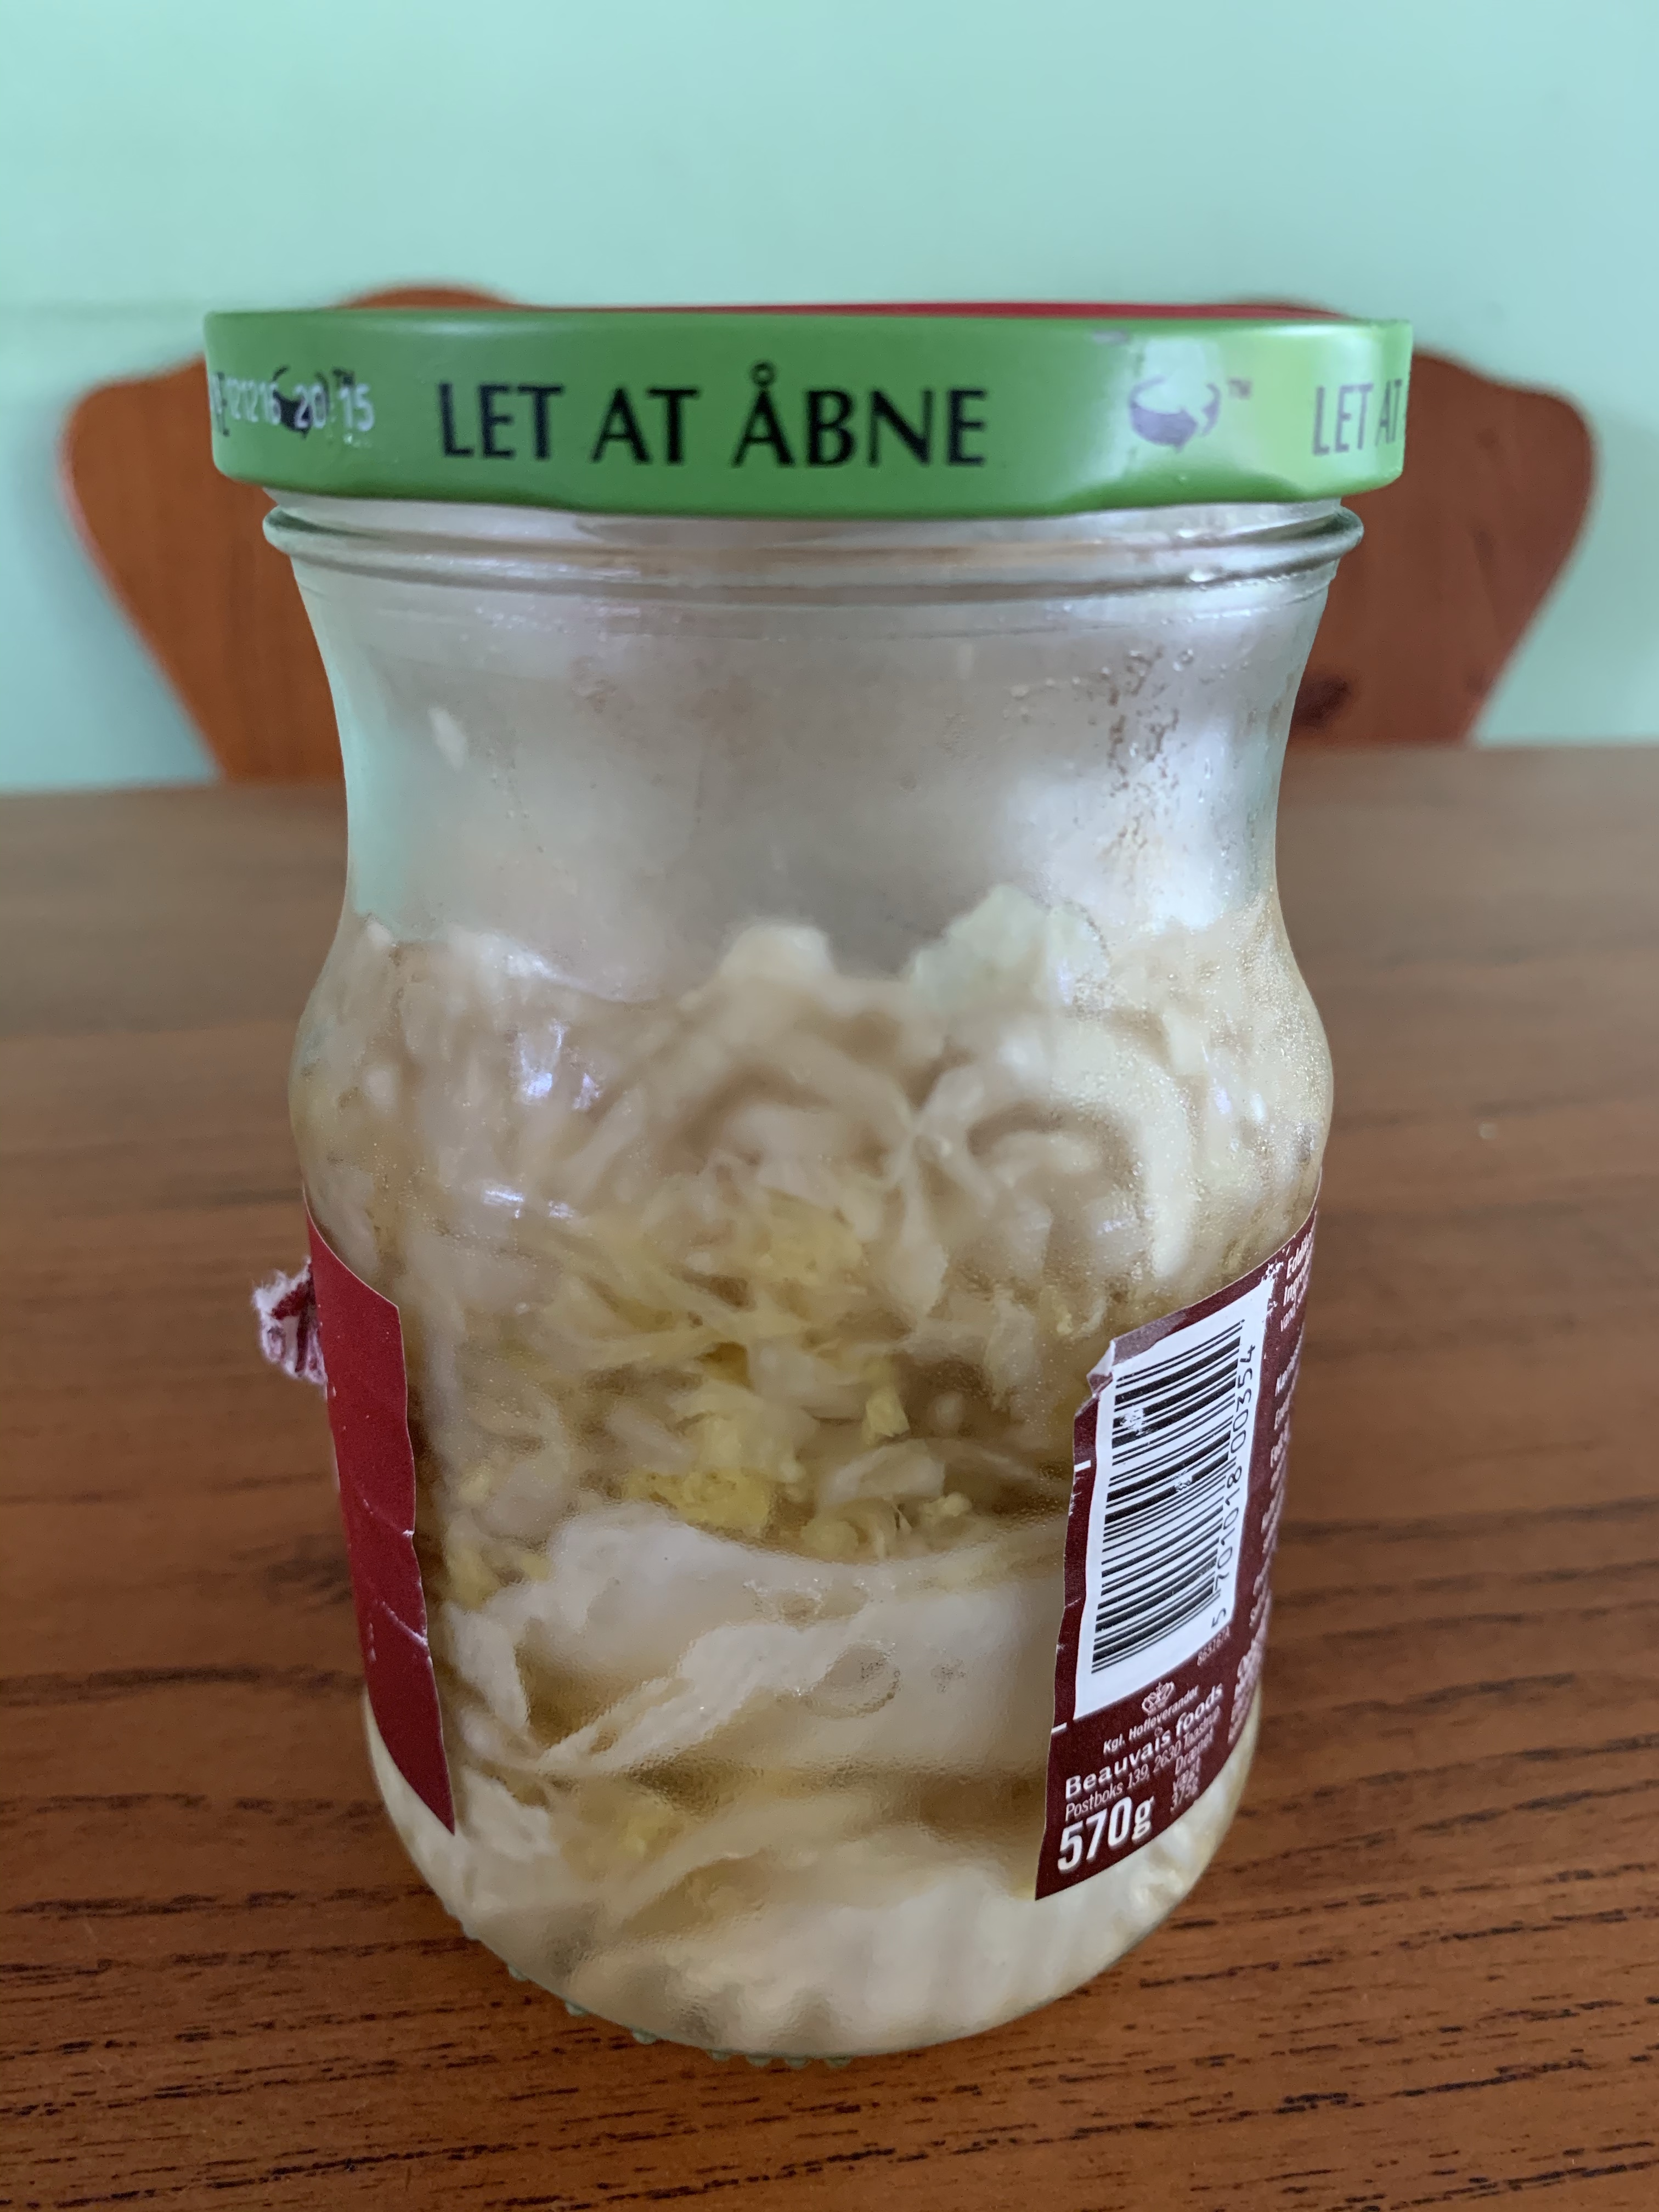
7. After 3 months, your EE is ready for harvesting. Usually the mush will sink to the bottom after a while. I filter the EE and separate the mush and the liquid. I bottle the liquid in the 2L milk bottles and label them. I have 2 containers here. The one on the left is fresh and the peels are floating, whereas the one on the right has been around for 3 months. As you can see, the peels have broken down and have sunk to the bottom of the container.

Fermenting Eco-enzyme

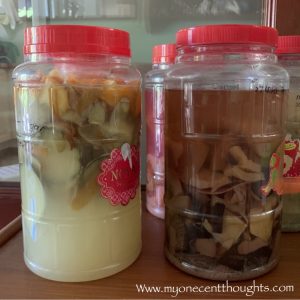
One 3L container can yield about 2L EE. I reuse the milk containers for this purpose.

Fermenting Eco-enzyme

What can we do with the mush?

  • add it into the composting bin (if you have one.) It is extremely effective as the bacteria in it helps to break up the food waste in the bin faster.
  • put it on stubborn stains and clean them away
  • put it in the toilet bowls for a few hours, then flush them away. Don’t worry, these won’t choke up the toilet bowl and they are broken down food waste. Use the toilet brush to brush away the ones that stuck to the toilet bowl (common sense, right…)

Fermenting Eco-enzyme

Eco-enzyme (EE) Usage Proportion

  • Dish washing – (EE : detergent ) 1 : 1
  • Laundry – 200ml EE (I use this amount and my clothes have a nice “citrusy” fragrance.
  • Floor cleaner – (EE : water) 1 : 800
  • Veggie / fruit soak – (EE : water) 1 : 50. To get rid of the pesticide on the fruit skins. Soak about 30 mins.
  • Fertiliser – (EE : water) 1: 1000
  • Pesticide – (EE : water) 1 : 300

The information here have been researched from the internet and from my experience in my EE learning journey. Credits to JC Cheng and her Eco Enzyme Facebook group which gave me a lot of ideas and inspiration to start off on this EE journey.

My other fermentation projects

Gluten Free Sourdough Starter

Gluten Free Sourdough Starter

All sourdough breads start life…. from a sourdough starter. Hehe. Ok, that was lame. Anyway, before you can bake a loaf of sourdough bread, you need the starter. The starter replaces the commercial yeast found in the normal bread. It is full of bacteria that do all the work in the bread for you and it is natural.

Creating a sourdough starter isn’t easy. Starting one that is gluten free is even more difficult. If you are leading a gluten free lifestyle, you will know that gluten free flours cost a lot more than the normal wheat flour out there, especially during the covid 19 lockdown period. They are even harder to find than gold! (exaggeration…)

I went through a lot of trial and error and trawled through lots of literature (online or in print, there are a lot of information on normal sourdough but very little on gluten free ones! So frustrating!) before I finally have a successful gluten free sourdough starter (which I named Scooby Dough) that doubles every time it is fed. By then, I have already used up sacks of various gluten free flours, literally, to create it.

Create a gluten free flour mix

I created a gluten free flour mix because I wanted my starter to be easily adaptable to any sourdough recipe and also imbued with various kinds of bacteria present in the different flours. You don’t have to do this. You can have a pure brown rice starter or a buckwheat starter or just a mix of 2 flours. The gluten free flours you can use are as follows : brown rice flour, buckwheat flour, sorghum flour, teff flour, millet flour. The most common starters are made of 50/50 brown rice/buckwheat. If you are allergic to any of these flours, just leave them out when creating the starter.

Setting up the gluten free sourdough starter

You will need :

– a sterilised clean glass jar or bowl with a cover

– weighing scale

– gluten free flour mix

– room temperature water (I have a filtration system at home, so I am using filtered water)

Day 1

In the morning, weigh out 20g gf flour mix, 20g water. Mix them thoroughly in a small bowl. The texture should be yoghurt like. Carefully, transfer the mix into the sterilised glass jar. Cover it loosely without screwing the cap. Leave it in a cool corner without direct sunlight.

In the evening, weigh out 20g gf flour mix, 20g water. Add them to the mix in the jar and mix them thoroughly. The proportion is always 1:1:1 – starter : flour : water. Put a rubber band around the level of your mix, so that you can tell if the starter has increased in volume and the amount of increase.

Day 2

Morning : Weigh out 20g starter, 40g flour, 40g water. Put the rest of the starter into a glass jar or container and keep it in the fridge. For the first few days, the bacteria has not been activated so it is not advisable to make anything with them yet. Wash the glass jar so that there aren’t any remnants in the jar which may cause mould to form. Mix everything in a bowl and transfer into the clean jar.

Evening :Weigh out 40g flour, 40g water and add them into the mix in the jar. Mix thoroughly.

Repeat the steps until your starter starts to bubble. This usually takes about 7-14 days. Once your starter starts to bubble, you can start using the discards in your fridge to make sourdough discard bakes.

Continue with the steps until your starter doubles in volume after 1 feeding. That means it is now ready for baking. Congratulations! You can give your pet starter a name (it is alive after all!) and start baking with it.

Q: What if it still doesn’t rise after 7-14 days?

A: Normally, it should. If it doesn’t, try replacing water with a fermented liquid such as yeast water, kombucha, ginger bug, whey. Another way is to add 5g of sugar every feed.

img_8513
Meet my pet starter, Scooby Dough!

Here is a picture of my pet starter Scooby Dough! Look at all his beautiful bubbles! If you find it too tedious and expensive (gluten free flours aren’t cheap) to create your own starter, you can buy an offspring of Scooby Dough here! You can use it to bake immediately. It is a very versatile starter and you can also change it to a starter of your own liking because it has been infused with a variety of gluten free flours.

Hibernating Sourdough Starter in Fridge

If you find that you don’t bake every day and the sourdough starter can be a very hungry pet, just pop it into your fridge after your last bake. It will go into hibernation mode. Just be sure to take it out once a week and feed it once. Let it double in volume then put it back in the fridge.

Plan ahead for your bakes. Take the starter out of the fridge 1 day in advance and feed it once in the morning to reactivate it. If it doesn’t double after that feed, you will need to feed it again in the evening. Once it doubles, it’s ready for a bake.

Other gluten free sourdough projects

Other fermentation projects


My Fermented Food Projects

My Fermented Food Projects

I have been intrigued with fermented food ever since I came across it on my quest to cure 宝贝’s eczema. I have even brought love for fermented food further by founding Craft & Culture with Winnie, so that we can reach out to more people out there who loves it but have no time or passion to make them.

Here are some of the books that got me started on fermentation.

Wild Fermentation – the Flavor, Nutrition, and Craft of Live-Culture Foods by Sandor Ellix Katz

Sandor Katz is the Father of Fermentation. His books details the science behind fermentation and various kinds of fermented food. It’s not a pretty book though because it is wordy and doesn’t have many pictures to follow. But it is very detailed and is a wealth of information.

The Art of Fermentation : An In-Depth Exploration of Essential Concepts and Processes from around the World

This is his 2nd book.

Fermented Vegetables by Kirsten K. Shockey & Christopher Shockey

I use this book extensively for fermentation of vegetables. It is very detailed with step by step information and beautiful pictures.

My Fermentations

Milk Kefir

Kombucha

Sauerkraut

Gluten Free Sourdough

Miso

Honey Garlic Ferment

Honey Cranberry Ferment


Fermentation : Sauerkraut (fermented cabbage)

Fermentation : Sauerkraut (fermented cabbage)

I have always wanted to make sauerkraut, but as usual, procrastination set in and before I knew it, it’s year 2020! I bought an organic cabbage yesterday. It cost a bomb… seriously. I have never paid so much for vegetables before… Maybe I should start growing cabbages at home. *ponder*

There it sat on my counter, staring at me, daring me to let it rot. I couldn’t stare it down, so I moved my ass and chopped it down. Ha da! And it’s actually surprisingly easy to do! So all of you out there, if you are still thinking (for the longest time ever) of starting but not, JUST DO IT!

Ingredients:

Cabbage (Organic if possible. Or else you will need to use vegetable wash to clean pesticide and yuckies off and also kill off the natural bacteria needed for fermentation)

Salt (I used Himalayan Pink Salt. That’s what I have at home anyway. You can use other mineral rich salts. I draw the line at refined salt.)

Before you start, make sure you have all the tools and containers ready.  Wash them down with soap. Sterilise them if it makes you feel better.

Tools:

Fermentation jar (I use the Lock&Lock Fermentation Jar that comes with a one-way air lock. I prefer to use food grade glass jars due to the high acidity of the ferment and it’s going to stay in it for a while.)

A long stick or spoon (for packing the cabbage into the jar)

Mixing bowl

A weight (to make sure your cabbages stay under the brine. I used a glass jar filled with water.)

7 Easy Steps:

1. Wash your organic cabbage under running water.

2. Pull out the biggest leaf. Cut it down so that it can cover the cabbage slices.

2. Finely slice the rest of the cabbage.

Fermented Cabbage Sauerkraut

3. Add in some salt over the shredded cabbage.  Massage it in with your fingers. (Oh yes, please wash your hands and the parts of your arms that will touch the cabbage, if you are making a big batch. But don’t use antibacterial soap which will interfere with the fermentation process.) Slowly you will see a puddle of liquid polling at the bottom of the pool. Speaking of which, it’s quite therapeutic to massage the cabbage. *lol*

Fermented Cabbage Sauerkraut

4. Taste the cabbage. If you feel that it’s not salty enough, add in more salt. If the brine is still very little, add in more salt and massage until there’s enough brine to cover the cabbage. If it’s already VERY salty but still not enough brine to cover the cabbage, you can add some lemon juice. If you have shredded your cabbage finely enough, you will usually have enough brine.

5. Grab the cabbage and start stuffing them down the fermentation jar. As you do that, use your stick or spoon to push the bits down to make sure there aren’t any air pockets. This stick that I bought from Daiso to roll my pastry dough is just nice for the job.

Fermented Cabbage Sauerkraut

6. Once you have filled your jar, put your big cabbage leaf or leaves over them and press down so that all the bits remain below the brine. I use a clean glass jar, filled with water, to weigh down the leaves. I am buying some glass weights from Amazon. Hope they come soon! Then I capped it with my air lock lid. If you do not have this, you can cover it with a cloth and snap a rubberband over the opening. Or you can just cover the lid loosely over so that air can escape.

Fermented Cabbage Sauerkraut


Fermented Cabbage Sauerkraut

7. I put my precious jar in a dark corner of my kitchen. The best temperature for fermentation is between 20-24 degree C. So that the cabbage has time to ferment nicely and not turn out to be too tart.

Fermented Cabbage Sauerkraut

How do you know if it’s done? Typically, it’s done if it reaches 4.6pH or lower. I keep a stack of ph paper at home to test for new ferments. Usually for old ferments, I would know the estimated amount of time. Alternatively, do the eye-taste-smell-touch test, which I usually do!

Eye – should look a little yellowish

Taste – nicely sour and a little picklelike (if there’s such a word), but not to the extent of becoming vinegar….

Smell – Sour

Touch – firm or slightly soft but not slimy. Slimy = bad news

Once you feel that the ferment is ready, you can bottle them and keep them in the fridge to hibernate the bacteria so that you can stop the fermentation process.

Fermented Cabbage Sauerkraut


The best thing is – it puts good microbes into your body which boosts your immune system which is extremely important during times like this. Take that, Coronavirus!!! AND most importantly, you will have some food at home and you don’t have to fight with the long queues of hoarders at the supermarkets!! Right now, the supermarkets are the most dangerous places in Singapore – what with the long queues and close proximity to dunno-who-is-already-infected.

Besides, I’m trying to work in more fermented food into our diets as these prove to be beneficial to my 宝贝 who is battling the eczema monster!!