Gluten Free Sourdough Starter
All sourdough breads start life…. from a sourdough starter. Hehe. Ok, that was lame. Anyway, before you can bake a loaf of sourdough bread, you need the starter. The starter replaces the commercial yeast found in the normal bread. It is full of bacteria that do all the work in the bread for you and it is natural.
Creating a sourdough starter isn’t easy. Starting one that is gluten free is even more difficult. If you are leading a gluten free lifestyle, you will know that gluten free flours cost a lot more than the normal wheat flour out there, especially during the covid 19 lockdown period. They are even harder to find than gold! (exaggeration…)
I went through a lot of trial and error and trawled through lots of literature (online or in print, there are a lot of information on normal sourdough but very little on gluten free ones! So frustrating!) before I finally have a successful gluten free sourdough starter (which I named Scooby Dough) that doubles every time it is fed. By then, I have already used up sacks of various gluten free flours, literally, to create it.
Create a gluten free flour mix
I created a gluten free flour mix because I wanted my starter to be easily adaptable to any sourdough recipe and also imbued with various kinds of bacteria present in the different flours. You don’t have to do this. You can have a pure brown rice starter or a buckwheat starter or just a mix of 2 flours. The gluten free flours you can use are as follows : brown rice flour, buckwheat flour, sorghum flour, teff flour, millet flour. The most common starters are made of 50/50 brown rice/buckwheat. If you are allergic to any of these flours, just leave them out when creating the starter.
Setting up the gluten free sourdough starter
You will need :
– a sterilised clean glass jar or bowl with a cover
– weighing scale
– gluten free flour mix
– room temperature water (I have a filtration system at home, so I am using filtered water)
Day 1
In the morning, weigh out 20g gf flour mix, 20g water. Mix them thoroughly in a small bowl. The texture should be yoghurt like. Carefully, transfer the mix into the sterilised glass jar. Cover it loosely without screwing the cap. Leave it in a cool corner without direct sunlight.
In the evening, weigh out 20g gf flour mix, 20g water. Add them to the mix in the jar and mix them thoroughly. The proportion is always 1:1:1 – starter : flour : water. Put a rubber band around the level of your mix, so that you can tell if the starter has increased in volume and the amount of increase.
Day 2
Morning : Weigh out 20g starter, 40g flour, 40g water. Put the rest of the starter into a glass jar or container and keep it in the fridge. For the first few days, the bacteria has not been activated so it is not advisable to make anything with them yet. Wash the glass jar so that there aren’t any remnants in the jar which may cause mould to form. Mix everything in a bowl and transfer into the clean jar.
Evening :Weigh out 40g flour, 40g water and add them into the mix in the jar. Mix thoroughly.
Repeat the steps until your starter starts to bubble. This usually takes about 7-14 days. Once your starter starts to bubble, you can start using the discards in your fridge to make sourdough discard bakes.
Continue with the steps until your starter doubles in volume after 1 feeding. That means it is now ready for baking. Congratulations! You can give your pet starter a name (it is alive after all!) and start baking with it.
Q: What if it still doesn’t rise after 7-14 days?
A: Normally, it should. If it doesn’t, try replacing water with a fermented liquid such as yeast water, kombucha, ginger bug, whey. Another way is to add 5g of sugar every feed.
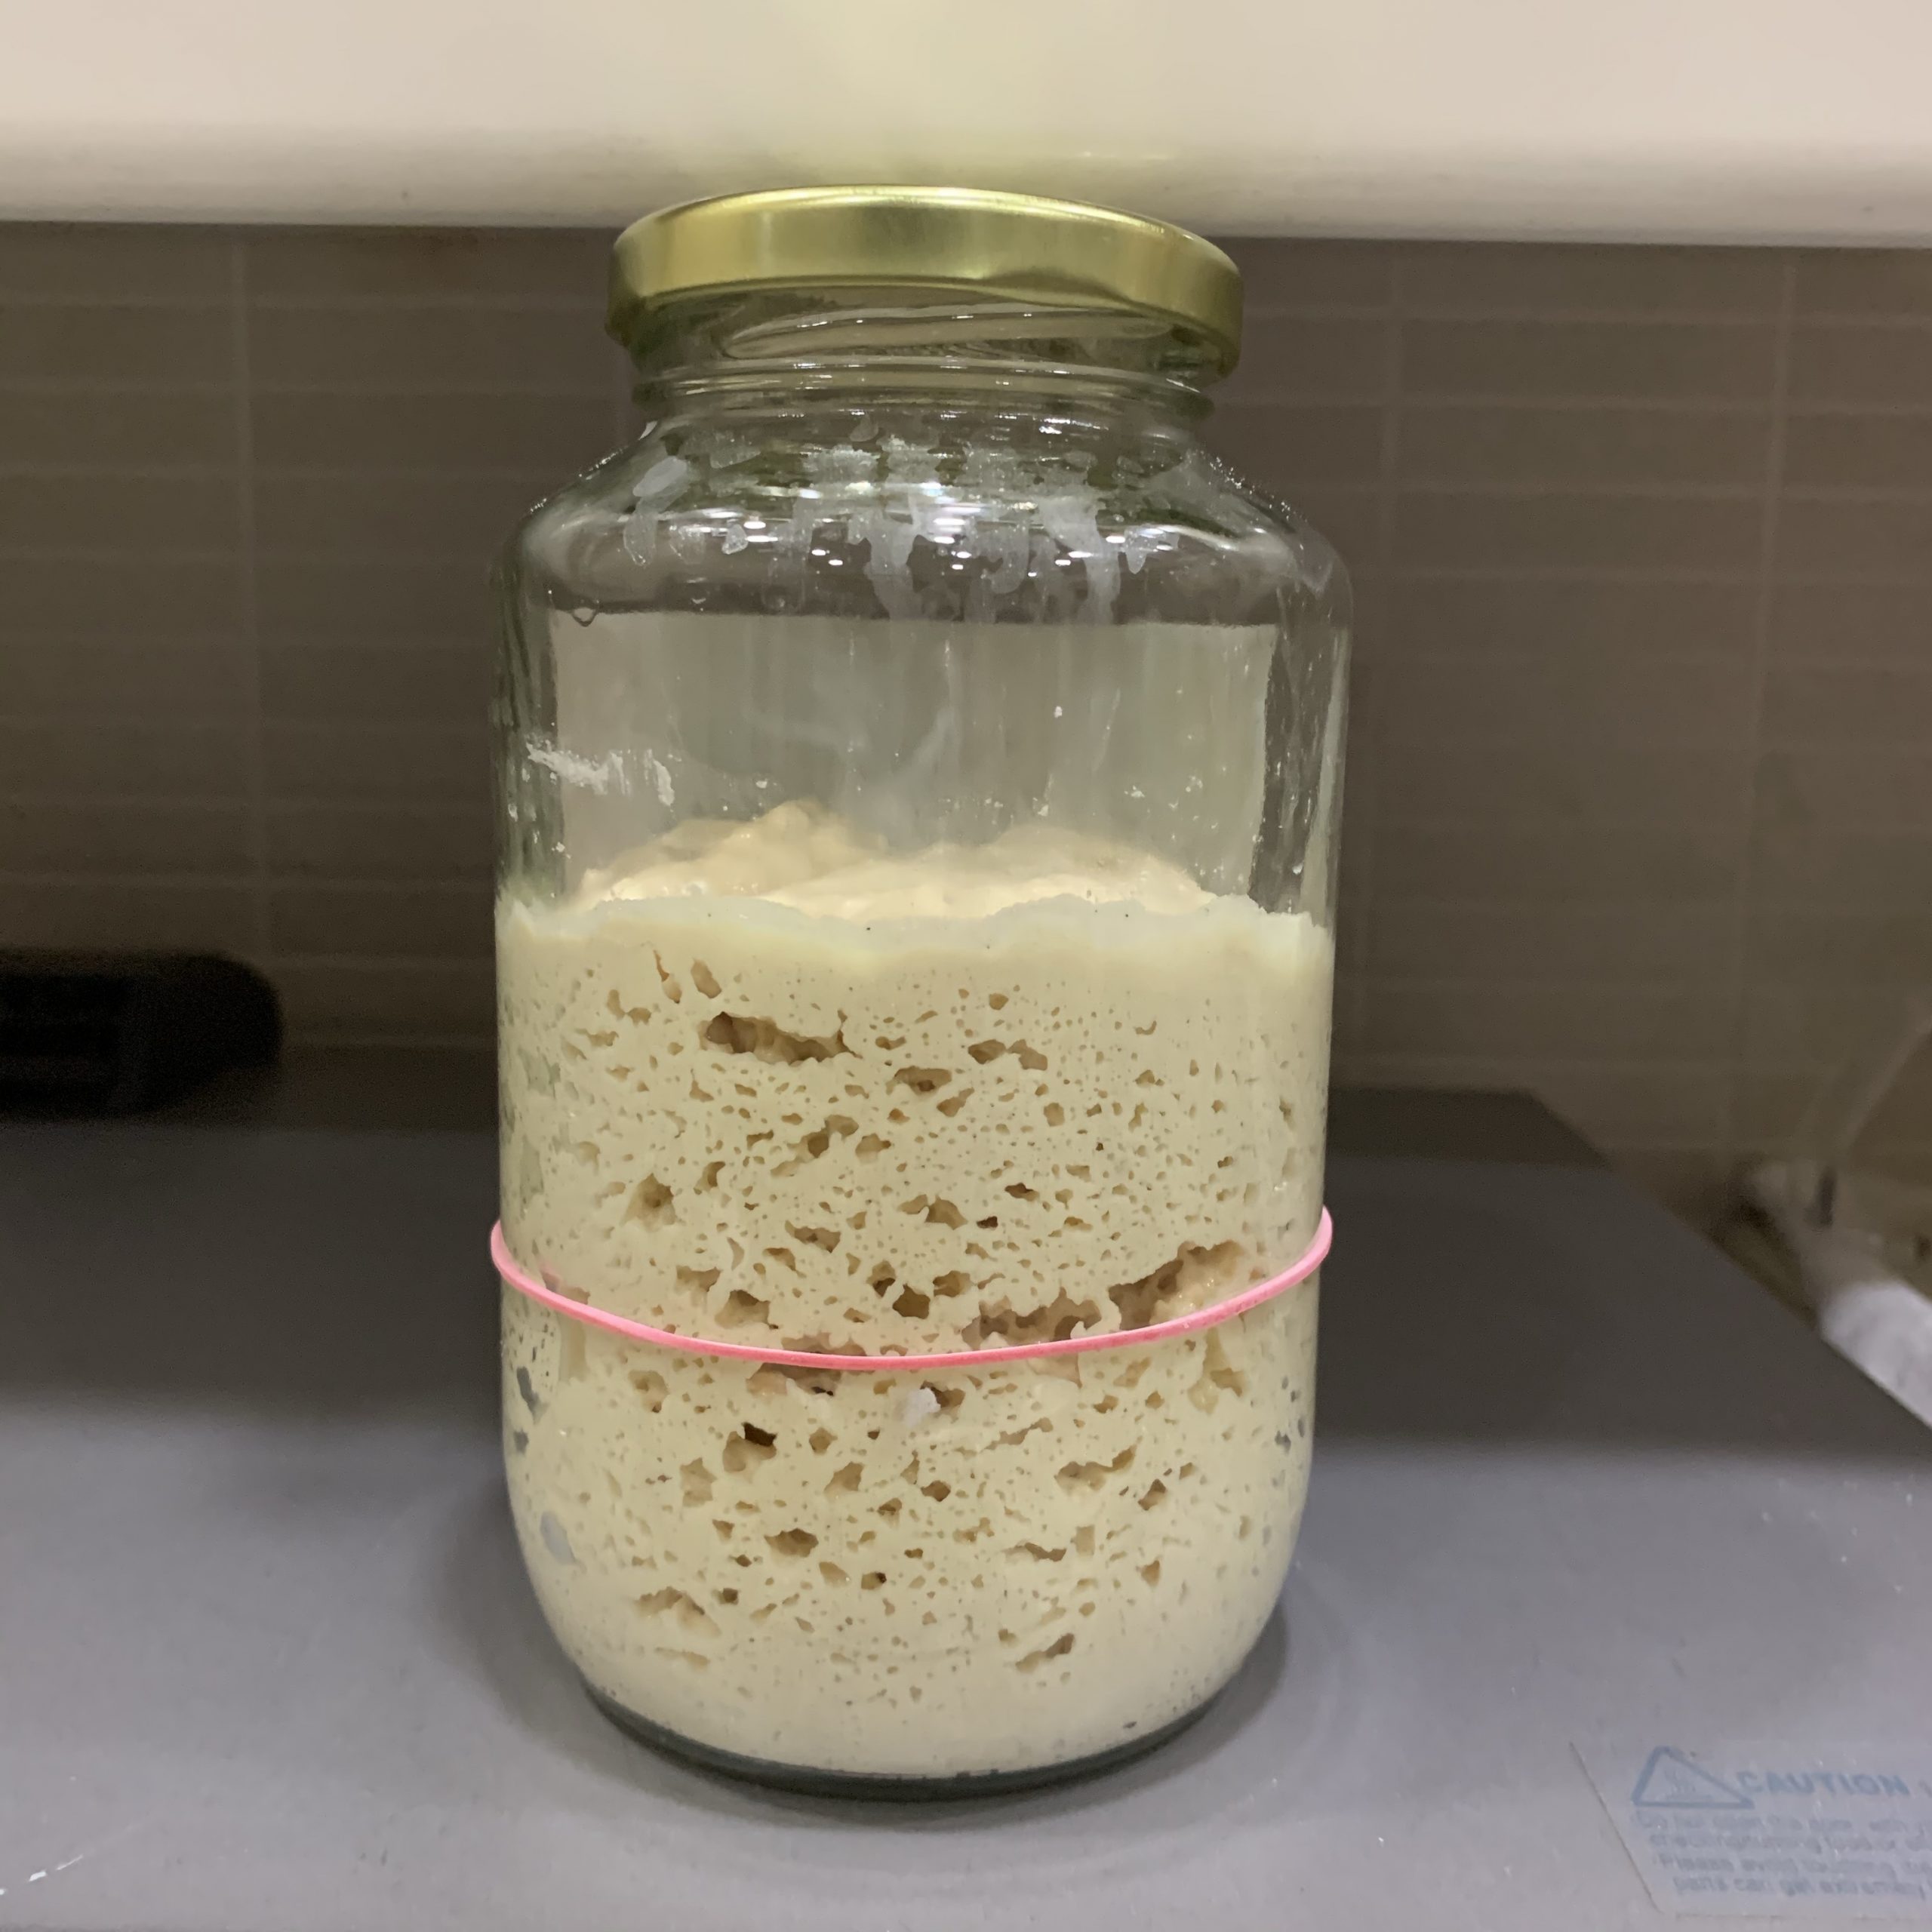
Here is a picture of my pet starter Scooby Dough! Look at all his beautiful bubbles! If you find it too tedious and expensive (gluten free flours aren’t cheap) to create your own starter, you can buy an offspring of Scooby Dough here! You can use it to bake immediately. It is a very versatile starter and you can also change it to a starter of your own liking because it has been infused with a variety of gluten free flours.
Hibernating Sourdough Starter in Fridge
If you find that you don’t bake every day and the sourdough starter can be a very hungry pet, just pop it into your fridge after your last bake. It will go into hibernation mode. Just be sure to take it out once a week and feed it once. Let it double in volume then put it back in the fridge.
Plan ahead for your bakes. Take the starter out of the fridge 1 day in advance and feed it once in the morning to reactivate it. If it doesn’t double after that feed, you will need to feed it again in the evening. Once it doubles, it’s ready for a bake.
Other gluten free sourdough projects


