Setting up a Mini Microgreen Farm at Home!
You may have noticed that I have been adding a lot of microgreens to my food recently. That’s because I have a mini microgreen farm, right in my dining room! And the hub nags all the time (yada yada!) that the microgreens must be used up within the same day or at most the next day to retain maximum nutritious value…. and ya, you get the picture…
So, all my friends started asking me how to set it up, how to grow it etc etc. I got tired of repeating my answers so, I am writing a post on it and answer everyone once and for all! If you still have questions, feel free to write them in the comment section and I will try my best to answer. 🤓
How it all started… the hub picked up a book on microgreens (not sure where, maybe from the library) and became utterly fascinated with the entire thingy. Apparently, microgreens yield 10x the amount of nutrients so a small amount is enough? Eh.. I didn’t read the book, I’m just taking his word for it, but it doesn’t address the fibre intake (IMHO). So he bought a little mini kit and started one tray of alfalfa for fun. This setup (including seeds and one tray….) cost about S$20…. I was like, “Waaa! Your microgreens very expensive leh!!!” But, the kids loved the alfalfa and so he was quite sold on the idea of it. 🙄 I found a setup on good ole Taobao for him. The entire things with rack, trays, grow lights etc etc only cost…. a fraction of what we would have to pay to get the same system in Singapore… 😑
It is a very simple setup made up of a rack and trays and grow lights. In fact, if you are very free during this CB period, you can DIY it.
I have received some emails on bulk buying. If there are enough of you who want to buy, I will check with the seller on this.
This is how our Microgreen setup looks like.
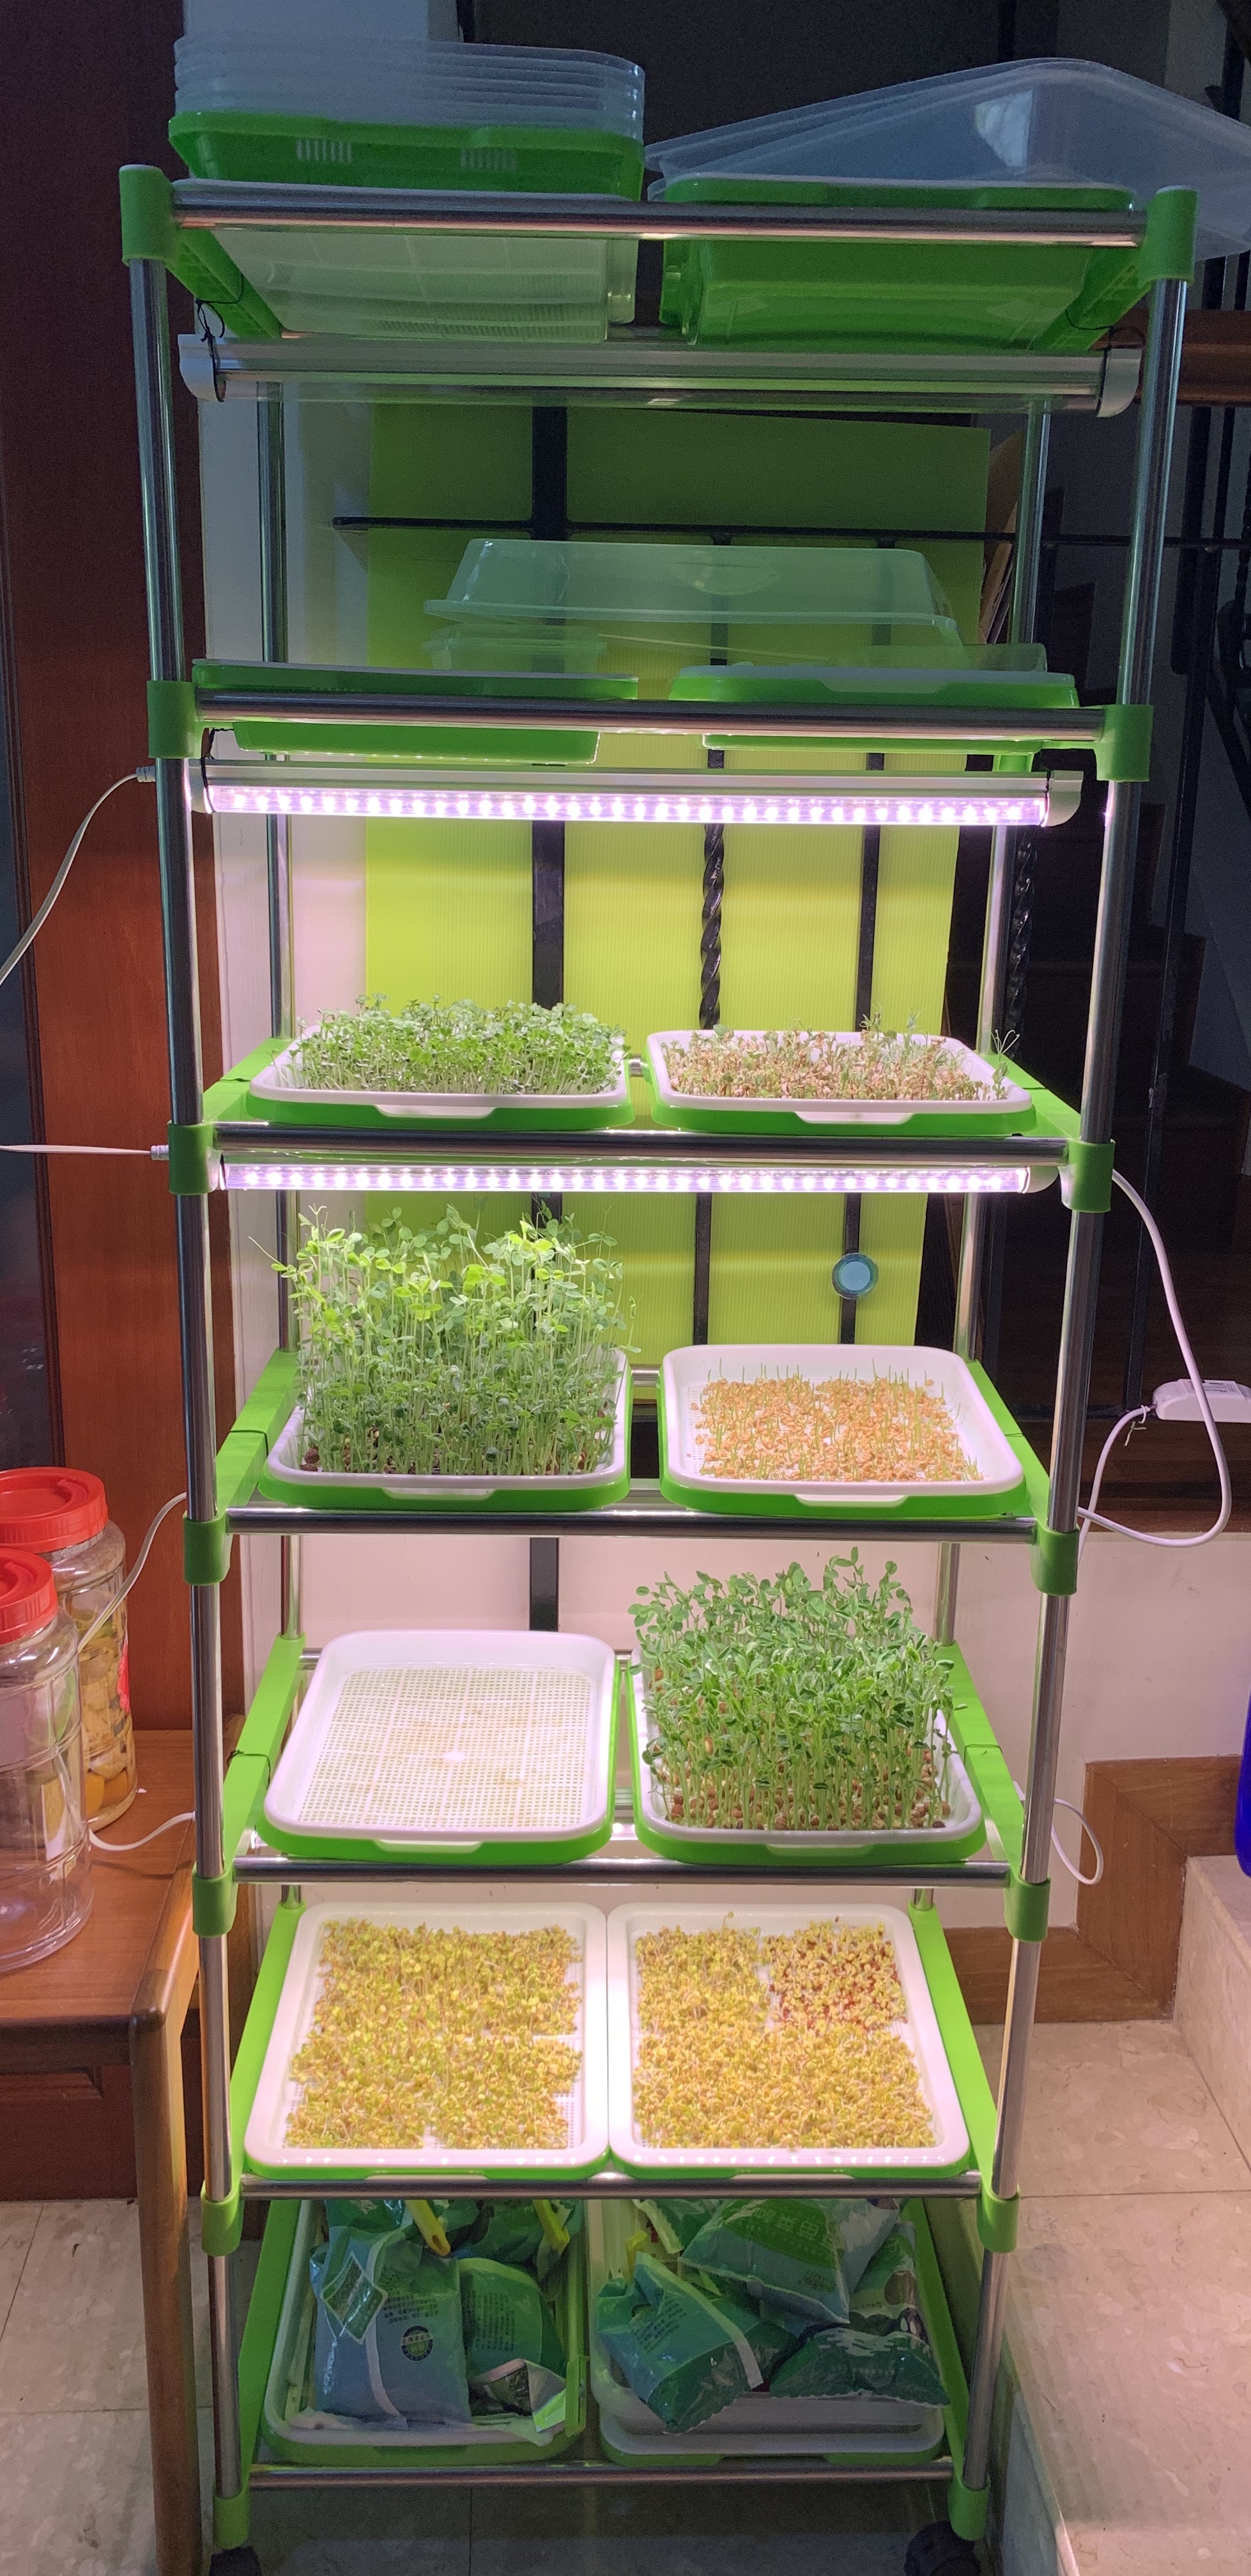
Simple right?
Now, what do you need to get started. Here are the tools of the trade.
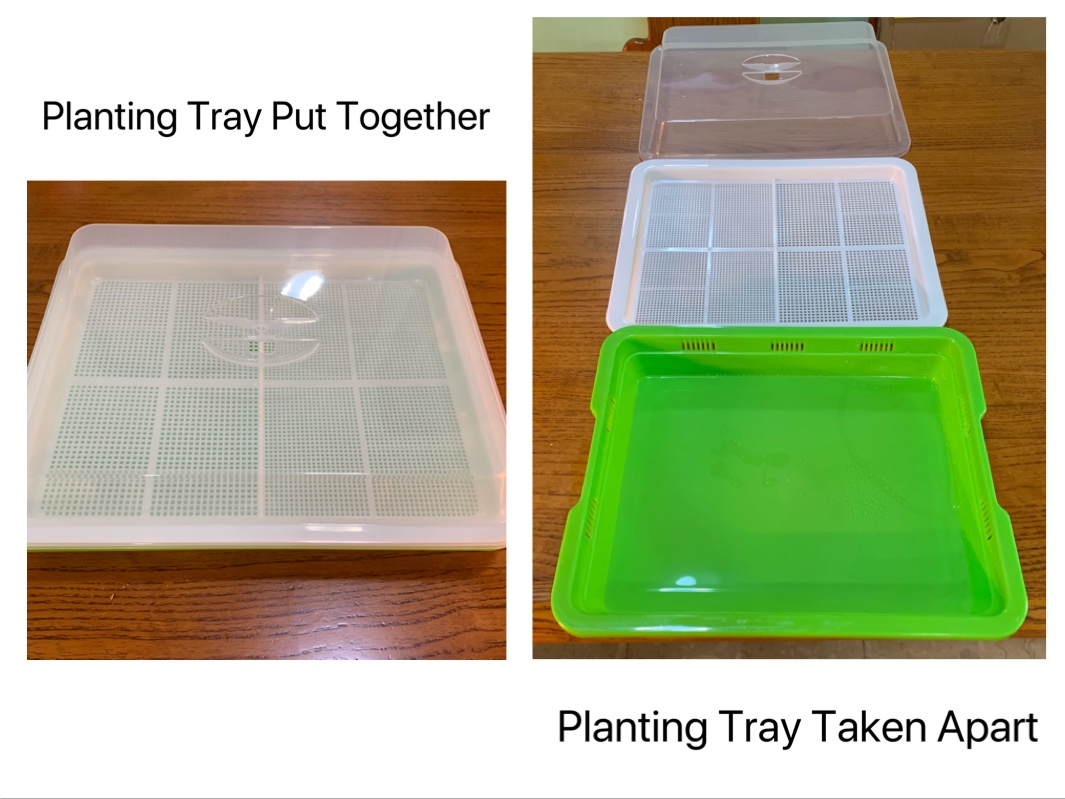
The planting tray consists of 3 sections.
- The green part where you fill it with water so that only the roots touch the water (and not the seed itself).
- The white tray with holes where the seeds sit on. It’s better to get trays with smaller holes so that the smaller seeds don’t fall through the holes. Our early ones had big holes so they can only be used for the bigger seads like maple peas etc.
- A transparent lid

Other essentials :
- The seeds, of course!! You can see my seed stash on the bottom shelf of my rack. :p
- A spraying bottle with fine nozzle.
- Tweezer
- Scissors (I have a smaller one that is better for harvesting the tiny crops like broccoli and alfalfa.)
The different attributes of the seeds
Every seed has a different soaking time, growing temperature, harvest height and number of harvests. The vendor which I buy the seeds from have these information on the packet. Or else, you can easily find these information on Google.

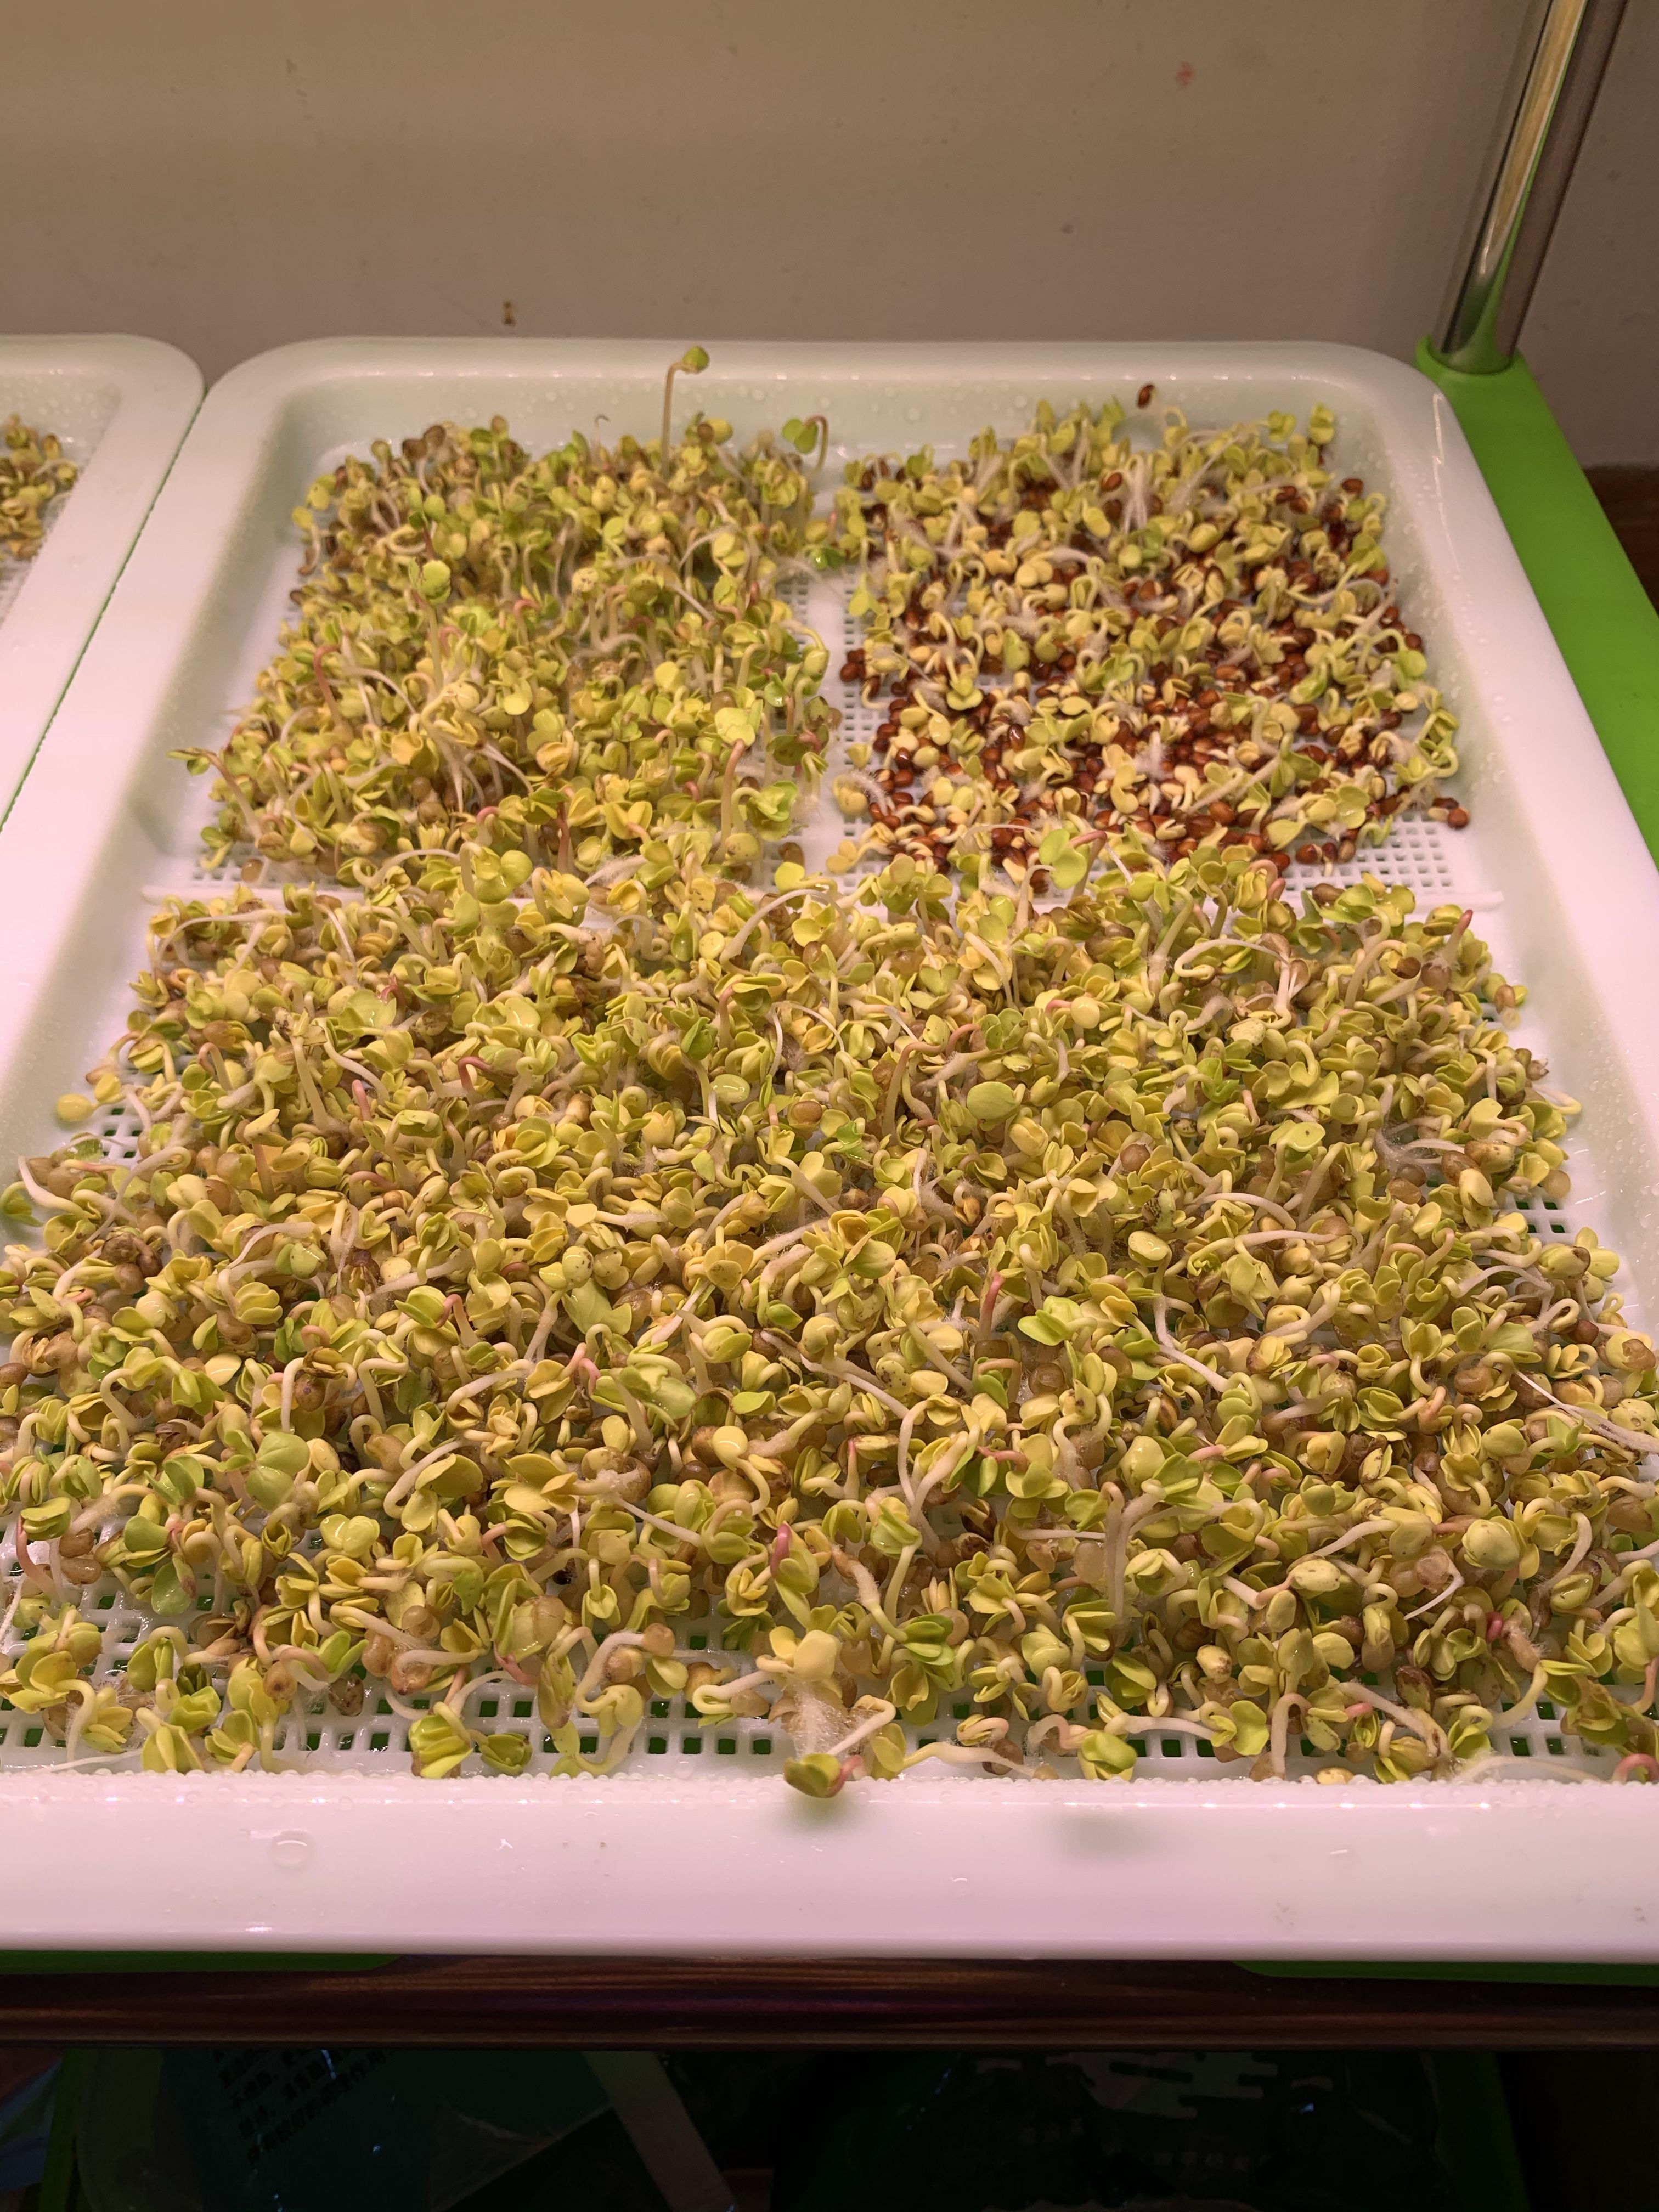
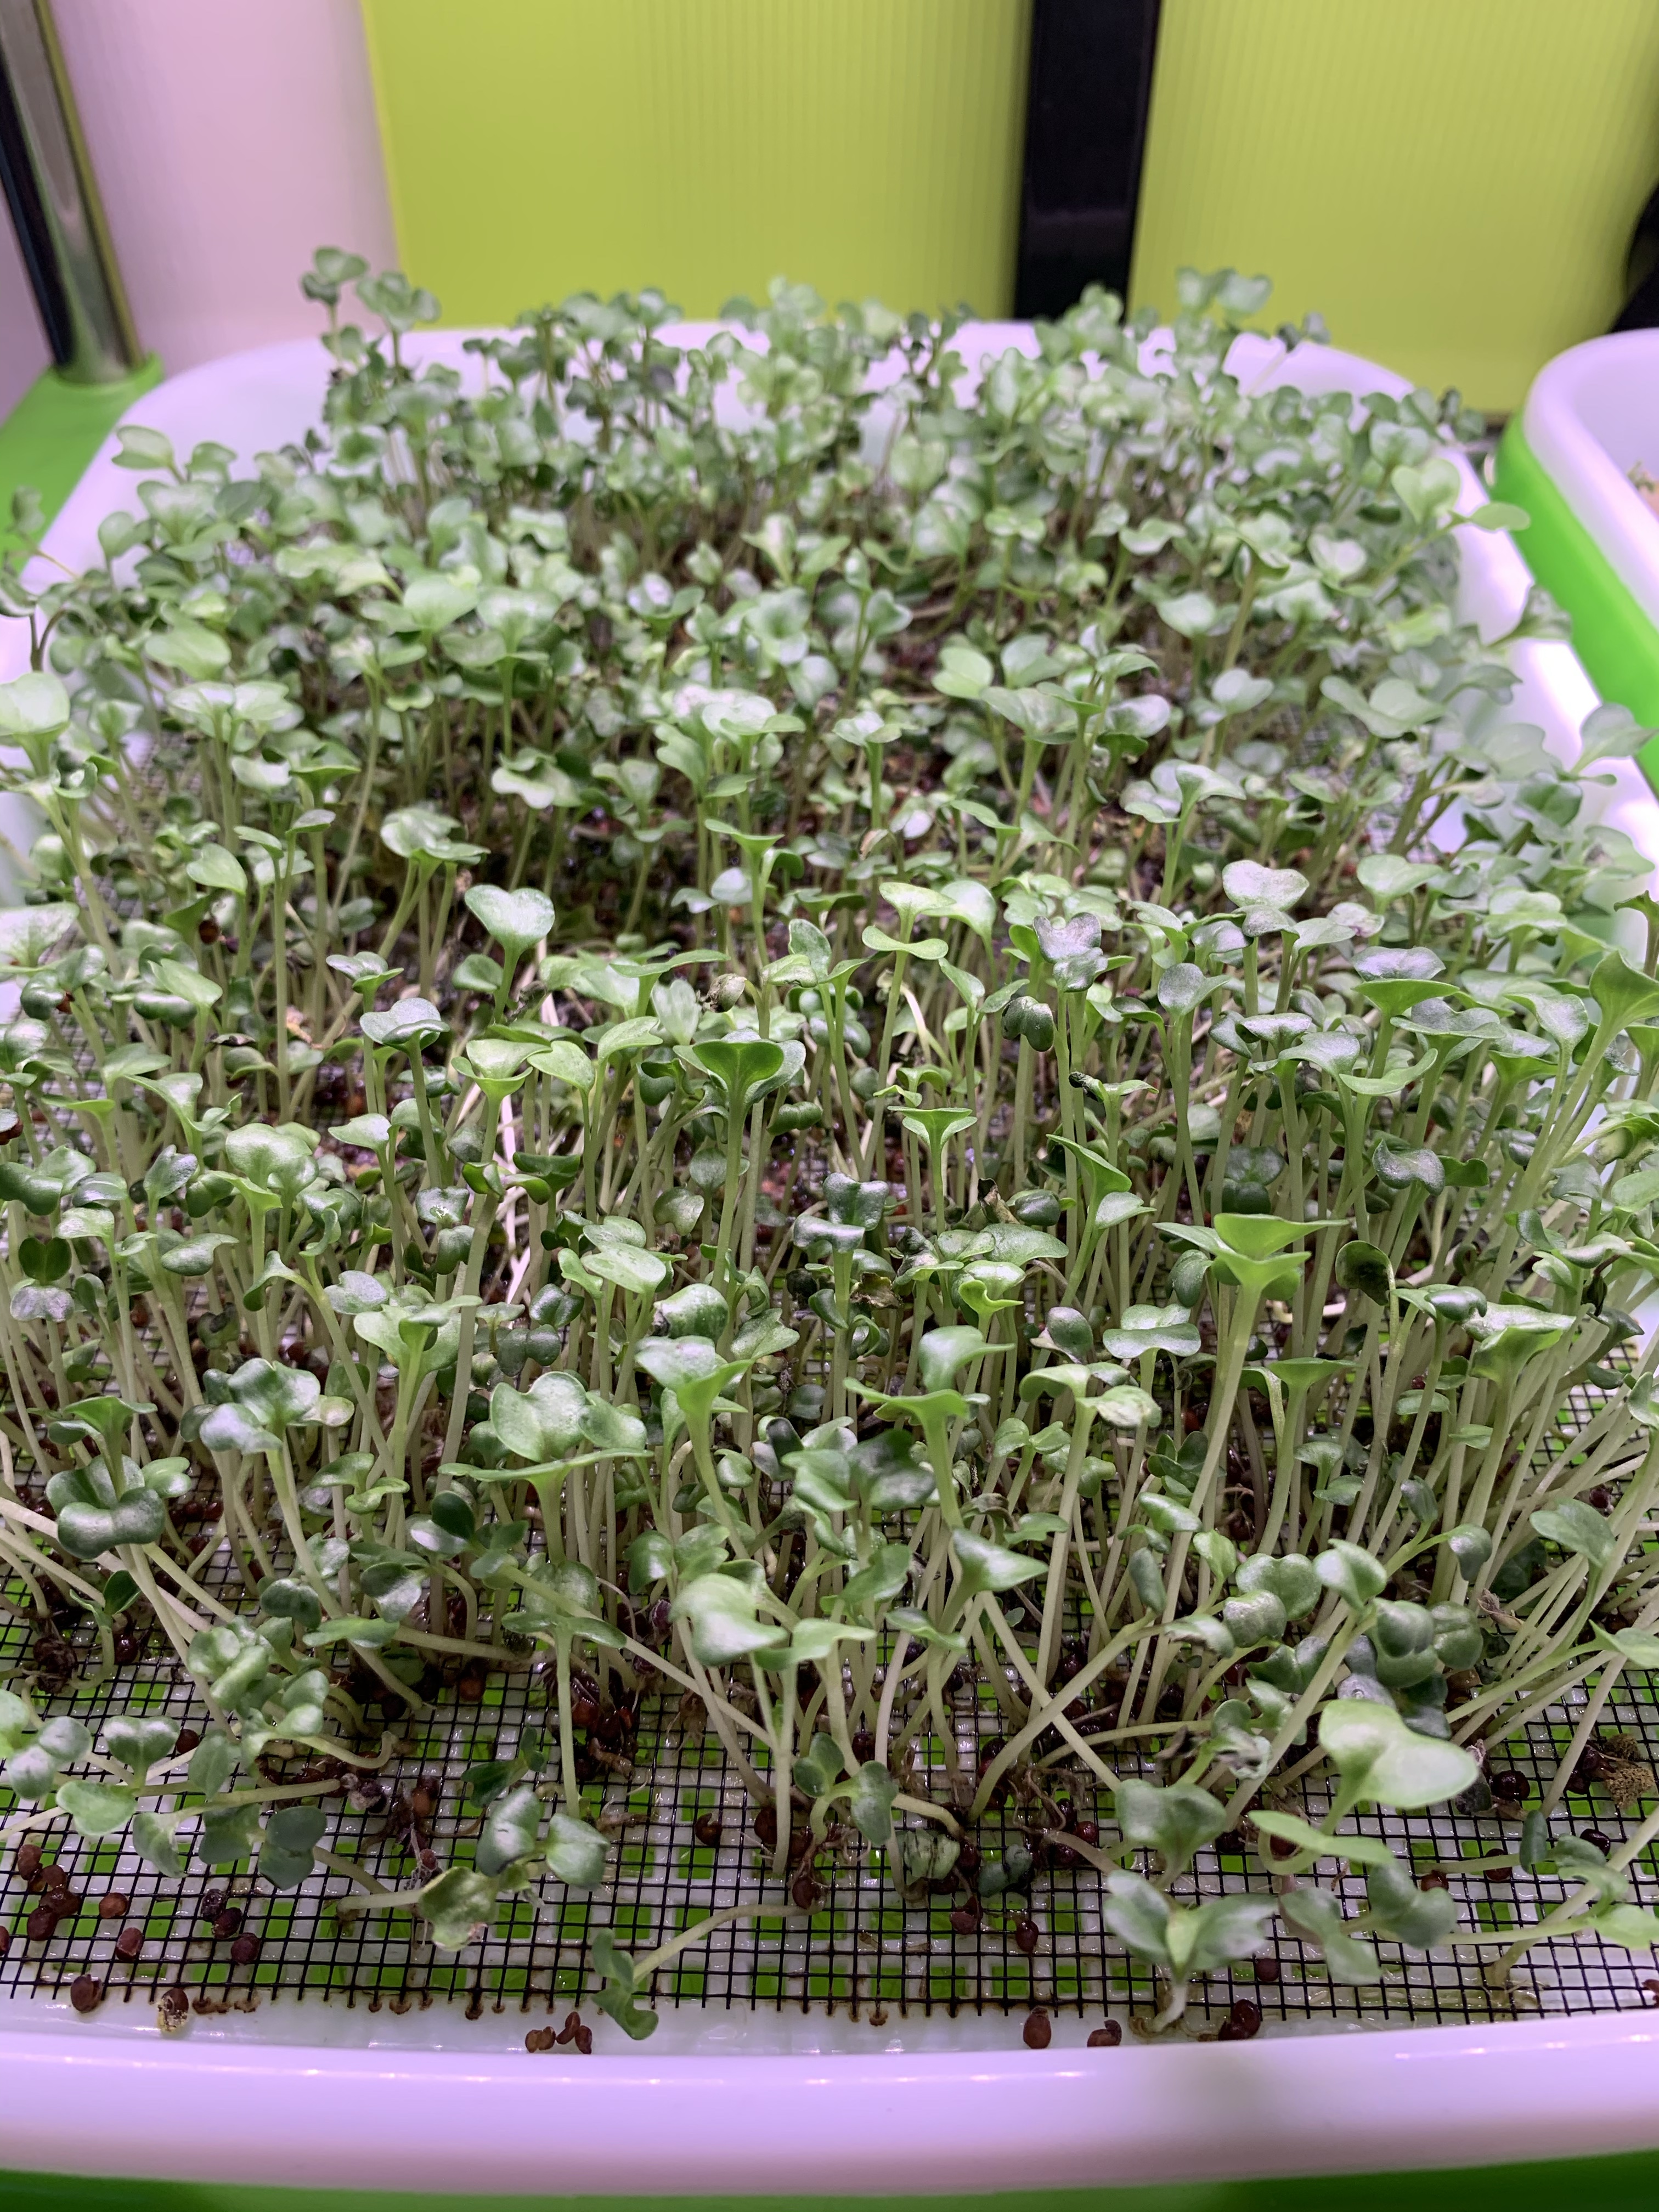
I will be using Radish as an example. Radish can be grown very easily. The microgreens have a bite to them, similar to the taste of the radish. The kiddos are not a fan of this one though. Radish seeds need to be soaked for 6-10 hours. The optimal growth temperature is 10-30 deg C which makes it suitable for it to be grown in our climate. They need to be harvested when they reach 6-8cm in height. The seeds are only good for 1 harvest.
4 Steps to growing Microgreens
Step 1: Soak the seeds. Check the soaking time on the packaging.

Step 2 : Spread them out evenly on the tray. Make sure you use the tray with the right holes. If you find that the holes are too big for your seeds, you can buy mesh from the nurseries and lay them over the holes so that the seeds don’t fall through. Cover the seeds with the plastic lid to keep the moisture in until the roots appear. Once the roots appear and reaches the water, remove the lid.
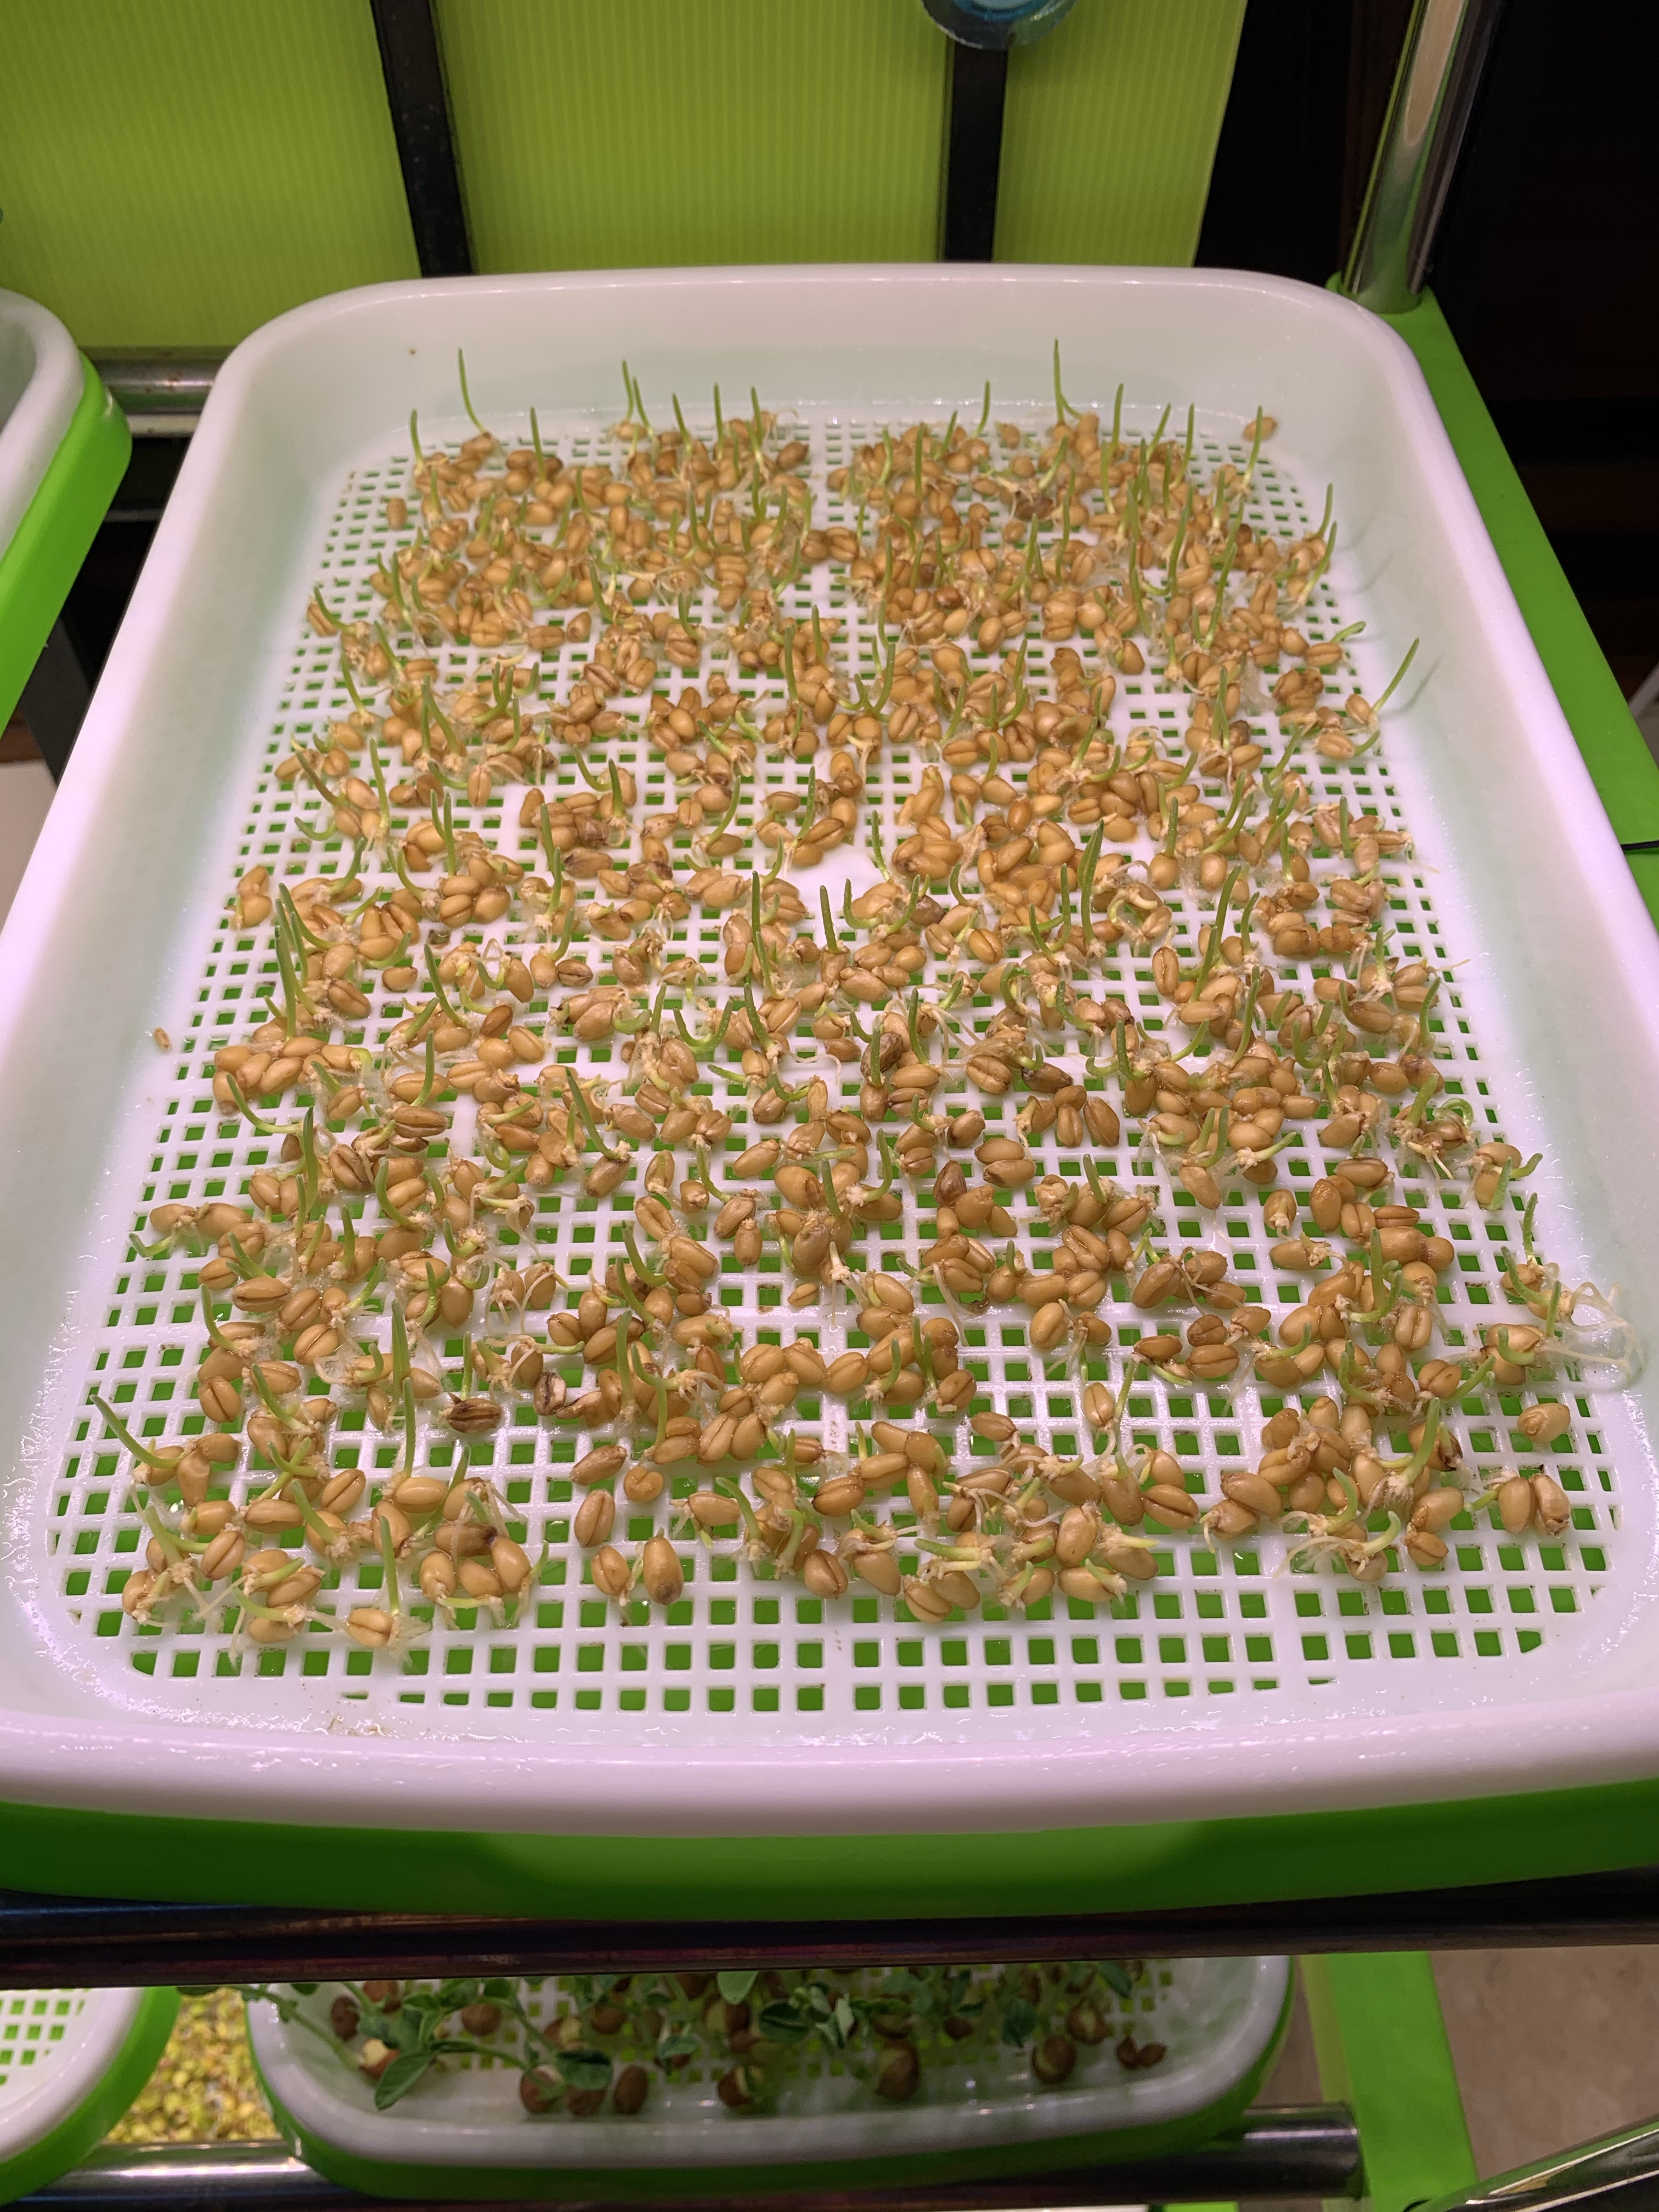
I couldn’t find any picture with freshly laid out seeds. These seeds are maybe 1-2 days old on the tray. Turn on the grow lights from 9pm-7am.
Step 3: Changing of the water. Change the water in the tray every 1-2 days. It depends on the depth of your bottom tray. The roots of the seedlings must touch the water but the water level must be below the seeds or they will rot. Using the tweezers, turn the seeds with the roots growing upwards, so that the roots are growing down into the water. Remove the rotting seeds or they will start to grow mouldy and the mould will spread to the healthy seedlings and they will start to rot too. There will also be an unpleasant smell (the rotting food smell). Yep, we went through all that during our noob phase. The kids were complaining of an awful smell and we traced it to the microgreens…
Step 4 : Continue doing Step 3 until the crops reach the harvesting height and then it’s harvest time! Yay! For crops that yield more than 1 harvest, snip them off above the seed leaves aka the first 2 tiny leaves that sprout out of the seeds. They will continue growing for the next harvest.
The best thing about microgreens is that they are kept in a clean environment. The best time to eat them is immediately after harvesting! If you aren’t planning to eat them yet, keep them in an air tight container in the fridge. Be sure to eat them within 1-2 days for maximum nutrition and freshness.
Ways to eat the microgreens
- As salads – Retain their natural sweetness.
- Blended with smoothies or yoghurts. We blend them into our milk kefir breakfast every morning.
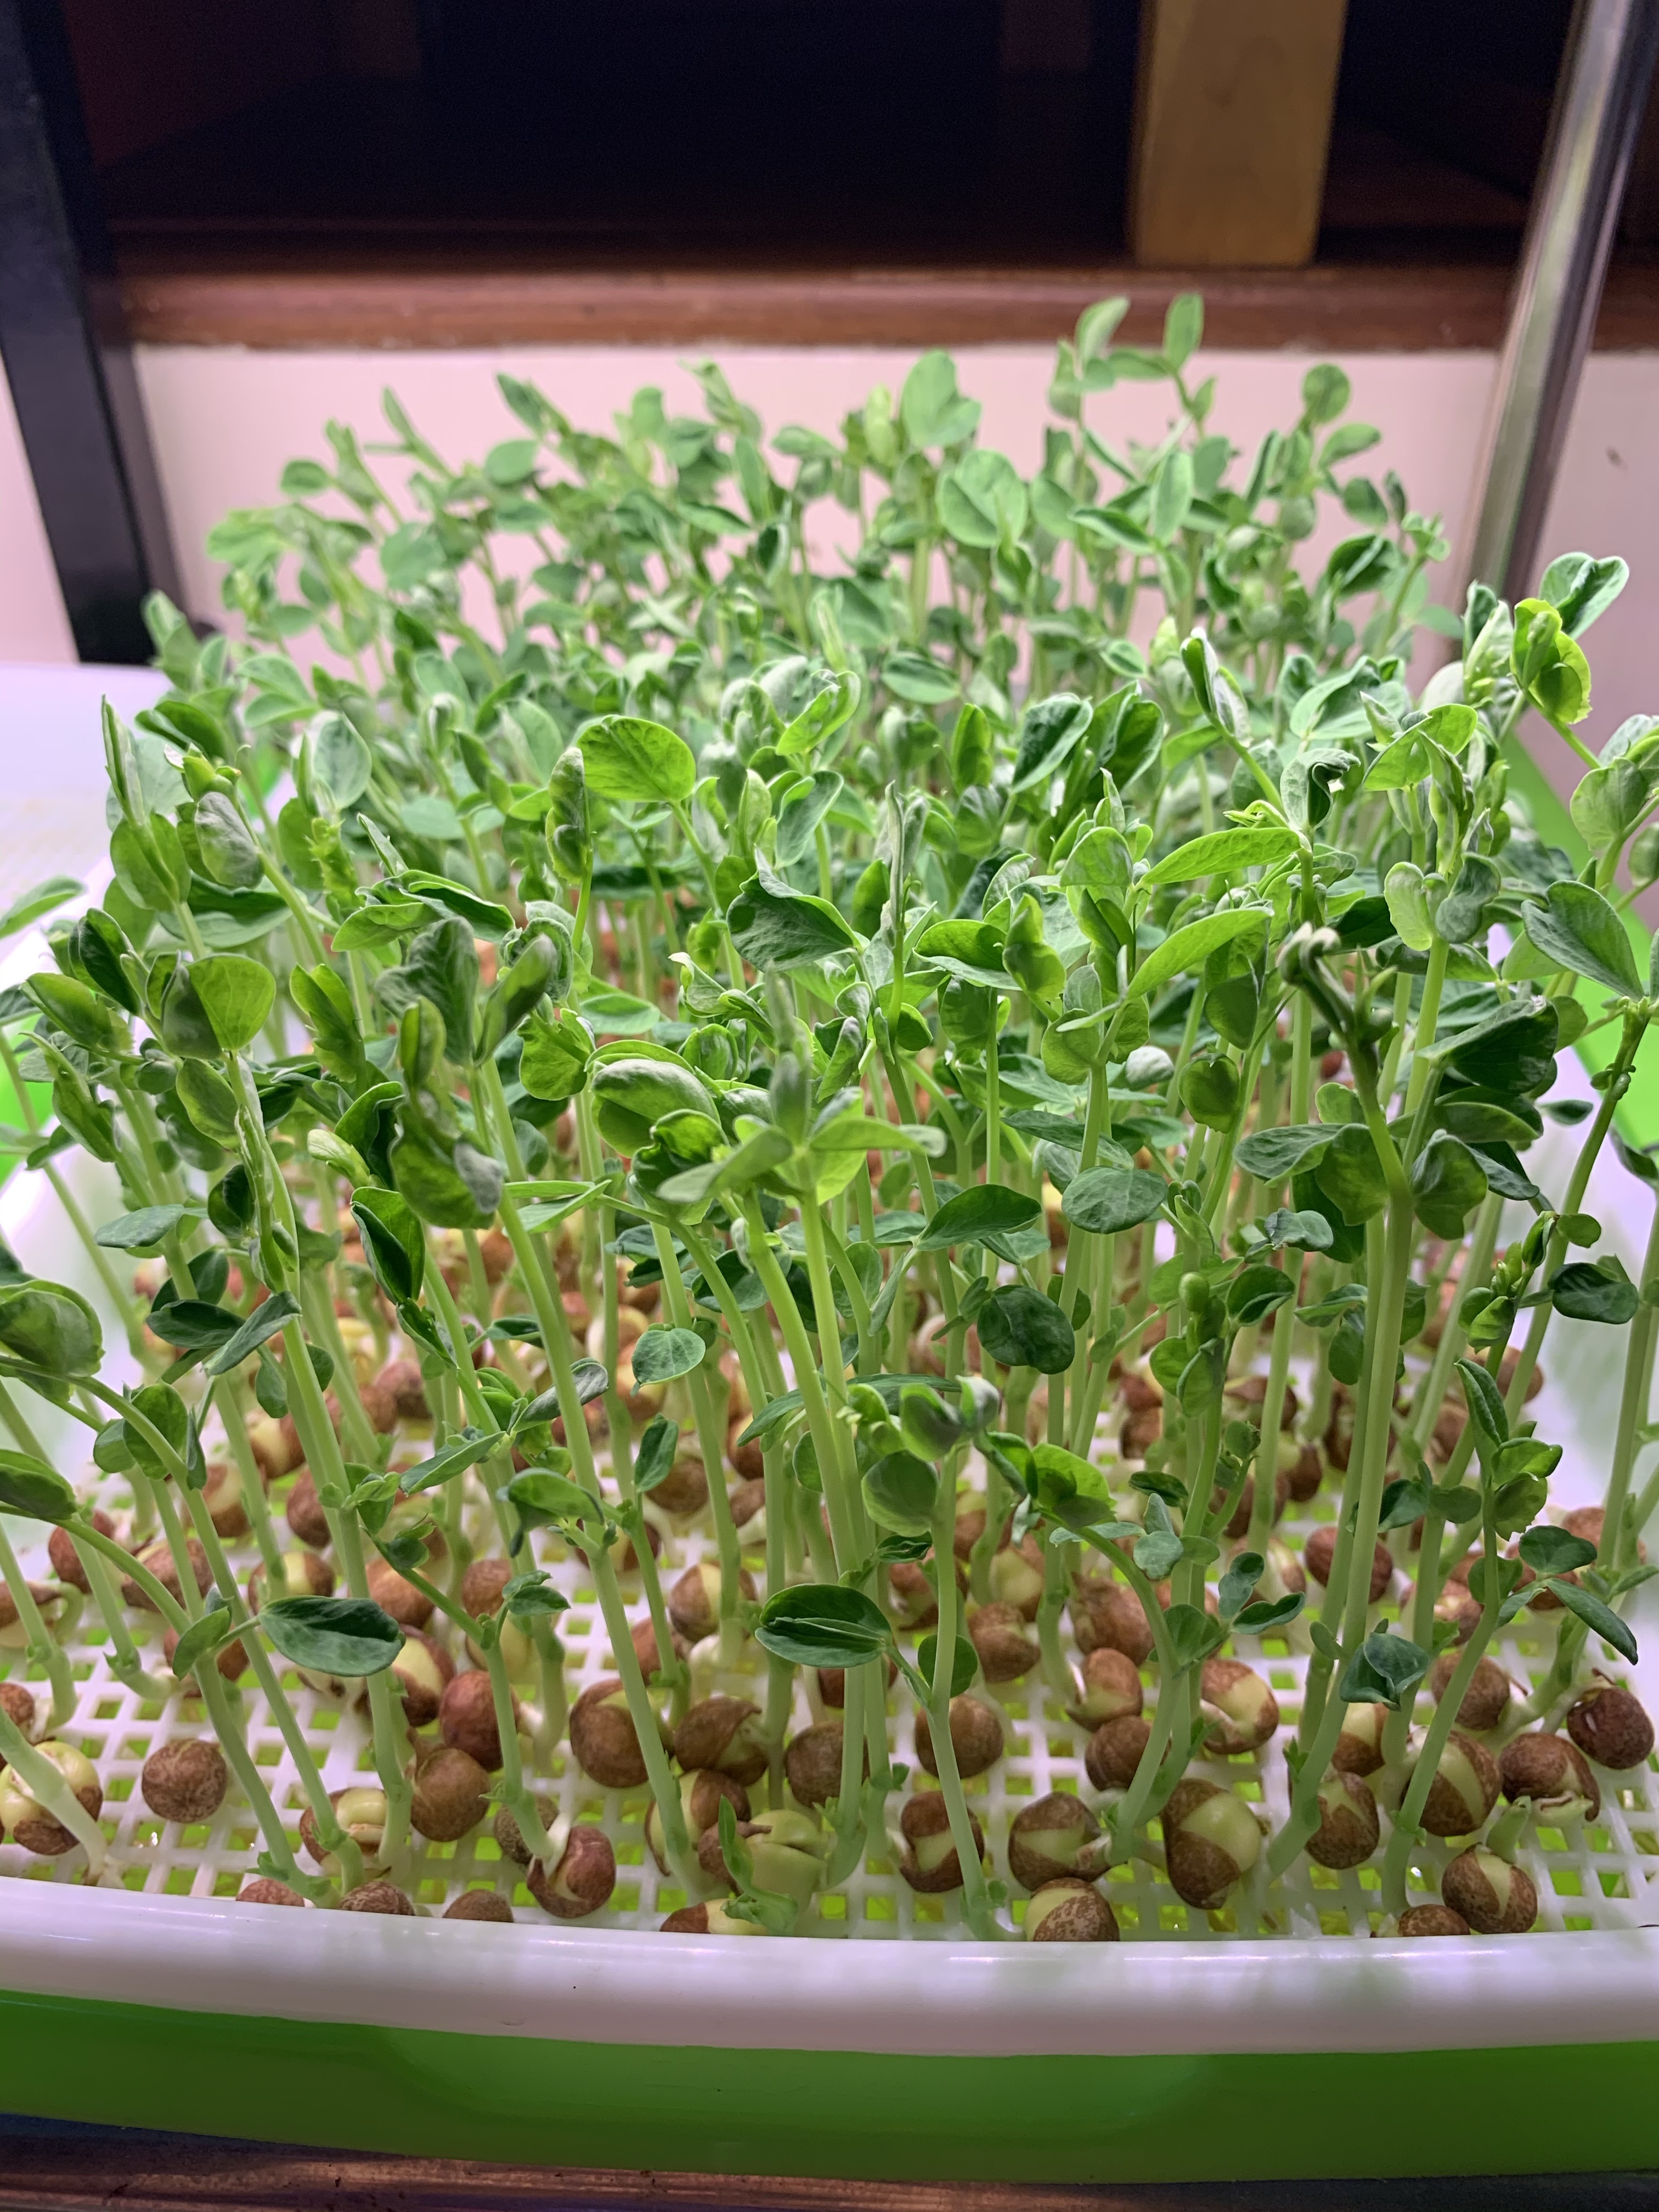
- Stir fry them. Especially the thicker ones like maple pea shoots.
- Toppings on all the dishes so that they look as though they are prepared in a Michelin restaurant.
Personal experiences with the seeds
Basically, all vegetable and most fruit seeds can be used as microgreen seeds. If you are feeling adventurous and would like to use the less common seeds, do check them out first so that you don’t poison yourself.
However, there are some seeds that germinate more easily and are easier to grow than others. We are still experimenting and trying them out. I welcome you to write in the comments so that we can share our experiences and make growing microgreens a fun affair!! What I deem as difficult may vary with other people’s experiences because it also depends on the freshness of the seeds. Fresh seeds have higher germination rates. I have categorised them into easy, intermediate and advanced. I haven’t tried the rest yet. Welcoming comments on them!
Easy
Radish, broccoli, maple pea, wheatgrass, carrot, alfalfa
Intermediate
Sunflower – The seeds grow at a different rate. So it’s difficult to get a nice crop. Ok, maybe I’m OCD, I like seeing them at the same height… But, I like the nutty flavour of the microgreens. That’s why we are still growing it.
Advanced
Pak Choy – low germination rate (it may be due to the quality of my seeds. Will try to get some from other vendors to verify this.)
Kang Kong – low germination rate
Green Pea – rots easily
Growing stats of the seeds
Soaking Time (ST), Harvest Height (HH), Number of Harvests (NoH). Pardon my translation. If you know the english/chinese names of the seeds, do let me know!
Broccoli 西兰花- ST 5-6h, HH 5-6cm, NoH 1
Green Peas 方绿豌豆 – ST 12-14h, HH 8-10cm, NoH 2
Radish 白萝卜- ST 6-10h, HH 6-8cm, NoH, 1
Kang Kong 空心菜 – ST 20-24h, HH 7-9cm, NoH 1
Wheatgrass 小麦草 – ST 8-12h, HH 8-10cm, NoH 2
Pak Choy 小白菜 – ST 4-6h, HH 5-7cm, NoH 1
Maple Pea 豆苗 – ST 10-12h, HH 7-10cm, NoH 3
Carrot 红萝卜 – ST 8-10h, HH 6-8cm, NoH1
Broad Bean 蚕豆 – ST 16-18h, HH 14-16cm, NoH 2
Vanilla 香草 – ST 4-6h, HH 4-6cm, NoH 1
Alfalfa 苜蓿 – ST 4-6h, HH 4-5cm, NoH 1
4 thoughts on “Setting up a Mini Microgreen Farm at Home!”
Very meticulous in sharing with clear instructions …inspires me to follow yr passion
Thank you! It’s very easy. Just try it!
Thank you for your experience.
I’m also growing microgreens at hm now.
Similar to yours.
Cool!! At least we won’t have to worry if another lockdown happens and everything is oos. 🤣