When I picked up 宝贝from school after her PSLE Maths paper, I asked her how it was. She replied that it was not very easy, but ok lah. She said she wasn’t sure of 1 or 2 of the questions and she assured me that she “checked” through her paper thoroughly (which was usually just flipping through… roll eyes).
“Mommy! Check with you! Is 1kg 1000g or 100g?”
“1000g lah!! KILO leh!”
“Oh no!! I put 1000g initially then when I checked through, I decided to change it to 100g!” she moaned.
“How many points?”
“2 points.”
“Ok lah… won’t die.”
So she was happy again.
Little did I know that, the Maths paper was the subject of such a huge uproar on the internet.
Mid afternoon, my phone sprang to life with a deluge of messages! I thought, “Waaa! Stock market crashed or what?! Or covid hit 10,000???” There were messages popping up in many chat groups and some personal messages asking me about the difficulty of the paper. I was like, “She said ok leh.” And I was bombarded by dozens of copies of screenshots of parents who had taken to social media lamenting about their kids breaking down, vomiting, fainting, or dunno what. And there were open letters being shot to every single MP in Singapore (I am not surprised if PM Lee received quite a few of those.) Even ex-journalists with or without children weighed in on that.
I was truly shocked at all these. Even if PSLE is a major exam, but does it even warrant such a furore? Over the years, I have heard from friends that their children thrashed their textbooks and notes, some even burning them right after PSLE. I am a person who respects books as they contain knowledge and we must always respect knowledge. I can’t imagine what kind of hatred they have for PSLE to justify for such behaviour.
Our children take their cues from us. If we, as parents put an over emphasis on PSLE, then it is highly likely that they would treat it like it is a matter of life and death? Seriously, PSLE is not the end of the road. Many of my friends even told me that they were more stressed up about the exam than their kids…
Many blame the MOE, the society, the school and well, everyone else except themselves for the “stress” on PSLE. Maybe, we should look within ourselves. Are we the ones who are truly stressing our kids out? No doubt it is an important exam and should be taken seriously, but there is life after that.
Coming back to the difficult Maths paper, according to 宝贝, it was not easy but doable. After all, there will always be a few difficult questions to filter out the top students from the average. How many people out there can get full marks for an exam paper? No full marks won’t die wan lah. After all, what’s done is done. There is no point in comparing answers, berating the child or making a huge fuss out of it. I just want to give my 宝贝 a good hug and tell her that no matter what the results are, she has already done her best. Let us move on and look forward to an exciting Secondary school journey! She is already doing market research on which trendy bag to buy for Secondary school…
Meanwhile, she has been playing Roblox every day after the first PSLE paper. Macham like holiday has already started… and ya, we play Roblox together with her too. Haha! PSLE is over for me! Yay!
I love cinnamon. I started researching into cinnamon after I started adding it into home cooked food and bakes. I discovered that there are 2 types of cinnamon sold in the market – Ceylon and Cassia. The difference in price is very disparate! Ceylon cinnamon can cost a few times more than Cassia!
Cinnamon is produced from drying strips of inner bark of the Cinnamomum tree. You can buy them in the form of cinnamon sticks or quills or powder or extract.
Cassia Cinnamon originated from China and are widely grown in East and South Asia. It is dark brown (reddish) in colour, with thicker stalks and a rougher texture than its Ceylon cousin. It is very affordable and is most commonly consumed due to its price point. Therefore, if you see a bottle of cinnamon in the supermarket and it’s not specified whether it’s ceylon or cassia, it is most likely to be the latter. It has a very strong and spicy flavour.
Ceylon Cinnamon is native to Sri Lanka and South India. It is made from the inner bark of the Cinnamomum verum tree. It is tan brown in colour and its stalks are dense with soft layers and a smoother texture. As it is less common than the Cassia Cinnamon, it is more expensive. It has a delicate and mildly sweet flavour which makes it suitable for desserts.
Why do I use the Ceylon and not Cassia Cinnamon?
Cassia cinnamon contains coumarin which can be harmful in large doses. Cassia contains ~1% coumarin whereas Ceylon contains ~0.004%, which is negligible.
Coumarin is known to cause kidney, liver and lunch damage, therefore it may be harmful in large doses.
Lots of tests have been conducted with the Ceylon Cinnamon which shows that it has been useful in controlling blood sugar, which is important with diabetes patients.
It also blocks a protein named tau from accumulating in the brain. Tau buildup is a characteristic of Alzheimer’s disease.
At the end of the day, it’s all about moderation. Just don’t take anything excessively or good stuff may also have bad outcomes.
You may have noticed that I have been adding a lot of microgreens to my food recently. That’s because I have a mini microgreen farm, right in my dining room! And the hub nags all the time (yada yada!) that the microgreens must be used up within the same day or at most the next day to retain maximum nutritious value…. and ya, you get the picture…
So, all my friends started asking me how to set it up, how to grow it etc etc. I got tired of repeating my answers so, I am writing a post on it and answer everyone once and for all! If you still have questions, feel free to write them in the comment section and I will try my best to answer. 🤓
How it all started… the hub picked up a book on microgreens (not sure where, maybe from the library) and became utterly fascinated with the entire thingy. Apparently, microgreens yield 10x the amount of nutrients so a small amount is enough? Eh.. I didn’t read the book, I’m just taking his word for it, but it doesn’t address the fibre intake (IMHO). So he bought a little mini kit and started one tray of alfalfa for fun. This setup (including seeds and one tray….) cost about S$20…. I was like, “Waaa! Your microgreens very expensive leh!!!” But, the kids loved the alfalfa and so he was quite sold on the idea of it. 🙄 I found a setup on good ole Taobao for him. The entire things with rack, trays, grow lights etc etc only cost…. a fraction of what we would have to pay to get the same system in Singapore… 😑
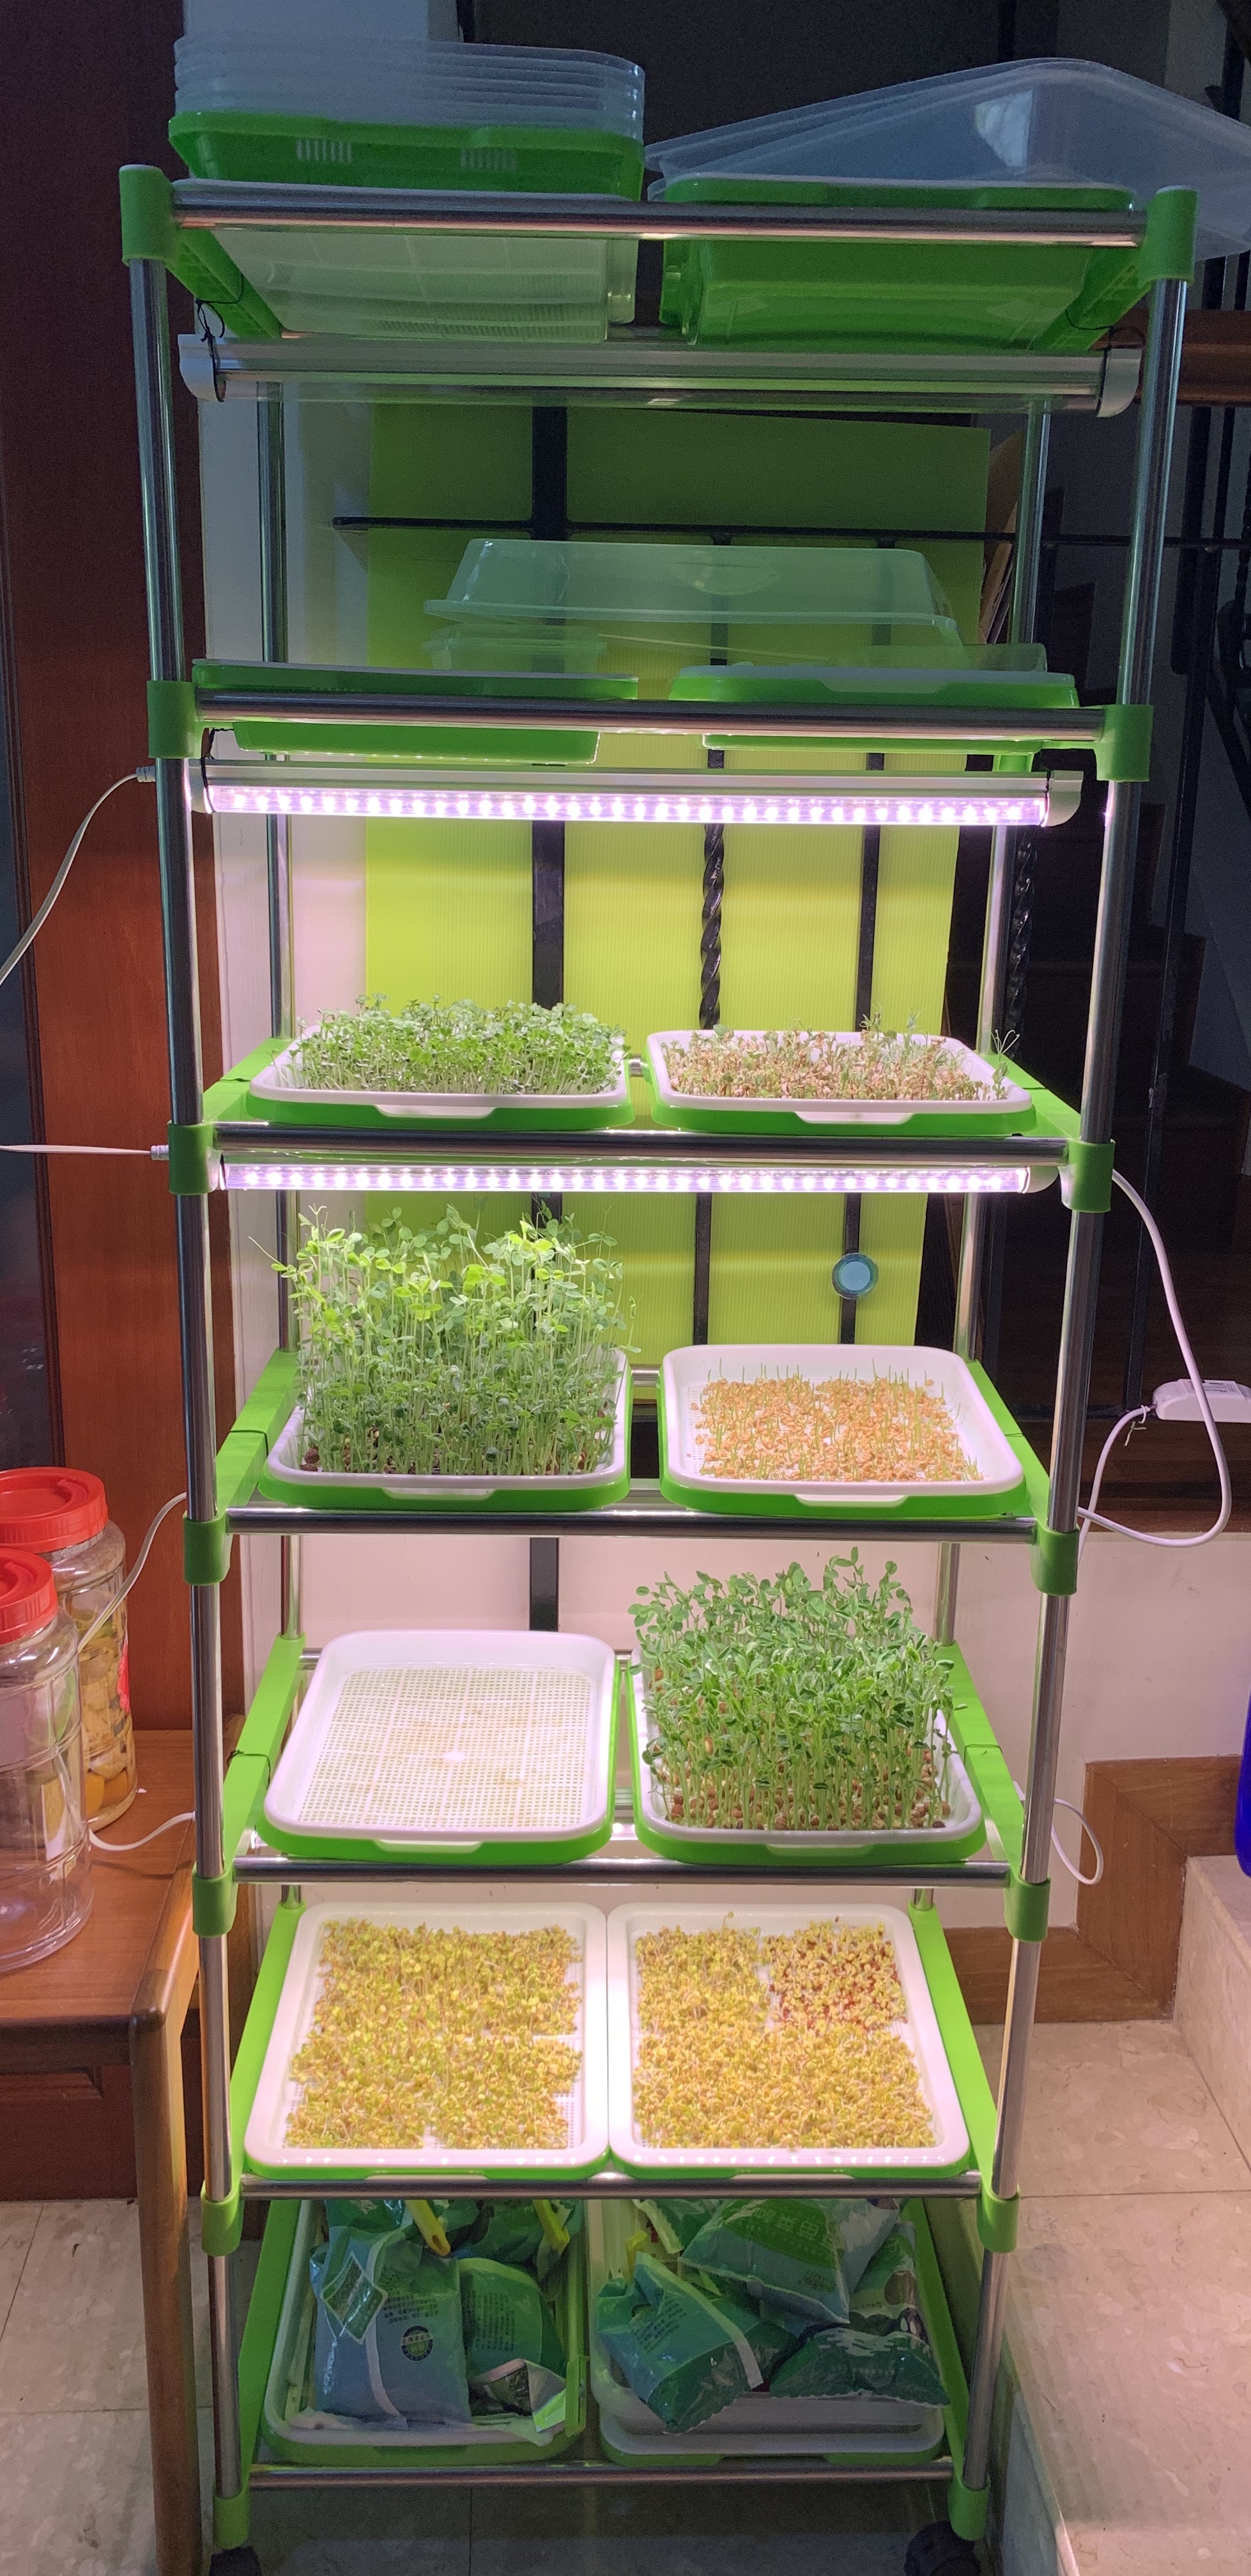
It is a very simple setup made up of a rack and trays and grow lights. In fact, if you are very free during this CB period, you can DIY it.
I have received some emails on bulk buying. If there are enough of you who want to buy, I will check with the seller on this.
This is how our Microgreen setup looks like.
Simple right?
Now, what do you need to get started. Here are the tools of the trade.
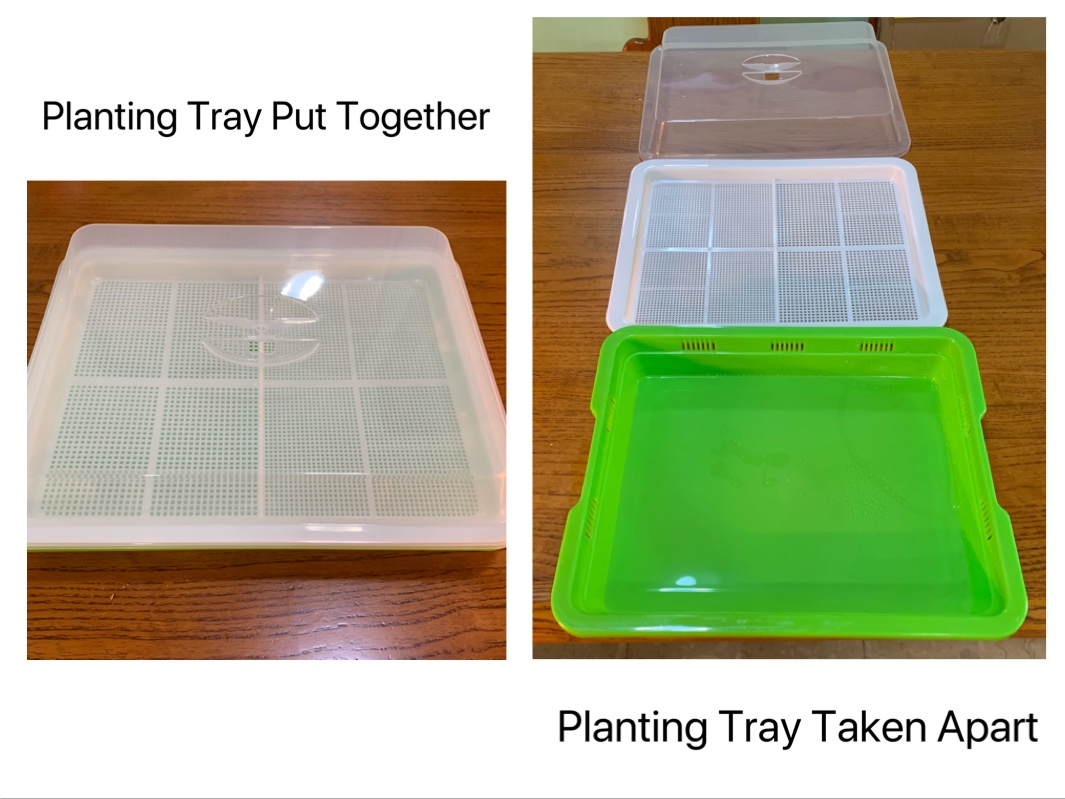
The planting tray consists of 3 sections.
The green part where you fill it with water so that only the roots touch the water (and not the seed itself).
The white tray with holes where the seeds sit on. It’s better to get trays with smaller holes so that the smaller seeds don’t fall through the holes. Our early ones had big holes so they can only be used for the bigger seads like maple peas etc.
A transparent lid
Other essentials :
The seeds, of course!! You can see my seed stash on the bottom shelf of my rack. :p
A spraying bottle with fine nozzle.
Tweezer
Scissors (I have a smaller one that is better for harvesting the tiny crops like broccoli and alfalfa.)
The different attributes of the seeds
Every seed has a different soaking time, growing temperature, harvest height and number of harvests. The vendor which I buy the seeds from have these information on the packet. Or else, you can easily find these information on Google.
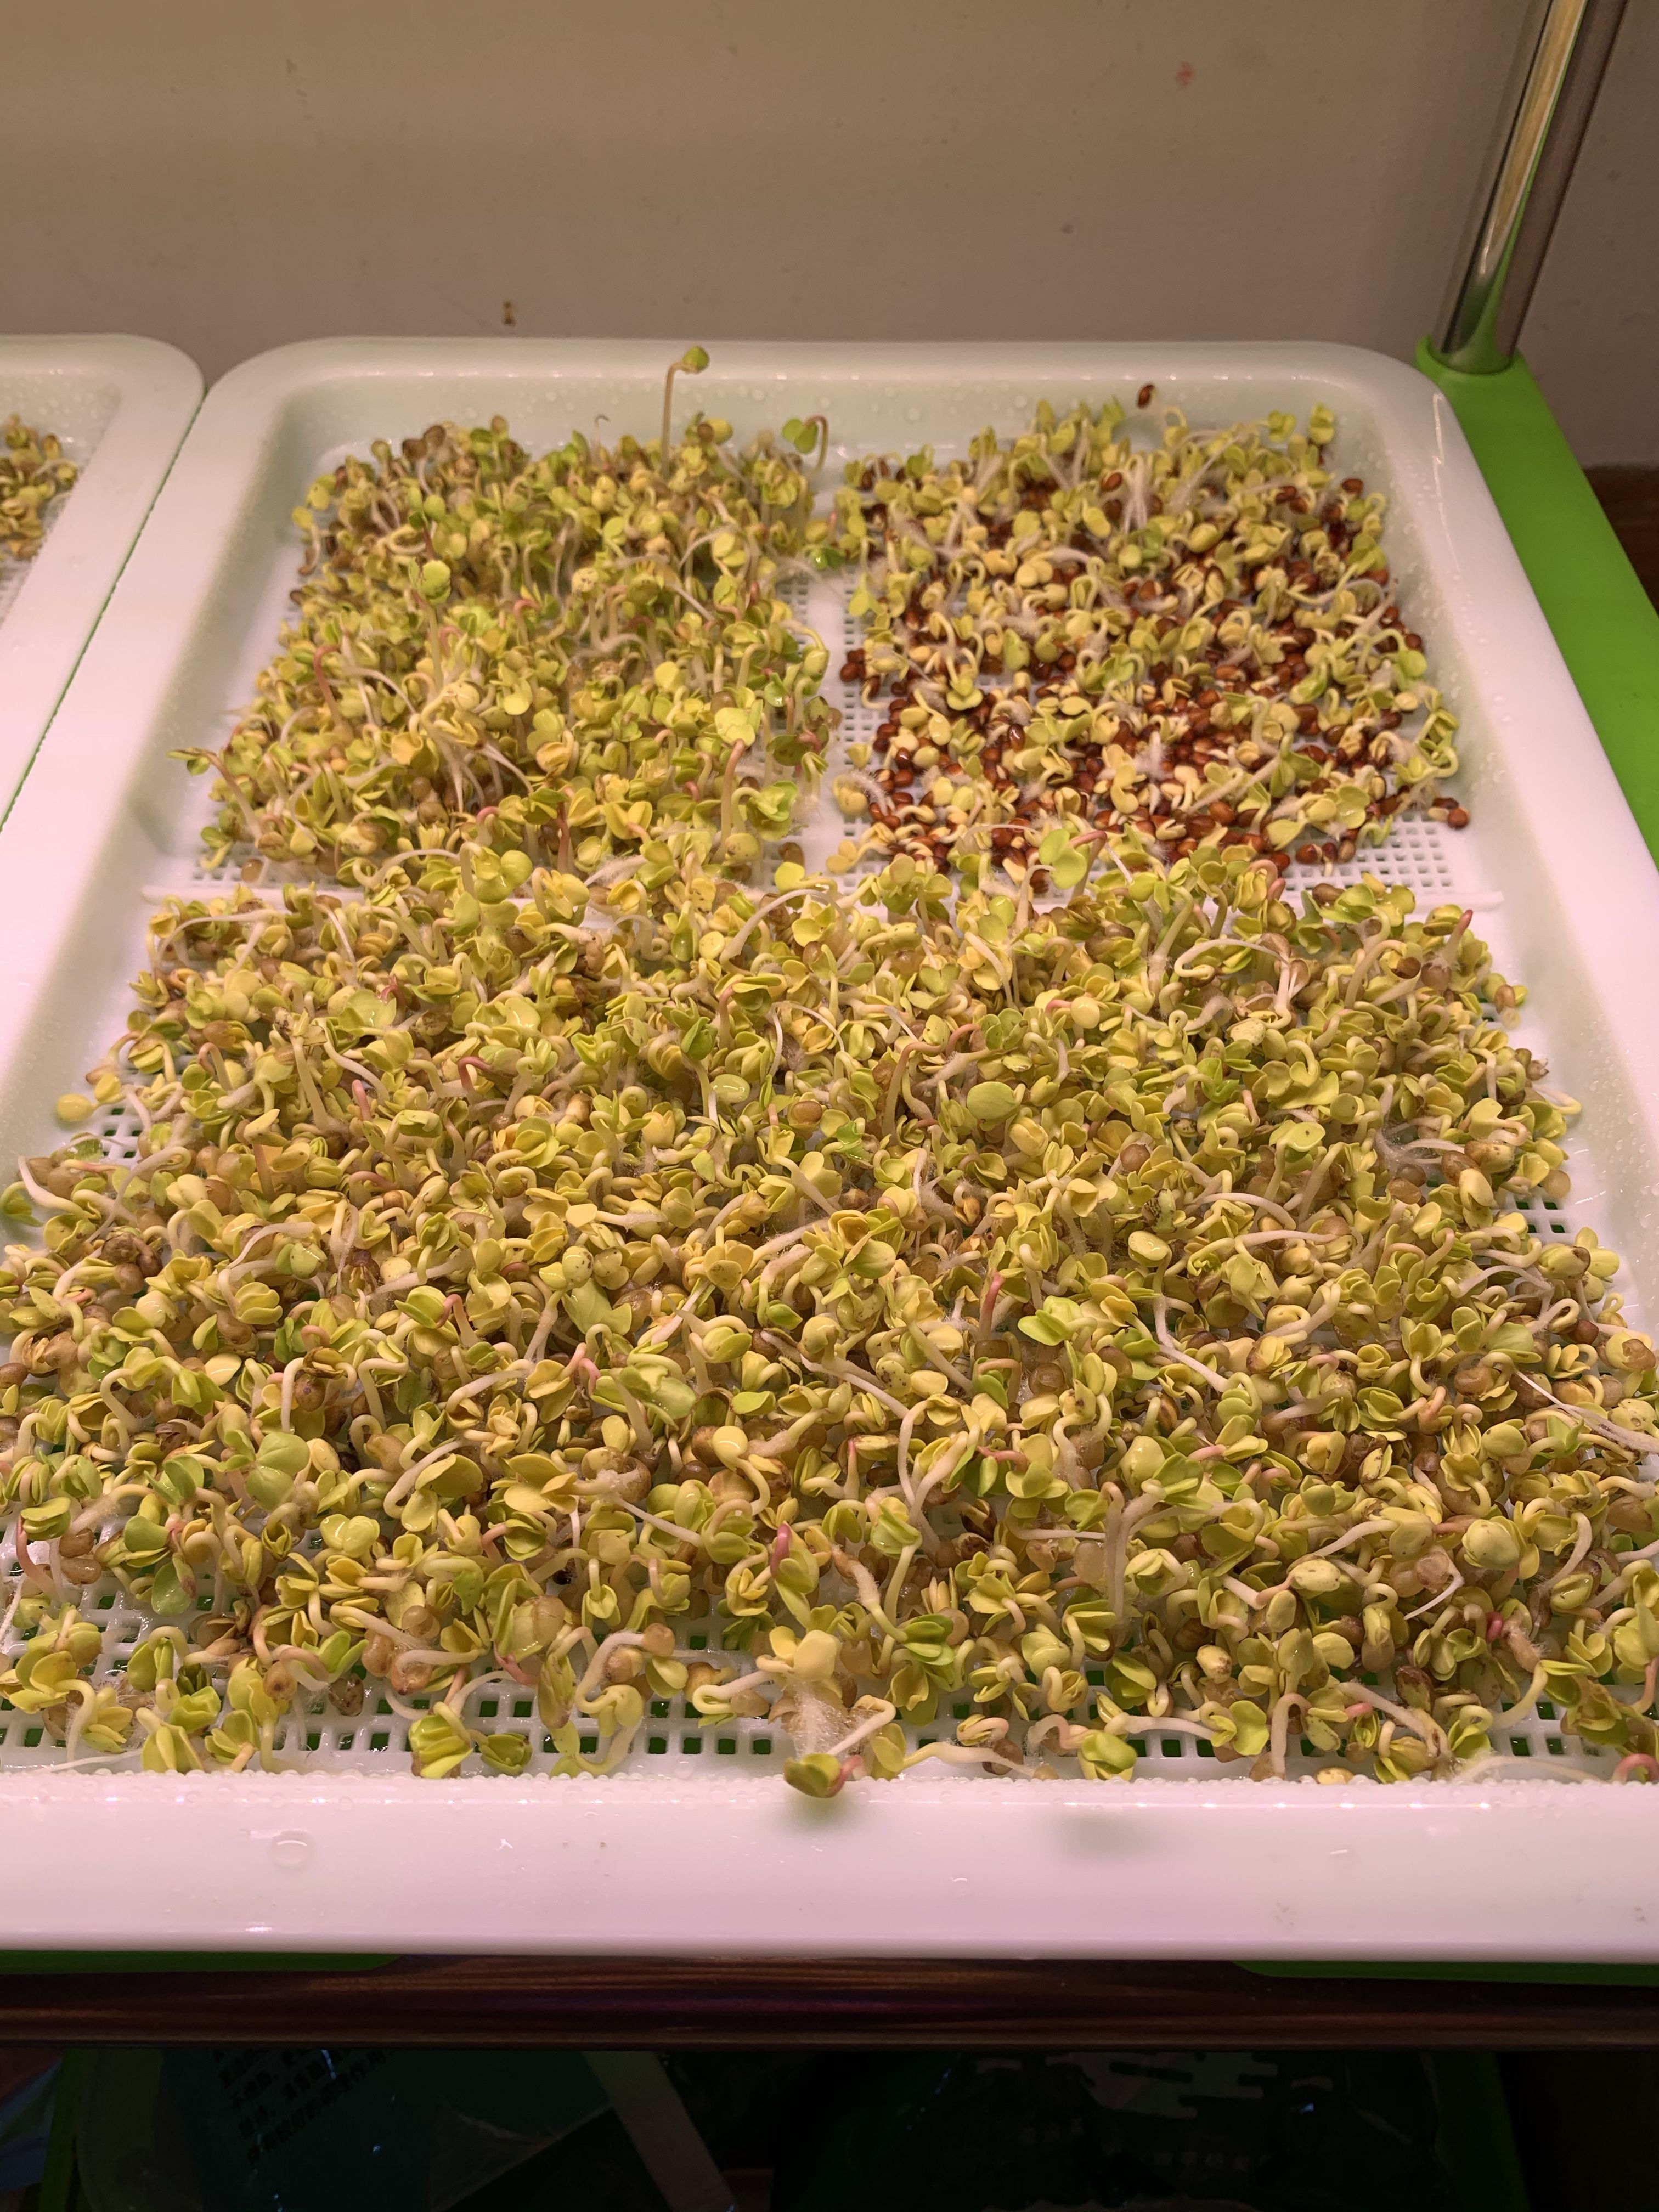
I will be using Radish as an example. Radish can be grown very easily. The microgreens have a bite to them, similar to the taste of the radish. The kiddos are not a fan of this one though. Radish seeds need to be soaked for 6-10 hours. The optimal growth temperature is 10-30 deg C which makes it suitable for it to be grown in our climate. They need to be harvested when they reach 6-8cm in height. The seeds are only good for 1 harvest.
4 Steps to growing Microgreens
Step 1: Soak the seeds. Check the soaking time on the packaging.
Soaking sunflower seeds
Step 2 : Spread them out evenly on the tray. Make sure you use the tray with the right holes. If you find that the holes are too big for your seeds, you can buy mesh from the nurseries and lay them over the holes so that the seeds don’t fall through. Cover the seeds with the plastic lid to keep the moisture in until the roots appear. Once the roots appear and reaches the water, remove the lid.
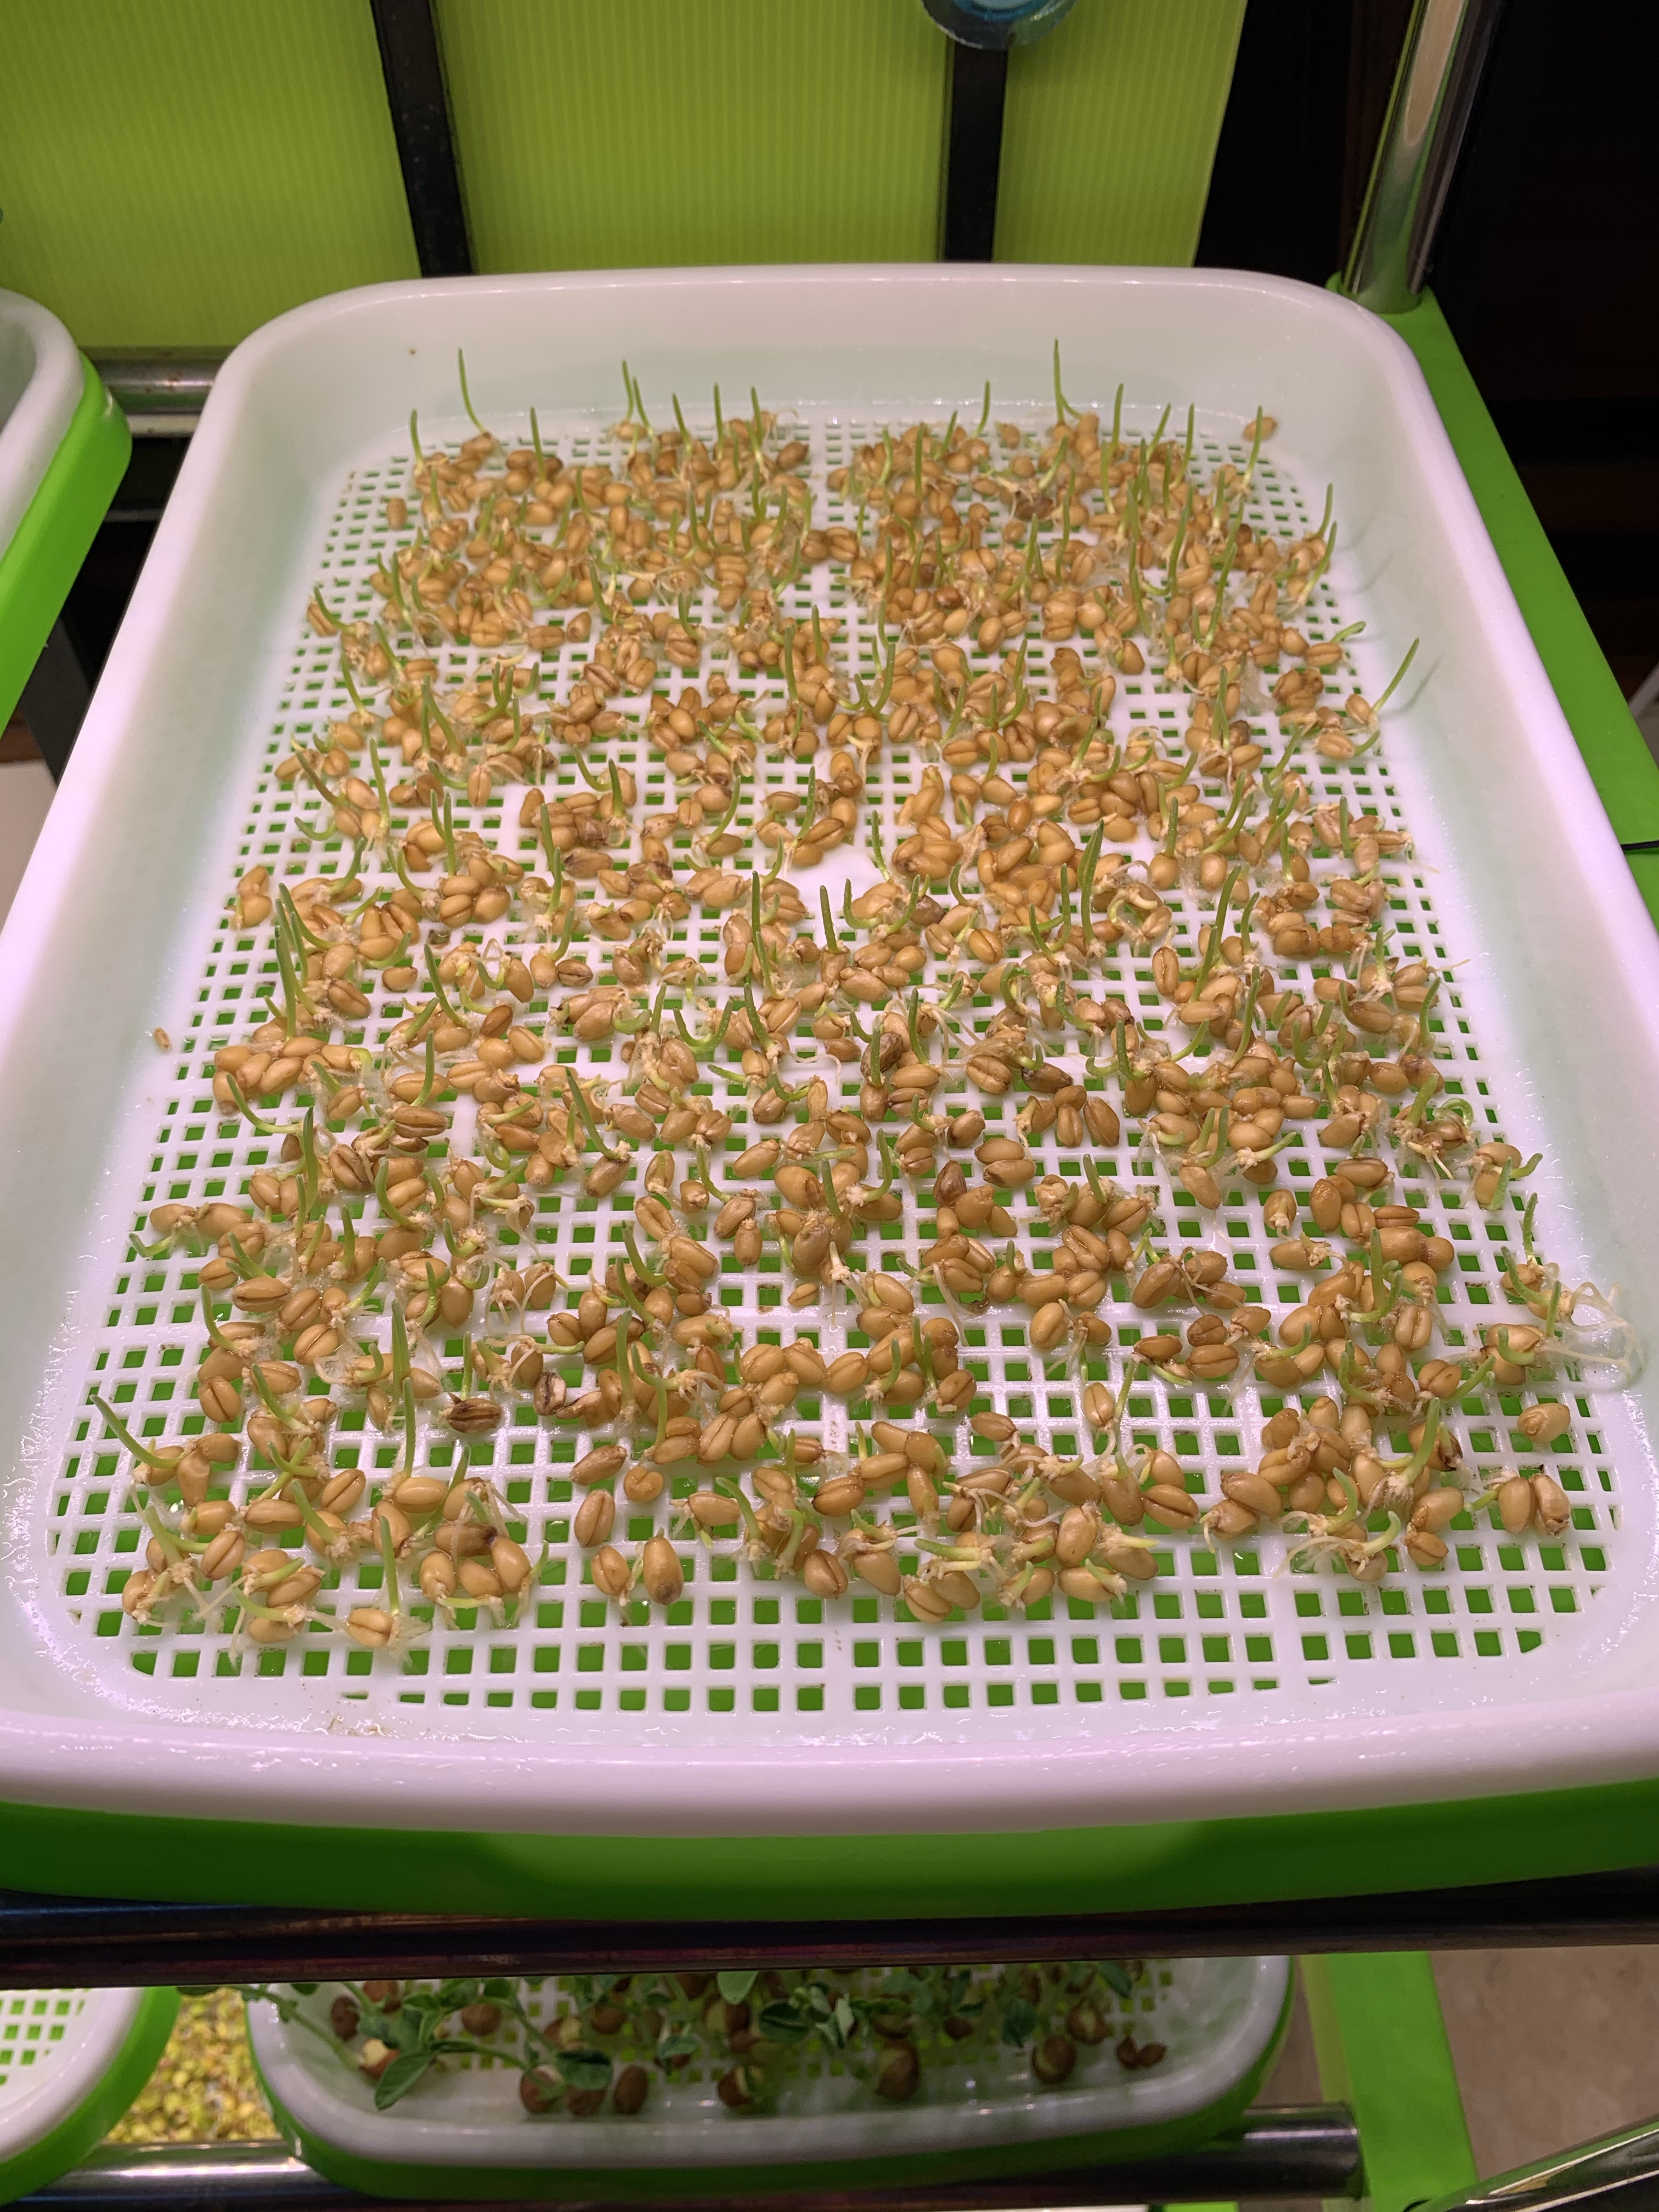
I couldn’t find any picture with freshly laid out seeds. These seeds are maybe 1-2 days old on the tray. Turn on the grow lights from 9pm-7am.
Germinating wheatgrass
Step 3: Changing of the water. Change the water in the tray every 1-2 days. It depends on the depth of your bottom tray. The roots of the seedlings must touch the water but the water level must be below the seeds or they will rot. Using the tweezers, turn the seeds with the roots growing upwards, so that the roots are growing down into the water. Remove the rotting seeds or they will start to grow mouldy and the mould will spread to the healthy seedlings and they will start to rot too. There will also be an unpleasant smell (the rotting food smell). Yep, we went through all that during our noob phase. The kids were complaining of an awful smell and we traced it to the microgreens…
Step 4 : Continue doing Step 3 until the crops reach the harvesting height and then it’s harvest time! Yay! For crops that yield more than 1 harvest, snip them off above the seed leaves aka the first 2 tiny leaves that sprout out of the seeds. They will continue growing for the next harvest.
The best thing about microgreens is that they are kept in a clean environment. The best time to eat them is immediately after harvesting! If you aren’t planning to eat them yet, keep them in an air tight container in the fridge. Be sure to eat them within 1-2 days for maximum nutrition and freshness.
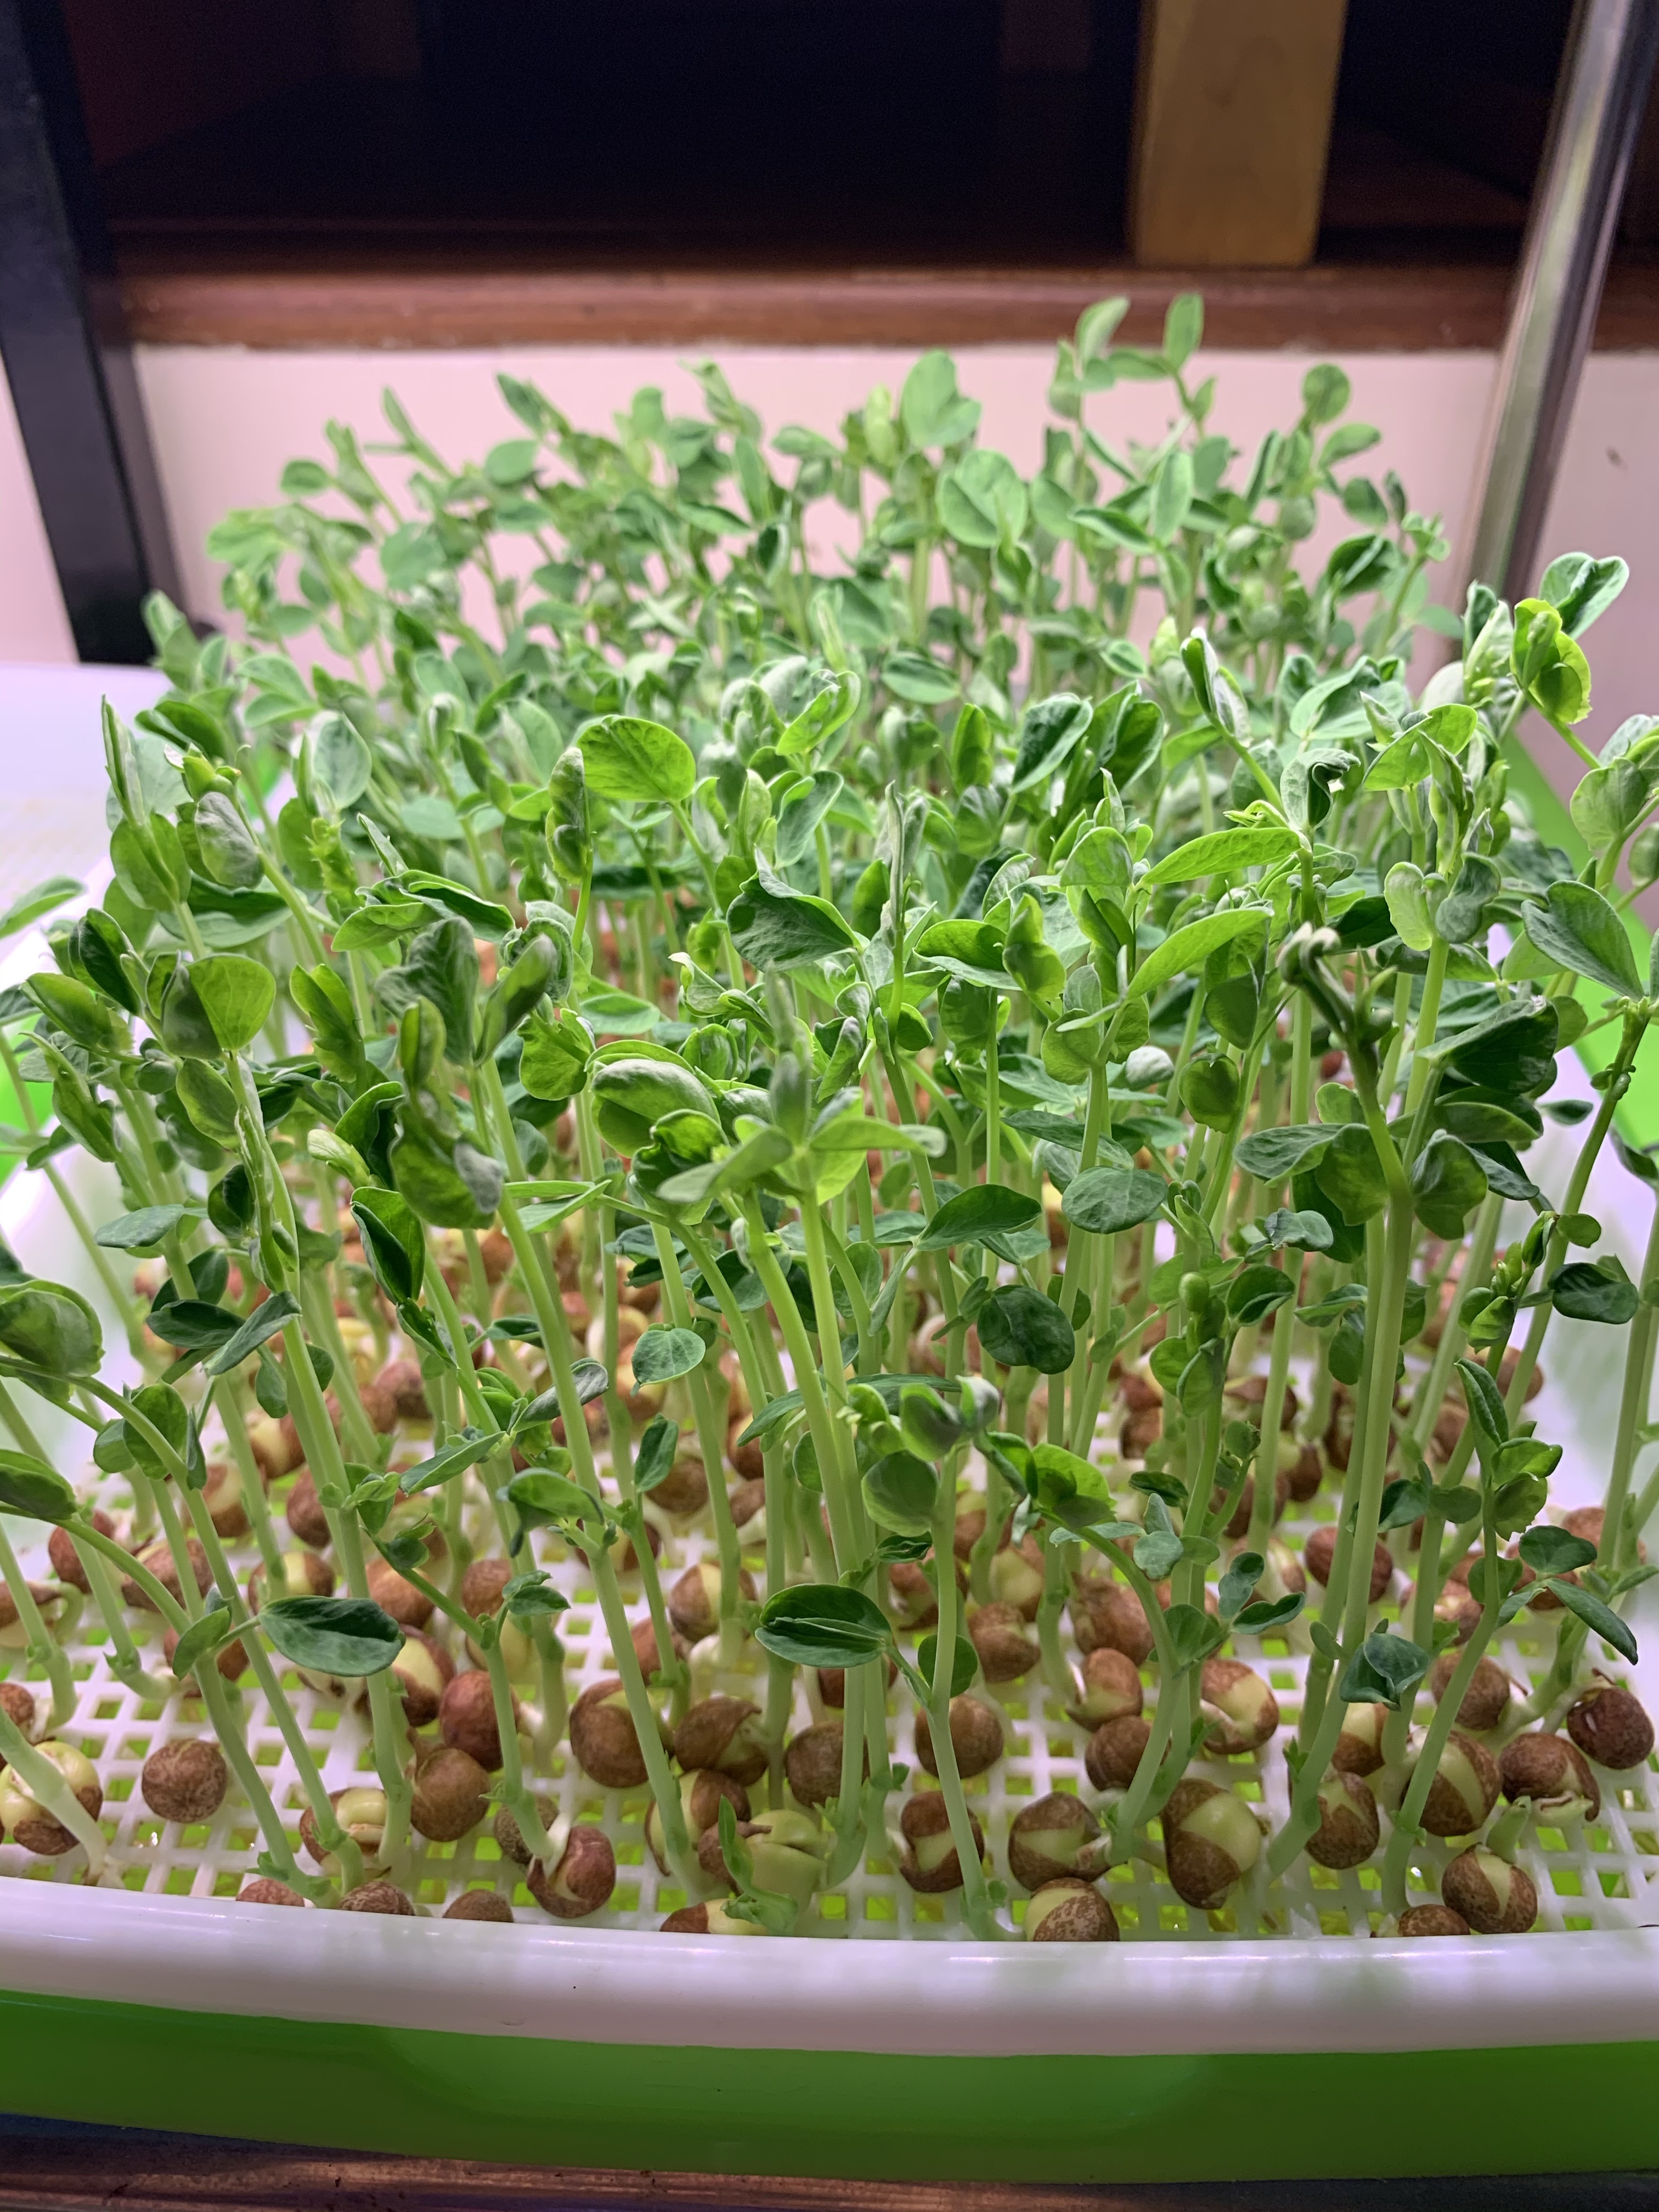
maple pea shoots (dou miao)
Ways to eat the microgreens
As salads – Retain their natural sweetness.
Blended with smoothies or yoghurts. We blend them into our milk kefir breakfast every morning.
Stir fry them. Especially the thicker ones like maple pea shoots.
Toppings on all the dishes so that they look as though they are prepared in a Michelin restaurant.
Personal experiences with the seeds
Basically, all vegetable and most fruit seeds can be used as microgreen seeds. If you are feeling adventurous and would like to use the less common seeds, do check them out first so that you don’t poison yourself.
However, there are some seeds that germinate more easily and are easier to grow than others. We are still experimenting and trying them out. I welcome you to write in the comments so that we can share our experiences and make growing microgreens a fun affair!! What I deem as difficult may vary with other people’s experiences because it also depends on the freshness of the seeds. Fresh seeds have higher germination rates. I have categorised them into easy, intermediate and advanced. I haven’t tried the rest yet. Welcoming comments on them!
Easy
Radish, broccoli, maple pea, wheatgrass, carrot, alfalfa
Intermediate
Sunflower – The seeds grow at a different rate. So it’s difficult to get a nice crop. Ok, maybe I’m OCD, I like seeing them at the same height… But, I like the nutty flavour of the microgreens. That’s why we are still growing it.
Advanced
Pak Choy – low germination rate (it may be due to the quality of my seeds. Will try to get some from other vendors to verify this.)
Kang Kong – low germination rate
Green Pea – rots easily
Growing stats of the seeds
Soaking Time (ST), Harvest Height (HH), Number of Harvests (NoH). Pardon my translation. If you know the english/chinese names of the seeds, do let me know!
Broccoli 西兰花- ST 5-6h, HH 5-6cm, NoH 1
Green Peas 方绿豌豆 – ST 12-14h, HH 8-10cm, NoH 2
Radish 白萝卜- ST 6-10h, HH 6-8cm, NoH, 1
Kang Kong 空心菜 – ST 20-24h, HH 7-9cm, NoH 1
Wheatgrass 小麦草 – ST 8-12h, HH 8-10cm, NoH 2
Pak Choy 小白菜 – ST 4-6h, HH 5-7cm, NoH 1
Maple Pea 豆苗 – ST 10-12h, HH 7-10cm, NoH 3
Carrot 红萝卜 – ST 8-10h, HH 6-8cm, NoH1
Broad Bean 蚕豆 – ST 16-18h, HH 14-16cm, NoH 2
Vanilla 香草 – ST 4-6h, HH 4-6cm, NoH 1
Alfalfa 苜蓿 – ST 4-6h, HH 4-5cm, NoH 1
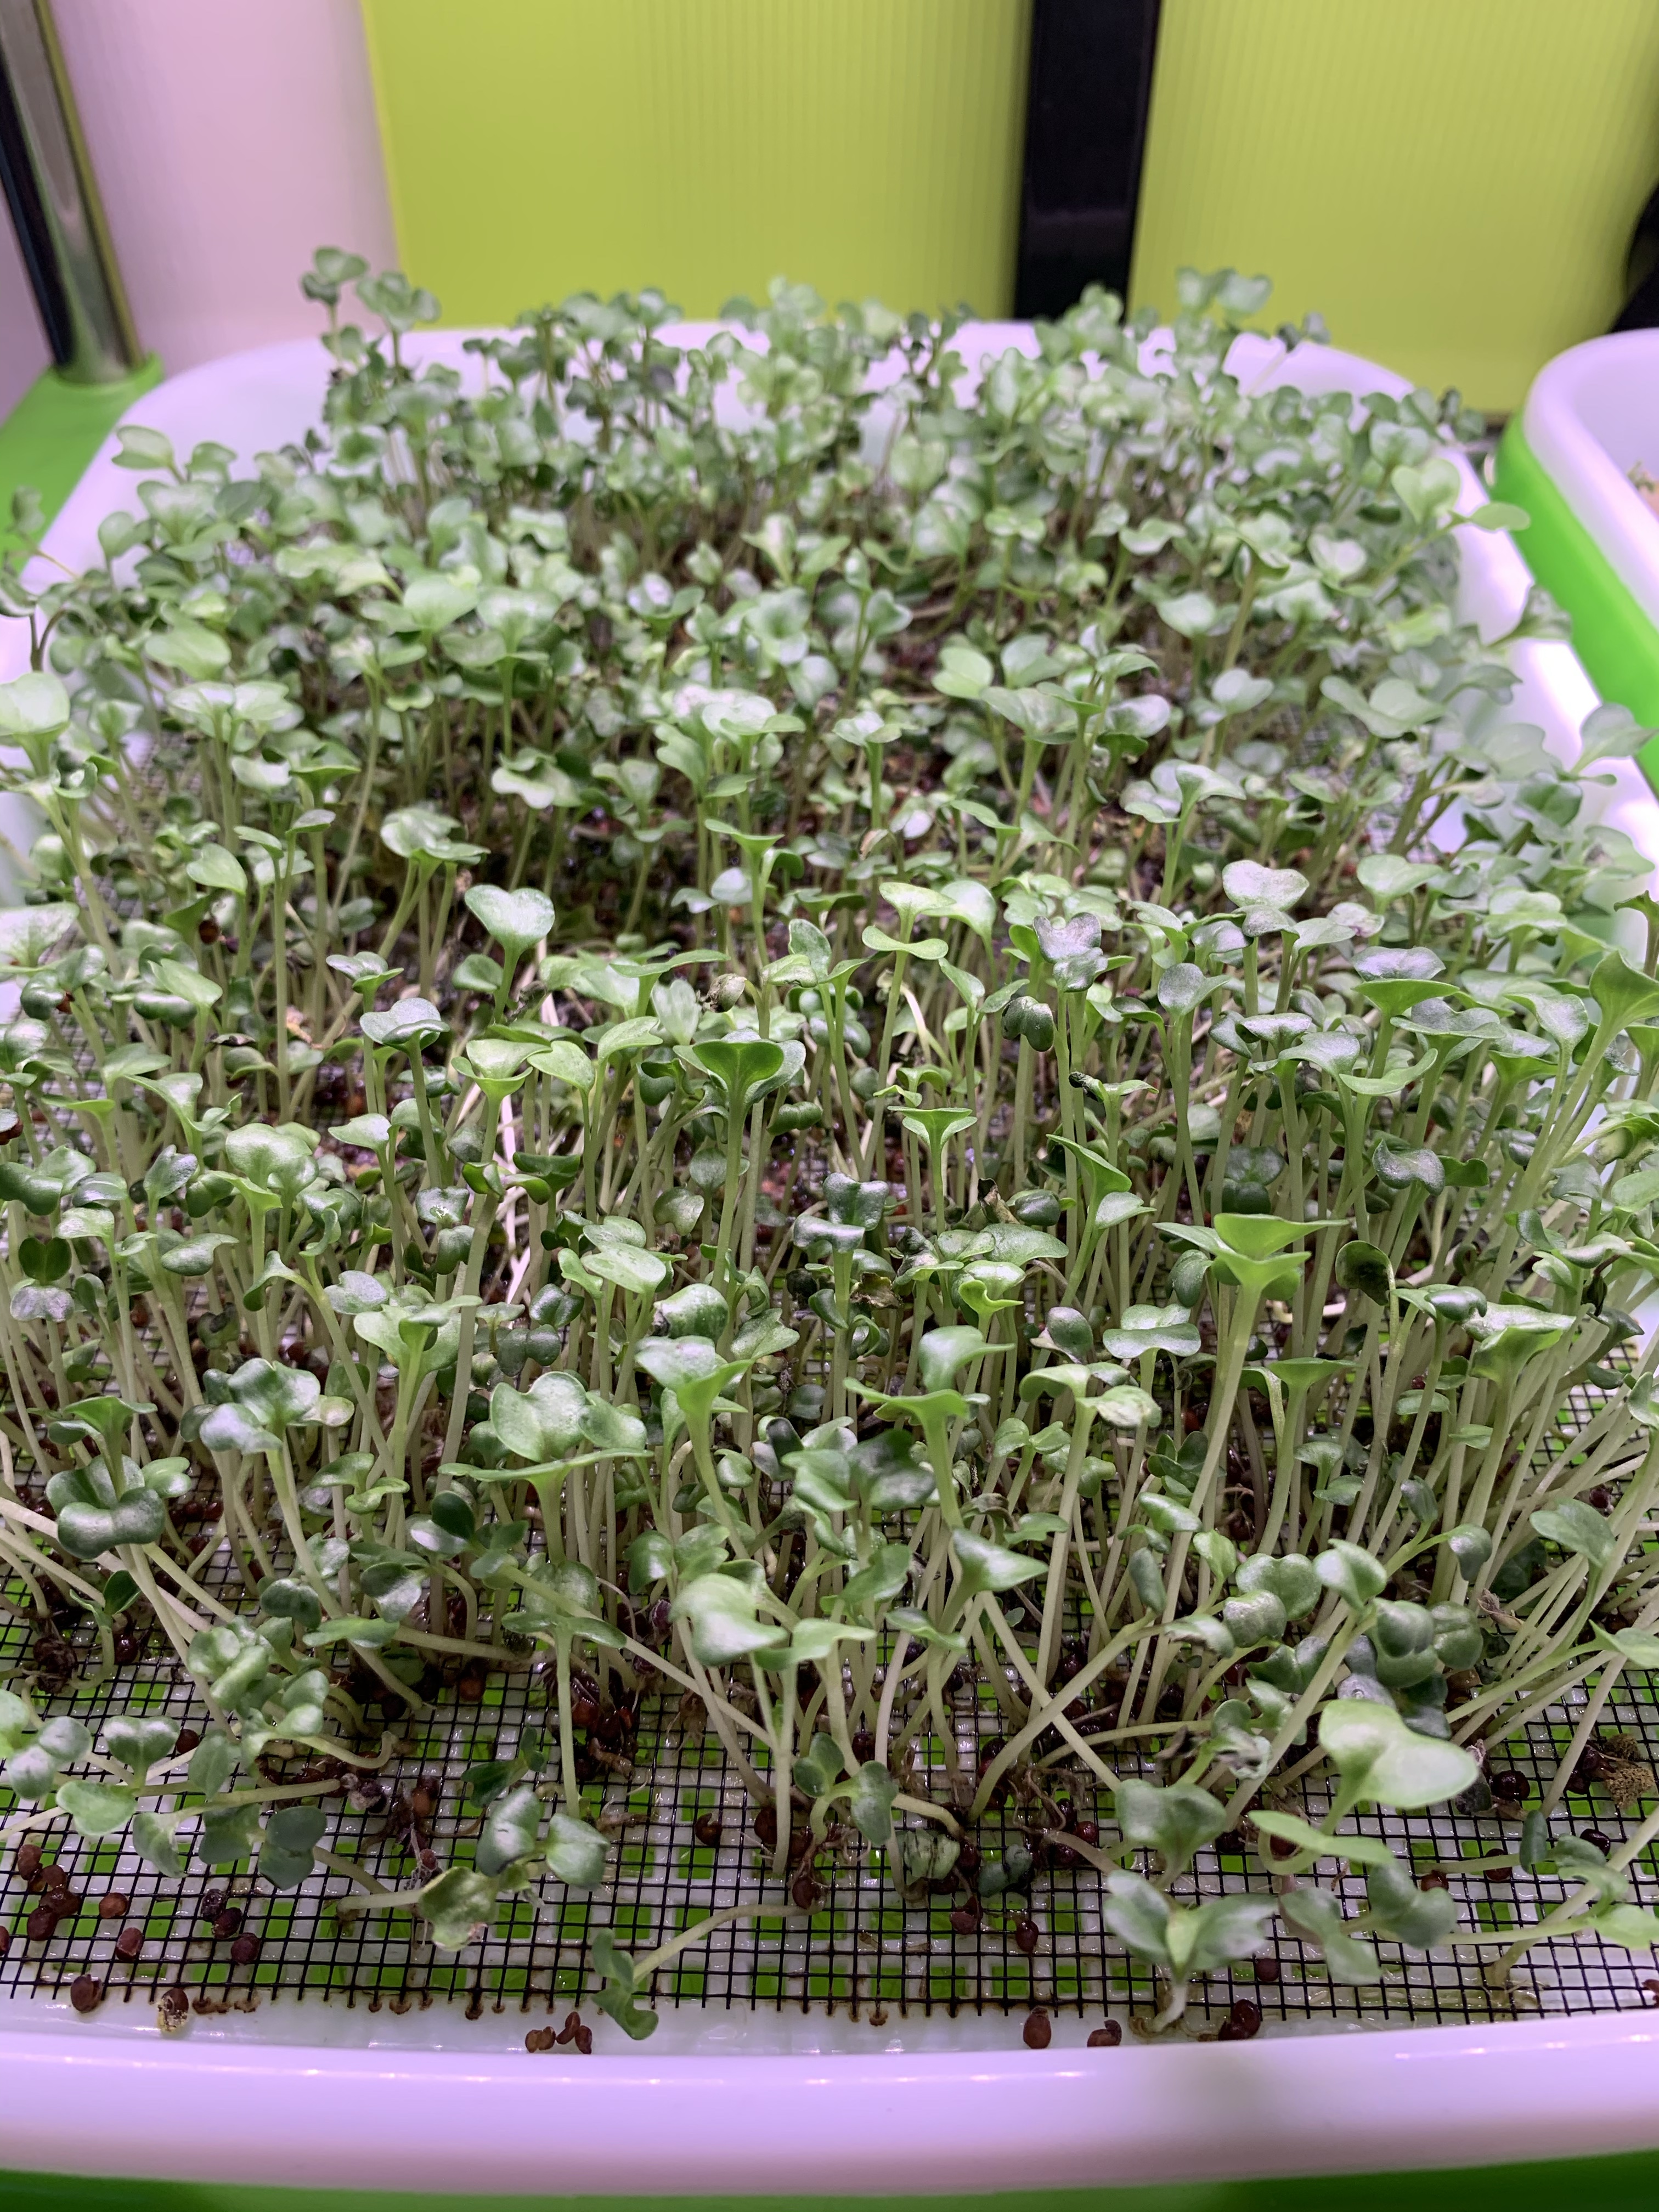
Broccoli microgreens. Because they are very small, they sit on a mesh to prevent them from falling through the holes.
The trial Home Based Learning (HBL) which took place on a Wednesday just before the Circuit Break (CB) period went terribly. There were tantrums, crying, shouting from children and parent (yes, only 1 parent, because the other parent locked himself away in his study room, oblivious to the chaos.). When MOE announced school closures, I was horrified…If I were to put myself through that every single day, there would probably be a murder before the week even ended.
I work better when I have a schedule and clarity of what is going to happen next. I decided that having schedules for every one (including myself) could preserve our (my…) sanity. There was an article which was aggressively forwarded on all social media to not impose a schedule on the children. I beg to differ on that.
So, on the day of the school closure announcement, I set the kids on a task – create their own schedules for a typical school day during CB. They needed to factor in time for HBL, time for extra work or enrichment class practice, exercise, meals, hobbies and of course PLAY! We used the Canva software to create it. Canva is so idiot-proof that my daughter was able to create an invitation card for her birthday party when she was 6.
Doing up their schedules on canva. Had to lend one of them my laptop so that they wouldn’t kill each other. Looking very serious…
They felt empowered and had a lot of fun doing up their schedules, choosing their own backgrounds, graphics etc. I had to tweak the timings a little. I simply couldn’t allow them to have meals as and when they please. What am I?! A Cafe arh?! Sheesh. And the HBL timings had to be staggered so they wouldn’t fight over the one laptop they shared.
宝贝’s schedule. She even included notes and reminders.
小小宝贝’s schedule. No frills. He only chose the template and didn’t know how to add the extra stuff like the doggy pics that his sister had.
They stuck their schedules at their study spaces, at eye level, literally smack in their faces.
Right in their faces… :p
So far, it has worked pretty well. Sometimes they finish their work earlier. They get more playtime, so that’s an incentive for them. But for slipshod work, they get playtime deducted. No more whining, pushing of boundaries, complaining la dee dah. Along the way, we have also worked in time for doing household chores and cooking. Meanwhile, 姐姐 is now the appointed IT officer for her brother whenever he runs into technical issues. Delegation, delegation…
So ya, scheduling has done wonders during this CB period and I have retained my sanity. With luck, they may even turn into junior masterchefs and spiffy cleaners before the CB ends… Keeping my fingers crossed. Looking forward to my days of kiao ka-ing when my minions can cook and clean the house!
I have been dying to make fresh basil pesto sauce every since I got my first rooted cutting from one of the nice members on the FB Urban Farming group.
I have been trying to propagate them through cuttings ever since I received it. Right now, I have 3 little basil plants and they need a trim. Their leaves are getting messy. Snip Snip snip!
I love the rich taste of this fresh basil pesto sauce. It is especially easy to do and all you need is just throw everything into a food processor. How much more idiot proof can it get??
Ingredients for Fresh Basil Pesto Sauce:
2 cups fresh basil leaves
1/3 cup nuts (usually pine nuts or walnuts are used, I used macademia because I only have those right now and can’t go out to buy others as it’s the covid19 circuit break now)
3 cloves of garlic, minced
1/3 cup of freshly grated Parmesean cheese (If you don’t have this at home, you can use Romano or Parmesean-Reggiano)
1/2 cup extra virgin olive oil
salt and freshly ground black pepper, to taste
Method:
Put the basil leaves and nuts into a food processor and pulse them until they are fine.
Add garlic and cheese to the mixture. Pulse.
Add olive oil. Pulse until mixture becomes a paste.
Stir in salt and ground black pepper to the paste. To taste.
Fresh Basil Leaves from my plants in the yard. How much more organic can it get!? :)
Texture of pesto mixture before adding salt and black pepper
You can add it to your pasta. Just lightly toss them on a warm pan. It also tastes very good on toasted bread and crackers. Or if you think your food is too bland and needs an extra oomph!
And so Singapore started the CB (Circuit Break) (What were you thinking of? Certainly not a hokkien “slang” I hope…). CB is uniquely Singaporean – made famous by our PM Lee!
#1 CB horror story…..
Opened the vegetable door of the refrigerator… “OMG! This is the only thing we have left!!!” Until our next Redmart delivery (which I spent like 2 weeks to get a slot.)
“Don’t worry! Let me see what I can harvest from my yard!”
“Waaa! I have harvested something! We can have this for dinner!”
3 eager sets of eyes…
All went 🤦🏻♀️🤦🏻🤦🏻 Guess I need to step up on my farming production…. very low productivity… 😅
We take a lot of things for granted. And we never realise it until we have lost it. Like garlic bread, it is such a common thing out there. Who has never eaten garlic bread before in their lives? Certainly not me!
It only struck me when my daughter (10 years old at this point of time), whose eyes lit up after taking a bite into the gluten free garlic bread, exclaimed, “Wow Mommy! This is the first time I have eaten garlic bread and it’s so yummy! Can you make it again??!!”
“What? You mean I haven’t made it for you before?”
“Nope!” She shook her head.
She’s quite right. She’s never eaten that in her whole life. She’s wheat intolerant (amidst other food allergies). Something as simple and common as… garlic bread.
When I posted my gluten free seaweed chicken recipe on one of the FB cooking groups, some mommies commented that their children had never eaten that before because the store bought ones contained gluten and other nasties. And now they could make it for them.
So now, I’m trying to convert the glutenful recipes into glutenfree ones so that our little ones can enjoy the yummy things that their friends take for granted.
Gluten Free Garlic Bread (Air Fryer)
This is quite idiot proof. Ok ok, everything that I (yes moi!) can make is idiot proof. Because, believe it or not, I failed my home economics practical tests when I was in school. I only managed to get A1 because I had close to full marks for the theory bits. *blush*
Ingredients
Gluten Free Baguette (2 small ones)
4 Tbsp unsalted butter (I use ghee)
2 large garlic cloves, minced
Salt and freshly ground pepper (I use himalayan salt) (to taste)
1/4 cup chopped parsley (optional)
Steps
Preheat airfryer to 160 deg C. If you are using oven, set it at 180 deg C.
Cut the bread to 1-2cm thickness. (The first time I did it, my kids complained that they were too big to bite into… all the little feedback from them.)
Airfry the slices for 5 mins. If you are using oven, bake them for about 8-10 mins until they look slightly toasted.
Melt the butter in a pot. Add garlic and season with salt and pepper to taste. Cook under low heat until the garlic is golden. It takes maybe 3-5 mins. Stir in parsley at this point if you want to add it in. It’s optional.
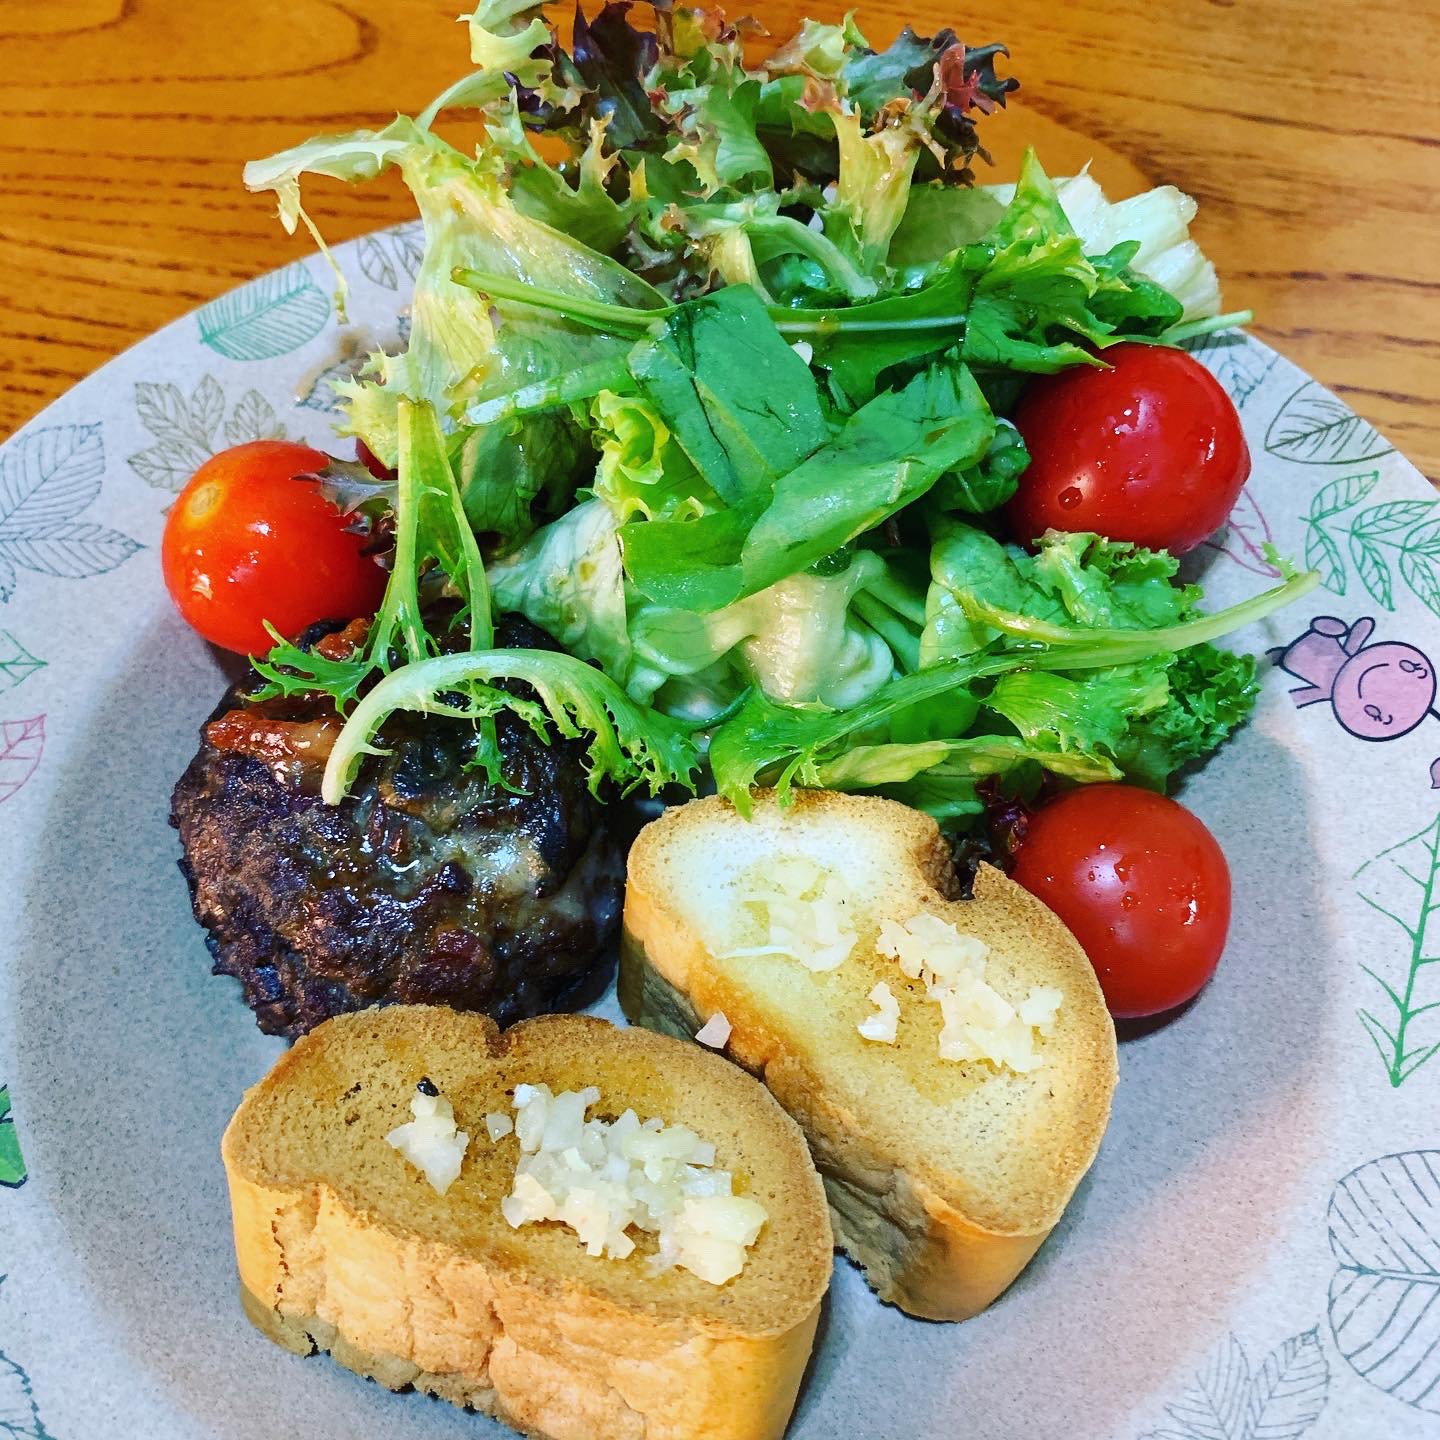
Spoon the mixture over the toasts and they are ready to be eaten! I added a lot more garlic mixture on the second round and it tasted much better. Maybe 2x or 3x more than what you see on the photo.
The biggest headache I face in the gluten free journey is that there are so few ready made food in the supermarket that cater to this group of people. Something that is so readily available like the seaweed chicken is a luxury for my child. The only way is… to make it myself.
There are many recipes online but the problem is, not all taste nice, even though the pictures look yummilicious. The other hurdle is, they are usually not made of gluten free ingredients. When some ingredients are replaced, they simply do not taste the same. After some trial and error and tweaking, I finally have one that is… gluten free AND yummy. (Well, that’s according to my children and hubby whose views may be heavily biased.)
You can try it out and see if it works for you. I hate frying in the wok as I certainly hate cleaning the cupboards, the stove, the floor, well, EVERYTHING. So this is an air fryer recipe.
Gluten Free Seaweed Chicken Recipe (Air Fryer)
Ingredients :
500g Chicken Thigh (with skin removed. I usually make crispy chicken skin which the kids love!)
3tsp gluten free soy sauce (I used the kikkoman one)
3tsp sugar vinegar mixture (1tsp sugar to 1tbsp vinegar)
1/2 tsp salt (to taste)
2tbsp gluten free self raising flour
2tbsp potato starch
3 sheets of seaweed
Method :
Cut the chicken thigh into rectangular pieces.
Marinade the chicken thigh pieces with the soy sauce, sugar vinegar mixture and salt. Let it marinade for at least 45 mins or more.
Cut the seaweed into rectangular strips that are big enough to go round the chicken pieces.
Mix the self raising flour and potato starch in a separate bowl.
Mix the chicken pieces into the flour-starch mixture and make sure that all pieces are evenly coated. Dust off extra flour from the chicken pieces.
Wrap each chicken piece with a piece of seaweed and place them neatly in the air fryer. You can choose to use the basket but I find it too tiring to wash the chicken bits off the mesh… so I use the grill basket. line them up so that they don’t overlap.
Set the temperature to 180 deg C for 15 mins.
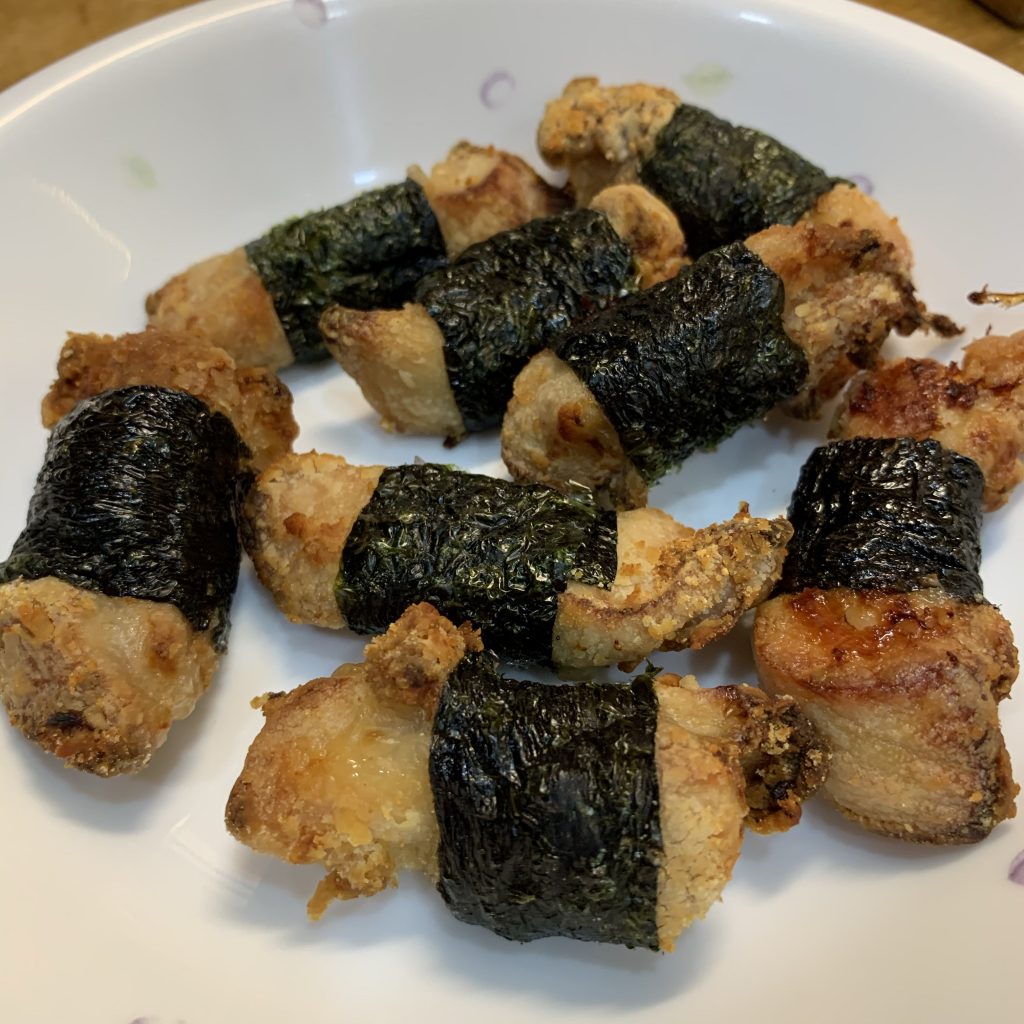
And Ta.. da…!! Gluten free seaweed chicken and NO OIL SPLATTERS!!
I came across the Sentosa KidZ Flea 2 years back when I was doing research on flea market for children. However, we were always unavailable during the dates. This year, I made up my mind to participate in it! I checked with 宝贝 if she would be interested, well, of course she was! Ever since she was introduced to the concept of money when she started Primary 1, she’s now more aware of it. We currently measure prices in equivalence to her pocket money per day.
Sentosa KidZ Flea is an award winning event organised by Sentosa annually and it takes place during the March holidays. It is open to children (age 7-12 years old) for them to sell their handicraft, pre-loved items, new items or even to set up game stalls. It promotes the entrepreneurial spirit in a fun way! They even gave a briefing session to the children to guide them on what to do and also to warn us parents that it’s the “real world” out there. Anything, and everything could happen. So it’s up to us, parents, to decide how much we wanted to step in.
Credit to www.sentosakidzflea.com
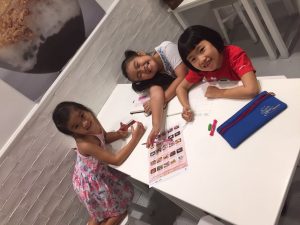
And so, I signed up for a store for 1 day (we decided not to be too ambitious on our first try) for the girls to try their hands at being mini bosses. After their briefing, the 2 老板娘s eagerly set down to conceptualise their stall and what to sell (with some inputs from their creative and helpful parents, us lah!).
And so, they brainstormed at a cafeteria.
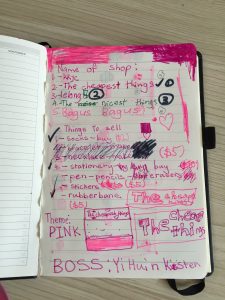
They wrote down a list of possible names for their stall. They debated on whether to sell handmade bracelets and necklaces, pre loved toys or their paintings. In the end, they decided that they would sell cute stationery (think smiggle style) and pretty hair accessories. I overheard them saying, “if we can’t sell everything, then we can bring them home and use! yay!!” Duh…. (Priorities, Kids!!) Well, I couldn’t really fault them for their logic. Because if they liked the products enough to want to own them, then so would others..?? So they picked the products (that they liked… they squealed in excitement over the product pictures), debated over the pricing (based on the sale price at their school bookshops and Popular) and finalised the actual quantities they wanted to order.
Most importantly, they decided on who the bosses were. They have already recruited their little siblings to be their sales people and have worked out the wages.
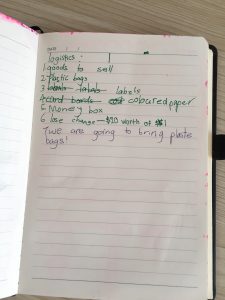
They came up with their logistics list…
And…. their booth design! After lots of discussion, they finalised their uniforms on that day – Pink top (yes, that includes 小小宝贝) and leggings (they compromised on this and allowed 小小宝贝 to wear jeans).
What’s next? Wait for their goods to arrive, take stock and pack them nicely.
SO… If you are looking for activities during the March holidays…..
Do come down to Sentosa, Palawan Beach area on next Thursday 16 March 2-7pm. Come and patronise our booth! The girls (and boy) will be selling cute stationery and hair accessories at very affordable prices. And part of the proceeds will be donated to Charity! Look out for our little bosses dressed in pink tops and leggings (or jeans)!
It all started one day when 宝贝 lamented that she’s taking forever to save up for something she wanted. Holding her head between her hands, she was poring over her daily accounts book to see where she could squeeze out more money.
“Well, if you can’t do away with the necessities and save more money, then you will have to make more money. Do you want to make money?”
“YESSSS!”
“Ok. I need someone to distribute flyers. Do you want to do it?”
“You mean stand on the square and give out paper to the passerbys?”
“Yep. I will pay $2 per hour. So, do you want to do it?”
She nodded eagerly. She probably didn’t realise that it’s harder than it seemed. Having done road shows, exhibitions, flag donations, school building donations and even kart kiosks, I know how difficult it was, even for an adult.
“But I want you to do it with me! And Di Di too!”
“Ok fine! I will distribute flyers right beside you!” Walk the talk right?! No sweat. I have thick skin anyway. Di Di aka 小小宝贝 also agreed. Not knowing what he was in for.
So I grabbed some flyers for the tuition centre (Check out Master Class for English tuition for P5-JC2. No point wasting a chance to advertise! Don’t worry, I’m not the one teaching. We have fully qualified MOE teachers hailing from top schools holding the fort.). And we decided to give out flyers outside Parkway Centre, after her dance class.
The BIG Day arrived. Armed with a small stack of flyers, we stood around the basement, among other flyer distributors.
“You only gave me 5 flyers!” She flapped her sheets at me.
“I will give you more when you have used them up. Let’s just do it for 15 minutes first. How much would you have earned by then?”
Frowning in deep thought, “50 cents? Does Didi get that too?”
“Of course!” Meanwhile, Didi was loitering near the ice cream shop display, ignoring us.
“Hokay! Let’s start!”
I did a few demonstrations and received many rejections, as usual. When I finally succeeded in giving out my first flyer, I smiled triumphantly at 宝贝. She was standing behind me, holding her flyers, looking at me doubtfully.
“There will always be rejections. It’s just part of it. It’s ok. Just persist!” Giving her the YOU-CAN-DO-IT sign.
She spent the next 5 minutes drawing circles on the ground with her shoe.
“Eh, hurry up leh!”
“I’m thinking of how to do it!”
“Ok, let me demonstrate again!”
Then the slew of excuses came. “It’s drizzling! I don’t want to stand in the rain!” “That’s my friend! I don’t want to give this to her!” “They don’t want to take it!”
She finally worked up her courage and walked boldly towards a parent, but one foot away, she suddenly turned around and strode back.
“What happened?!”
“I’m too shy! And why is Di di not doing it! He’s just looking at the ice creams!”
Ok fine! I called 小小宝贝over. “Eh! Are you here to distribute flyers or look at ice creams? Do you want to buy things?” He nodded eagerly. “Do you have money?” He shook his head. “So how?”
The little one said, “I must give out flyers to the uncles and aunties.”
“Ok Good! Tell you what, for every flyer you give out I give you 10 cents! Ok???”
“Yay!” Sigh… Expensive wages..
He looked at me wondering what to do next. Sigh. He was oogling at ice creams when I was doing my demonstrations. So, I gave out a few flyers to show him what to do. I pointed him to the parents sitting around the cafes and Macdonalds.
Without a word, he trotted up to a parent who was messaging on his phone, stood beside him and stared at him with his big round eyes, carrying his cute Eeyore bag and handed out a flyer to him. And… the scumbag waved him away!! Couldn’t he see that a little 4 year old was mustering up his courage to do that?!
Surprisingly, he wasn’t daunted. He walked up to another parent and handed the flyer to him. (Somehow he preferred to give out to Daddies). The daddy smiled and took it from him and patted his head.
He turned to me and gave me the brightest smile ever and hopped in glee. Then he went on to give out another one. The daddy walked past him (he was too small) and didn’t see him, then suddenly realised that the little kid was trying to give him something. He turned back and took the flyer from 小小宝贝.
Meanwhile, 宝贝 also tried to give out her flyers after watching her brother do it. Only to be waved away as though she was a pesky fly. (These parents will get their just desserts!!! Will it kill just to take a piece of paper from a child?!)
Then the hub’s call came. OK. Time to leave.
And so, 小小宝贝 made 20 cents.
Everyone agreed to do it again the next week. 宝贝decided that she would give out at least 1 flyer the next time. 小小宝贝 was looking forward to it as he had first tasted the joy of making money!
Some friends widened their eyes and exclaimed, “Waa! Zun Bo!?” Well, it’s a way to teach them the value of money, that it’s not easy to make money and to only spend the hard-earned money on things that they need. It’s also a way to build up courage and approach people. I find that our children are too soft and too dependent on us, parents, to do everything for them. We need to let them do things on their own, do the tough things, albeit in a safe environment. And definitely, facing up to rejections. It’s not easy to take rejections, but I always believe that, with every rejection, we will just emerge stronger and build thicker skins!
Taking the first step is always the hardest. But once, the step is taken, the rest will follow. For 宝贝, if her 4 year old brother can do it, there shouldn’t be a reason why she can’t do it as well.
So if you happen to be around Parkway Parade on Saturday morning, do come over and say hi to us and give some words of encouragement to the 宝贝s!
If you want your children receive free flyer distribution lesson, you are welcome too! But you pay them their wages ok!!