Browsed by
Category: Food Gluten Free

Home cooked gluten free food for 宝贝 ever since she was diagnosed of having an allergy to wheat.

Gluten Free Pork Floss aka Bak Hu

Gluten Free Pork Floss aka Bak Hu

I have been eating Pork Floss (Bak Hu) all my life since I was a kid. It’s very versatile and goes with almost everything! I ate it with bread, porridge, soup, anything and everything. And it is easily bought in Singapore – we have at least 4 or 5 Bak Kwa chain stores that sell it.

But, for 宝贝, being a kid who is allergic to wheat, she has never tasted it in all her life. Because, the sauce that goes into making it is not gluten free. If you have food allergies or a mom of one, you will totally understand how I feel.

As someone who has failed home economics in school, I can’t make over complicated dishes and neither do I have the patience to. So if I can make this, anyone can!

I attempted different recipes and finally got it right on the third try! My first attempt resulted in a block like meatloaf that resembled spam. (Ya, maybe I can try to recreate gluten free spam when I’m free. lol). The 2nd time, it was kind of overcooked to almost being burnt. You get the picture…

I like this recipe, because it makes use of the meat from the soup bones. The spare ribs that were used for cooking soup usually have very soft and tender meat. I fish them out from the soup and shred the meat from the bones and keep them in the fridge so that I can use them for making pork floss. I always love the idea of reuse, upcycling etc. And it’s fuss free because I use the breadmaker to make it. Yes, you have heard it right… BREADMAKER.

So here goes!

Ingredients for Gluten Free Pork Floss

– 300g meat (I use the shredded meat from spare ribs used in soup)

– 4 Tbsp sugar

– 2 Tbsp fish sauce

– 1 Tbsp gluten free light soy sauce

– 1 Tbsp water

Easy Peasy Method

1. Put everything into the breadmaker. Choose the Jam function. At the beginning of the cycle, use a spatula to push the meat in from the sides of the container so that they get mixed in nicely.

2. For my breadmaker, I need about 1 and a half cycles. After 1 cycle, I restarted a 2nd cycle for 50 mins. My full Jam cycle runs for 1h 25 mins. This timing varies for different brands of breadmaker. Like all kinds of cooking, for the first time, use the taste and sight tests between intervals to see if it’s done. It should look crispy and flaky and taste like the commercial ones.

Recipe for gluten free pork floss

Gluten Free Sourdough Cinnamon Sugar Flatbread

Gluten Free Sourdough Cinnamon Sugar Flatbread

I came across this recipe on the internet quite a while back. I saved it, meaning to try it out but forgot all about it until recently. The original recipe was heavy on sugar!! One would develop serious diabetes just looking at the amount of sugar in it. So I reduced the amount of sugar by 50% and found it still too sweet for my liking. I further reduce the sugar amount so that I don’t get hyperactive kids after they consume it…. The flatbread got a thumbs up from the kids. Then again, they love anything with even a tinge of sugar in it, with the exception of honey meatballs (they prefer savoury ones).

Feel free to reduce the amount of sugar even further, to your liking.

Ingredients for Gluten Free Sourdough Cinnamon Sugar Flatbread

1st bake

– 1/2-1tbsp veg oil or butter (for brushing on the sheet or tray)

– 2 Tbsp cinnamon (I use ceylon cinnamon. The difference between Cassia and Ceylon Cinnamon)

– 1/4 cup sugar

– 2 cups sourdough starter or discard.

2nd bake

– 2tbsp butter

– 1 1/2 tsp cinnamon

– 2 tbsp sugar

Method for Gluten Free Sourdough Cinnamon Sugar Flatbread

1. Preheat oven to 250 deg C

2. Brush oil on baking paper on tray.

3. Mix ingredients for 1st bake. Pour it evenly on the baking tray. Bake for 10 mins.

4. Mix ingredients for 2nd bake. Spread it evenly over the top of the bread.

5. Bake for 7 mins.

6. Rest for 10 mins. Serve.

Gluten Free Sourdough Cinnamon Sugar Flatbread

Other sourdough projects

Gluten Free Sourdough Discard Crumpets

Gluten Free Sourdough Discard Crumpets

Congratulations! If you are on this page, it means that your gluten free sourdough starter has started bubbling! Now it’s time to use your discards to make some yummy sourdough bakes!

This is the easiest discard recipe and I use it all the time. Usually I use it to make sourdough crumpets which my girl absolutely loves! They can be eaten on their own or with jam. The family loves the garlic version. (The picture is a garlic crumpet). If you have muffin rings, you can use them to make muffins. I have used them as pizza bases as well.

img_8224

Gluten Free Sourdough Discard Crumpet Recipe

Ingredients

– 1 cup (270g) gluten free sourdough starter or discard

– 1tsp sugar

– 1/2 tsp salt

– 1/2 tsp baking soda

– 1/2 tbsp ghee/cooking oil

Method

1. Whisk to combine discards, sugar and salt.

2. Heat up your pan. Add baking soda into the batter and whisk it in lightly to make sure that it has been thoroughly mixed in.

3. Pour 1/2 tbsp oil onto the hot pan and spread it to coat the pan. Ladle the batter onto the pan. I use the tablespoon (1-2 tbsp). You can make a few crumpets depending on the size of your pan.

4. Cook for a few mins until you see the top is set (you will see some bubbles on top).

5. Flip crumpets to lightly brown on the other side.

6. Cool the cooked crumpets on the rack. Or… if you can’t wait, like my girl, you can eat them when they are hot… If you don’t want to eat them immediately, you can freeze them in a single layer on a silicon mat in the freezer. Store them in a box when they have been frozen. You can toast them straight from the freezer next time.

*For garlic crumpets, you can combine with the garlic butter here. Or just mix minced garlic with butter, spread them on top of the crumpets and toast them in the oven.

Happy baking! All suggestions and questions are welcome. Just write them in the comments.

Other gluten free sourdough projects

Other fermentation projects

Gluten Free Sourdough Starter

Gluten Free Sourdough Starter

All sourdough breads start life…. from a sourdough starter. Hehe. Ok, that was lame. Anyway, before you can bake a loaf of sourdough bread, you need the starter. The starter replaces the commercial yeast found in the normal bread. It is full of bacteria that do all the work in the bread for you and it is natural.

Creating a sourdough starter isn’t easy. Starting one that is gluten free is even more difficult. If you are leading a gluten free lifestyle, you will know that gluten free flours cost a lot more than the normal wheat flour out there, especially during the covid 19 lockdown period. They are even harder to find than gold! (exaggeration…)

I went through a lot of trial and error and trawled through lots of literature (online or in print, there are a lot of information on normal sourdough but very little on gluten free ones! So frustrating!) before I finally have a successful gluten free sourdough starter (which I named Scooby Dough) that doubles every time it is fed. By then, I have already used up sacks of various gluten free flours, literally, to create it.

Create a gluten free flour mix

I created a gluten free flour mix because I wanted my starter to be easily adaptable to any sourdough recipe and also imbued with various kinds of bacteria present in the different flours. You don’t have to do this. You can have a pure brown rice starter or a buckwheat starter or just a mix of 2 flours. The gluten free flours you can use are as follows : brown rice flour, buckwheat flour, sorghum flour, teff flour, millet flour. The most common starters are made of 50/50 brown rice/buckwheat. If you are allergic to any of these flours, just leave them out when creating the starter.

Setting up the gluten free sourdough starter

You will need :

– a sterilised clean glass jar or bowl with a cover

– weighing scale

– gluten free flour mix

– room temperature water (I have a filtration system at home, so I am using filtered water)

Day 1

In the morning, weigh out 20g gf flour mix, 20g water. Mix them thoroughly in a small bowl. The texture should be yoghurt like. Carefully, transfer the mix into the sterilised glass jar. Cover it loosely without screwing the cap. Leave it in a cool corner without direct sunlight.

In the evening, weigh out 20g gf flour mix, 20g water. Add them to the mix in the jar and mix them thoroughly. The proportion is always 1:1:1 – starter : flour : water. Put a rubber band around the level of your mix, so that you can tell if the starter has increased in volume and the amount of increase.

Day 2

Morning : Weigh out 20g starter, 40g flour, 40g water. Put the rest of the starter into a glass jar or container and keep it in the fridge. For the first few days, the bacteria has not been activated so it is not advisable to make anything with them yet. Wash the glass jar so that there aren’t any remnants in the jar which may cause mould to form. Mix everything in a bowl and transfer into the clean jar.

Evening :Weigh out 40g flour, 40g water and add them into the mix in the jar. Mix thoroughly.

Repeat the steps until your starter starts to bubble. This usually takes about 7-14 days. Once your starter starts to bubble, you can start using the discards in your fridge to make sourdough discard bakes.

Continue with the steps until your starter doubles in volume after 1 feeding. That means it is now ready for baking. Congratulations! You can give your pet starter a name (it is alive after all!) and start baking with it.

Q: What if it still doesn’t rise after 7-14 days?

A: Normally, it should. If it doesn’t, try replacing water with a fermented liquid such as yeast water, kombucha, ginger bug, whey. Another way is to add 5g of sugar every feed.

img_8513
Meet my pet starter, Scooby Dough!

Here is a picture of my pet starter Scooby Dough! Look at all his beautiful bubbles! If you find it too tedious and expensive (gluten free flours aren’t cheap) to create your own starter, you can buy an offspring of Scooby Dough here! You can use it to bake immediately. It is a very versatile starter and you can also change it to a starter of your own liking because it has been infused with a variety of gluten free flours.

Hibernating Sourdough Starter in Fridge

If you find that you don’t bake every day and the sourdough starter can be a very hungry pet, just pop it into your fridge after your last bake. It will go into hibernation mode. Just be sure to take it out once a week and feed it once. Let it double in volume then put it back in the fridge.

Plan ahead for your bakes. Take the starter out of the fridge 1 day in advance and feed it once in the morning to reactivate it. If it doesn’t double after that feed, you will need to feed it again in the evening. Once it doubles, it’s ready for a bake.

Other gluten free sourdough projects

Other fermentation projects


Gluten Free Sourdough Projects

Gluten Free Sourdough Projects

I have never been good in the kitchen, be it baking or cooking. My home economics teachers can attest to that. It was extremely difficult when my little one was diagnosed with multiple food allergies, including wheat. I discovered that wheat was anywhere and everywhere. And the food industry in Singapore was poorly equipped to deal with such an allergy. So I didn’t have much of a choice but to cook them myself.

It has been a pretty amazing journey since. I don’t profess to be a master chef but the food have been decent enough for my little kiddos.

To me, baking bread is like the ultimate nirvana, not to mention sourdough. But now, I can even bake gluten free sourdough which is even harder than the regular sourdough because of the lack of gluten in it. So, if I (a complete baking idiot) can do it, I believe anyone out there can.

Here is a list of my gluten free sourdough projects.

Gluten Free Sourdough Starter

Gluten Free Sourdough Discard Crumpets

Gluten Free Sourdough Cinnamon Flatbread

If you are interested in other fermentation projects, just click here.

Raspberry Almond Cake (Gluten Free)

Raspberry Almond Cake (Gluten Free)

Gluten Free Raspberry Almond Cake Recipe

I must really thank Juan (Check out her instagram @juanspantry for more recipes) for this wonderful gluten free Raspberry Almond cake recipe. Anyone who is on a gluten free diet will totally understand how difficult it is to find a tasty and yet gluten free cake! What’s more, it’s super easy to bake! This is especially important to me because I am such a dunce in the kitchen!

Ingredients for Raspberry Almond Cake (Gluten Free)

  • 2 1/2 cups frozen raspberries, thawed
  • 6 eggs
  • 1 cup sugar
  • 2 cups almond meal (or ground almonds)

Method for Raspberry Almond Cake (Gluten Free)

  1.  Preheat oven to 160 deg C. Grease a 16cm or 22 cn round springform cake tin. Line base and side with baking paper.
  2. Place 2 cups of raspberries in a bowl  and mash them with a fork.
  3. Using a mixer, beat eggs and sugar on high speed for 8-10 mins or until thick and glossy. Gently fold in raspberries and almond meals. ALTERNATE the two until everything is combined.
  4. Pour the mix into a prepared tin. Bake for 60 mins or until it is golden and firm. Cool it in the tin for 10 minutes.
  5. Transfer to a wire rack for cooling. Decorate the top with the remaining raspberries. Serve.

Gluten Free Raspberry Almond Cake Recipe

Check out the centre of the cake. It’s moist and pink. The crust is a little crisped. Thumbs up from my kids. I am, henceforth, given the permission to bake this cake again. :p

Fresh Basil Pesto Sauce

Fresh Basil Pesto Sauce

I have been dying to make fresh basil pesto sauce every since I got my first rooted cutting from one of the nice members on the FB Urban Farming group.

I have been trying to propagate them through cuttings ever since I received it. Right now, I have 3 little basil plants and they need a trim. Their leaves are getting messy. Snip Snip snip!

I love the rich taste of this fresh basil pesto sauce. It is especially easy to do and all you need is just throw everything into a food processor. How much more idiot proof can it get??

Fresh Basil Pesto Spaghetti

Ingredients for Fresh Basil Pesto Sauce:

  • 2 cups fresh basil leaves
  • 1/3 cup nuts (usually pine nuts or walnuts are used, I used macademia because I only have those right now and can’t go out to buy others as it’s the covid19 circuit break now)
  • 3 cloves of garlic, minced
  • 1/3 cup of freshly grated Parmesean cheese (If you don’t have this at home, you can use Romano or Parmesean-Reggiano)
  • 1/2 cup extra virgin olive oil
  • salt and freshly ground black pepper, to taste

Method:

  1. Put the basil leaves and nuts into a food processor and pulse them until they are fine.
  2. Add garlic and cheese to the mixture. Pulse.
  3. Add olive oil. Pulse until mixture becomes a paste.
  4. Stir in salt and ground black pepper to the paste. To taste.
Fresh Basil leaves
Fresh Basil Leaves from my plants in the yard. How much more organic can it get!? 🙂
Texture of pesto mixture before adding salt and black pepper

You can add it to your pasta. Just lightly toss them on a warm pan. It also tastes very good on toasted bread and crackers. Or if you think your food is too bland and needs an extra oomph!

Gluten Free Garlic Bread

Gluten Free Garlic Bread

We take a lot of things for granted. And we never realise it until we have lost it. Like garlic bread, it is such a common thing out there. Who has never eaten garlic bread before in their lives? Certainly not me!

It only struck me when my daughter (10 years old at this point of time), whose eyes lit up after taking a bite into the gluten free garlic bread, exclaimed, “Wow Mommy! This is the first time I have eaten garlic bread and it’s so yummy! Can you make it again??!!”

“What? You mean I haven’t made it for you before?”

“Nope!” She shook her head.

She’s quite right. She’s never eaten that in her whole life. She’s wheat intolerant (amidst other food allergies). Something as simple and common as… garlic bread.

When I posted my gluten free seaweed chicken recipe on one of the FB cooking groups, some mommies commented that their children had never eaten that before because the store bought ones contained gluten and other nasties. And now they could make it for them.

So now, I’m trying to convert the glutenful recipes into glutenfree ones so that our little ones can enjoy the yummy things that their friends take for granted.

Gluten Free Garlic Bread (Air Fryer)

Gluten free garlic bread recipe

This is quite idiot proof. Ok ok, everything that I (yes moi!) can make is idiot proof. Because, believe it or not, I failed my home economics practical tests when I was in school. I only managed to get A1 because I had close to full marks for the theory bits. *blush*

Ingredients

  • Gluten Free Baguette (2 small ones)
  • 4 Tbsp unsalted butter (I use ghee)
  • 2 large garlic cloves, minced
  • Salt and freshly ground pepper (I use himalayan salt) (to taste)
  • 1/4 cup chopped parsley (optional)

Steps

  1. Preheat airfryer to 160 deg C. If you are using oven, set it at 180 deg C.
  2. Cut the bread to 1-2cm thickness. (The first time I did it, my kids complained that they were too big to bite into… all the little feedback from them.)
  3. Airfry the slices for 5 mins. If you are using oven, bake them for about 8-10 mins until they look slightly toasted.
  4. Melt the butter in a pot. Add garlic and season with salt and pepper to taste. Cook under low heat until the garlic is golden. It takes maybe 3-5 mins. Stir in parsley at this point if you want to add it in. It’s optional.
  5. Spoon the mixture over the toasts and they are ready to be eaten! I added a lot more garlic mixture on the second round and it tasted much better. Maybe 2x or 3x more than what you see on the photo.

Hope your kiddos like them!

Gluten Free Seaweed Chicken

Gluten Free Seaweed Chicken

The biggest headache I face in the gluten free journey is that there are so few ready made food in the supermarket that cater to this group of people. Something that is so readily available like the seaweed chicken is a luxury for my child. The only way is… to make it myself.

There are many recipes online but the problem is, not all taste nice, even though the pictures look yummilicious. The other hurdle is, they are usually not made of gluten free ingredients. When some ingredients are replaced, they simply do not taste the same. After some trial and error and tweaking, I finally have one that is… gluten free AND yummy. (Well, that’s according to my children and hubby whose views may be heavily biased.)

You can try it out and see if it works for you. I hate frying in the wok as I certainly hate cleaning the cupboards, the stove, the floor, well, EVERYTHING. So this is an air fryer recipe.

Gluten Free Seaweed Chicken Recipe (Air Fryer)

Gluten free seaweed chicken recipe

Ingredients :

  • 500g Chicken Thigh (with skin removed. I usually make crispy chicken skin which the kids love!)
  • 3tsp gluten free soy sauce (I used the kikkoman one)
  • 3tsp sugar vinegar mixture (1tsp sugar to 1tbsp vinegar)
  • 1/2 tsp salt (to taste)
  • 2tbsp gluten free self raising flour
  • 2tbsp potato starch
  • 3 sheets of seaweed

Method :

  1. Cut the chicken thigh into rectangular pieces.
  2. Marinade the chicken thigh pieces with the soy sauce, sugar vinegar mixture and salt. Let it marinade for at least 45 mins or more.
  3. Cut the seaweed into rectangular strips that are big enough to go round the chicken pieces.
  4. Mix the self raising flour and potato starch in a separate bowl.
  5. Mix the chicken pieces into the flour-starch mixture and make sure that all pieces are evenly coated. Dust off extra flour from the chicken pieces.
  6. Wrap each chicken piece with a piece of seaweed and place them neatly in the air fryer. You can choose to use the basket but I find it too tiring to wash the chicken bits off the mesh… so I use the grill basket. line them up so that they don’t overlap.
  7. Set the temperature to 180 deg C for 15 mins.
  8. And Ta.. da…!! Gluten free seaweed chicken and NO OIL SPLATTERS!!
Fermentation : Sauerkraut (fermented cabbage)

Fermentation : Sauerkraut (fermented cabbage)

I have always wanted to make sauerkraut, but as usual, procrastination set in and before I knew it, it’s year 2020! I bought an organic cabbage yesterday. It cost a bomb… seriously. I have never paid so much for vegetables before… Maybe I should start growing cabbages at home. *ponder*

There it sat on my counter, staring at me, daring me to let it rot. I couldn’t stare it down, so I moved my ass and chopped it down. Ha da! And it’s actually surprisingly easy to do! So all of you out there, if you are still thinking (for the longest time ever) of starting but not, JUST DO IT!

Ingredients:

Cabbage (Organic if possible. Or else you will need to use vegetable wash to clean pesticide and yuckies off and also kill off the natural bacteria needed for fermentation)

Salt (I used Himalayan Pink Salt. That’s what I have at home anyway. You can use other mineral rich salts. I draw the line at refined salt.)

Before you start, make sure you have all the tools and containers ready.  Wash them down with soap. Sterilise them if it makes you feel better.

Tools:

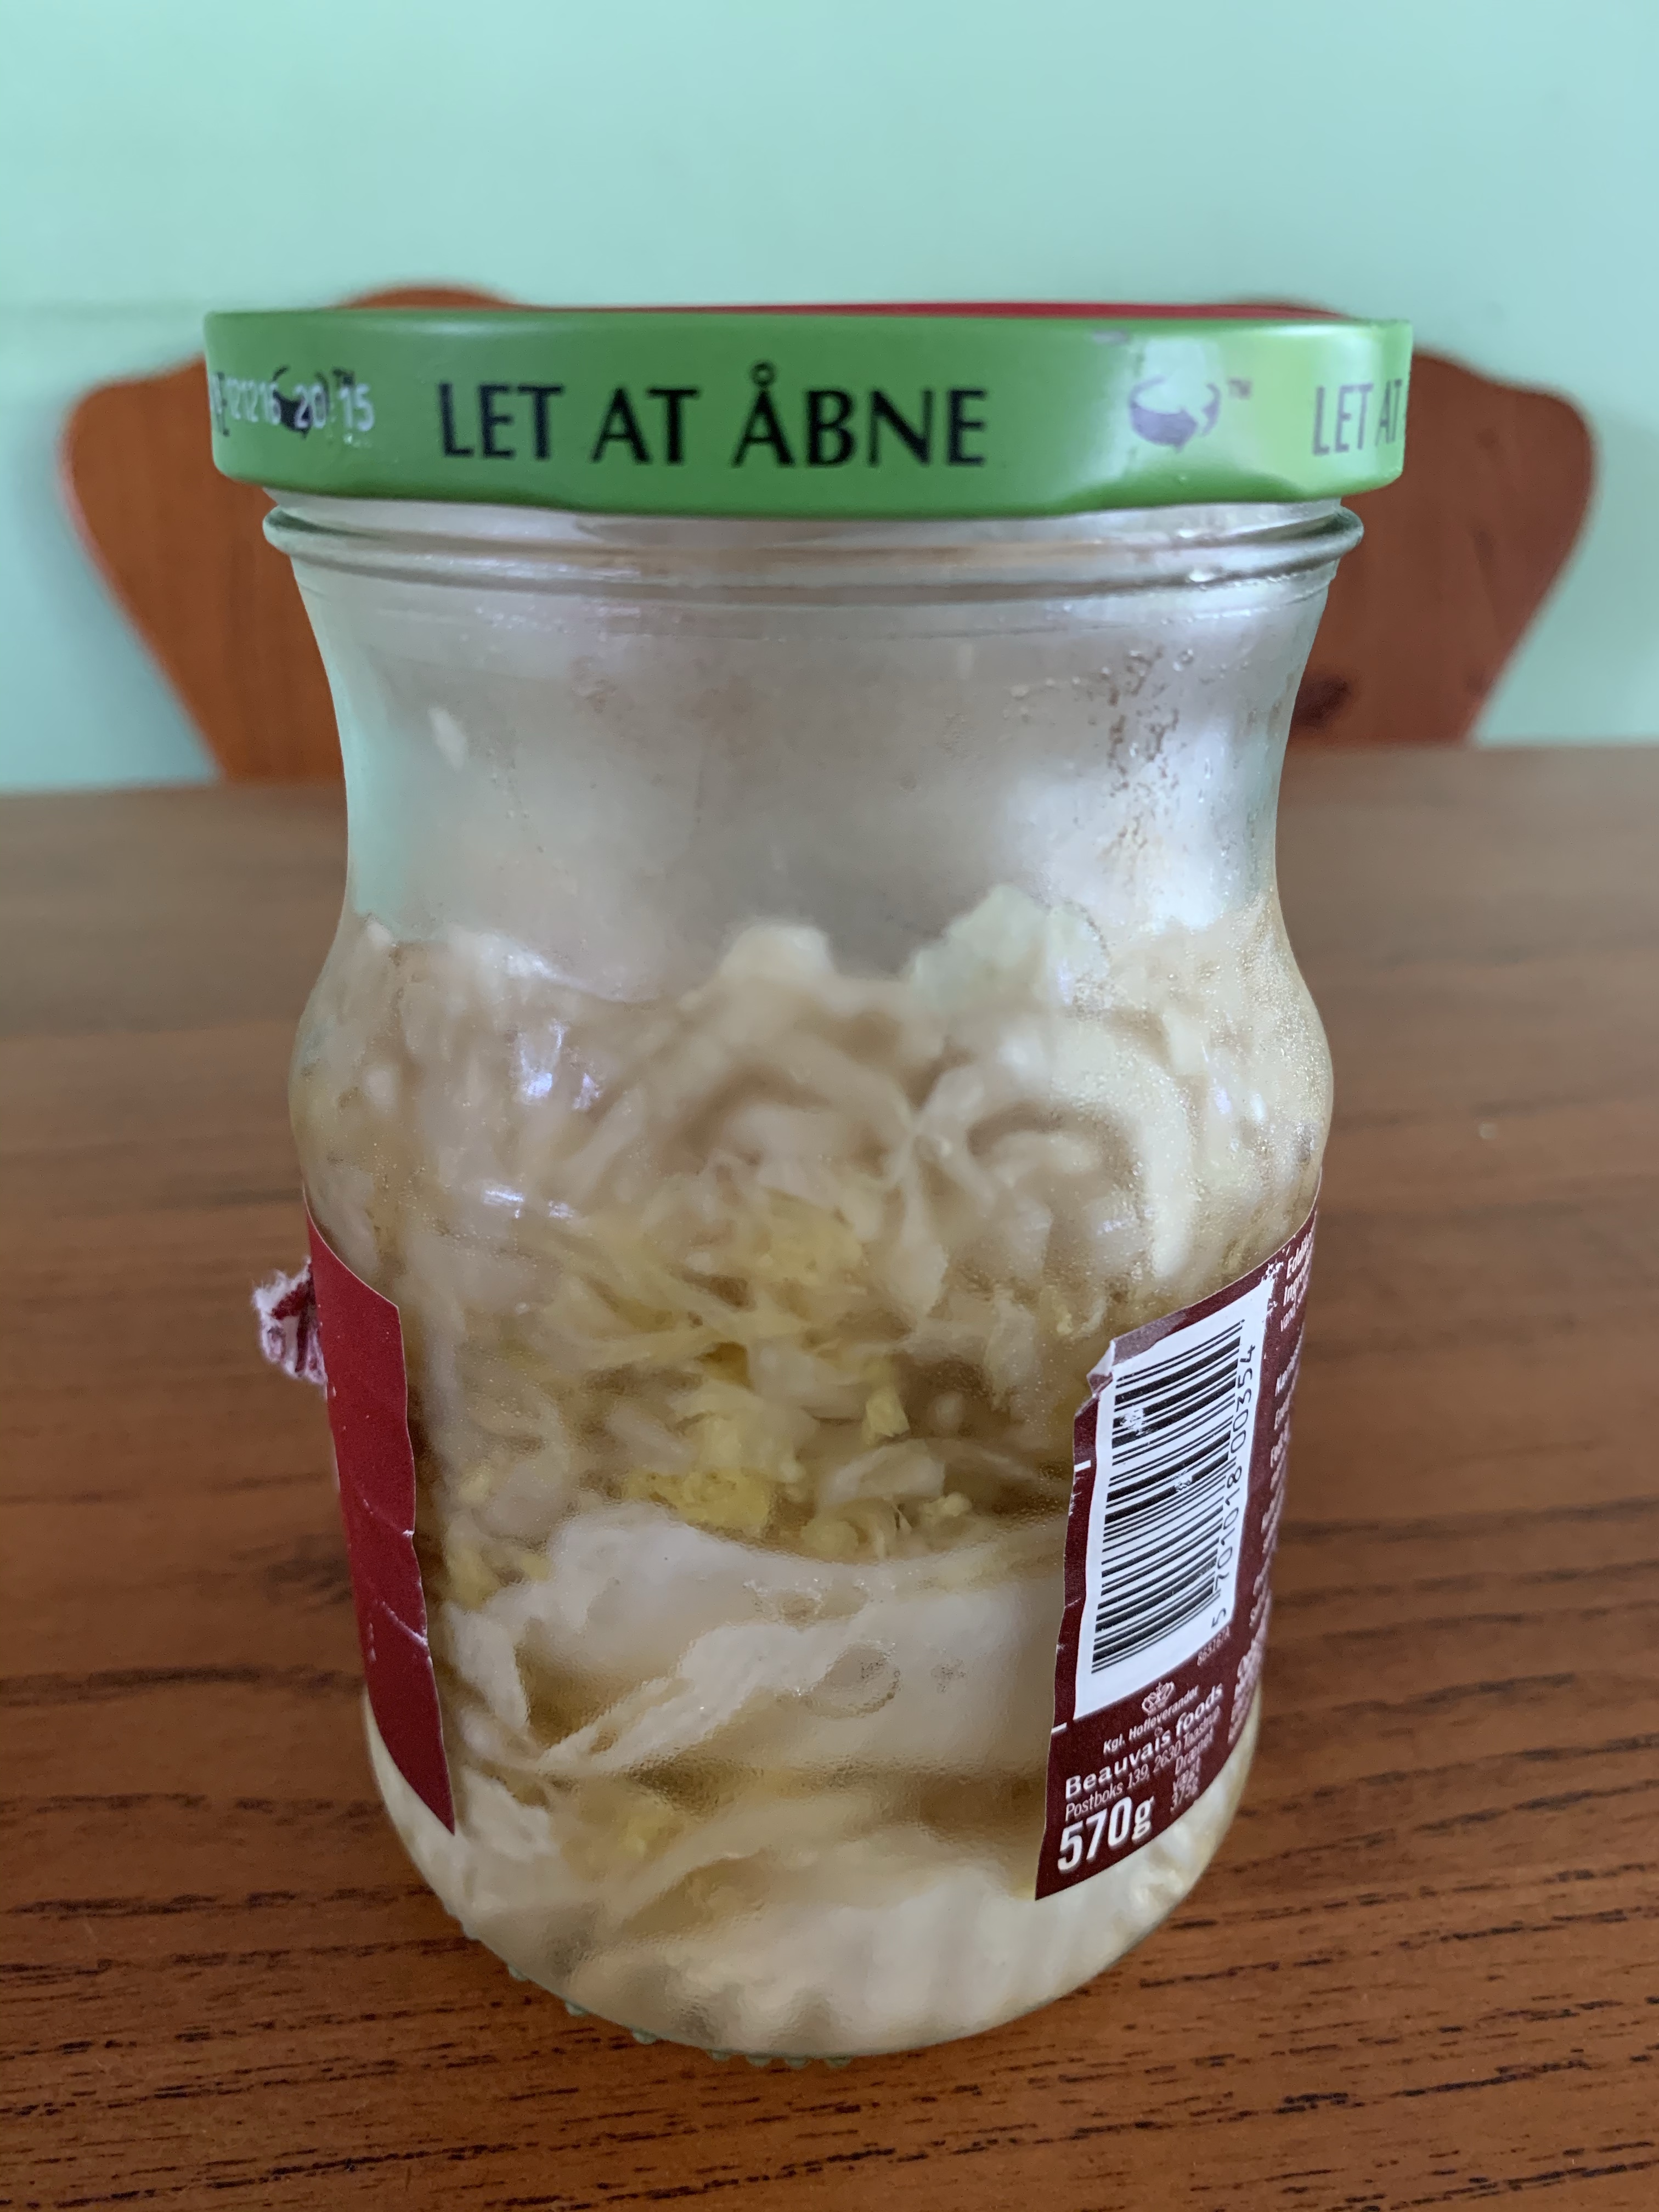
Fermentation jar (I use the Lock&Lock Fermentation Jar that comes with a one-way air lock. I prefer to use food grade glass jars due to the high acidity of the ferment and it’s going to stay in it for a while.)

A long stick or spoon (for packing the cabbage into the jar)

Mixing bowl

A weight (to make sure your cabbages stay under the brine. I used a glass jar filled with water.)

7 Easy Steps:

1. Wash your organic cabbage under running water.

2. Pull out the biggest leaf. Cut it down so that it can cover the cabbage slices.

2. Finely slice the rest of the cabbage.

Fermented Cabbage Sauerkraut

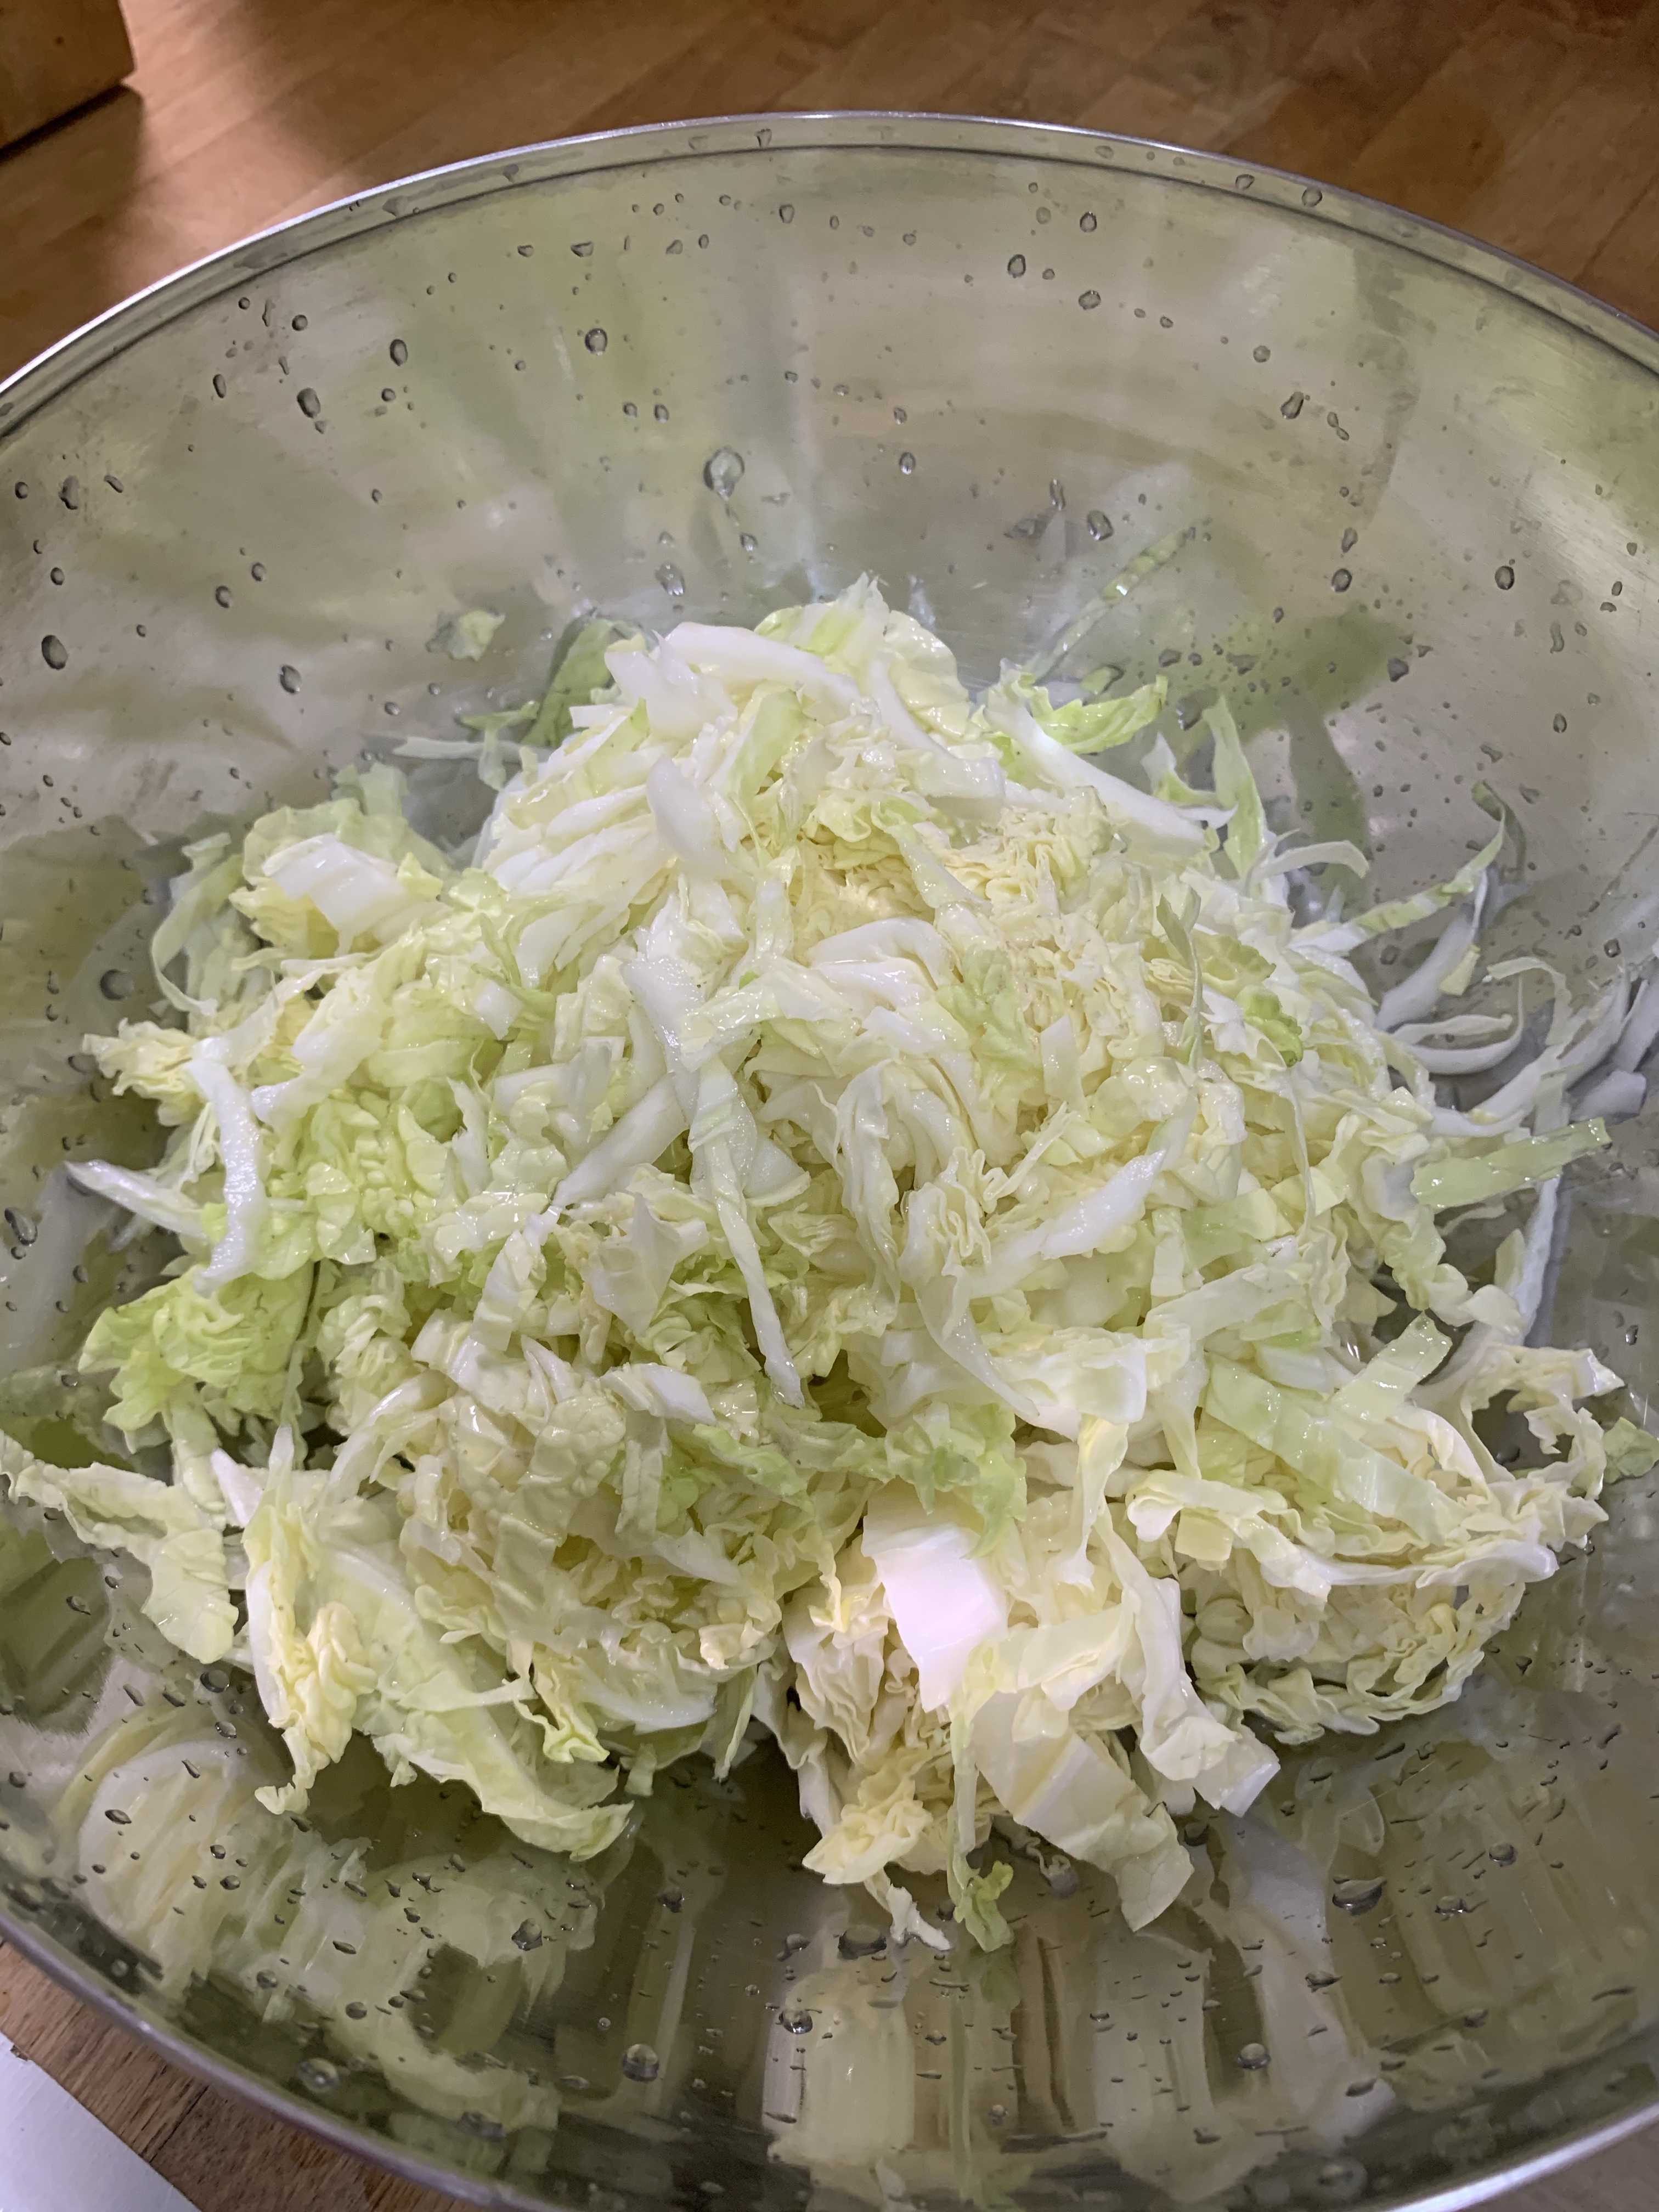
3. Add in some salt over the shredded cabbage.  Massage it in with your fingers. (Oh yes, please wash your hands and the parts of your arms that will touch the cabbage, if you are making a big batch. But don’t use antibacterial soap which will interfere with the fermentation process.) Slowly you will see a puddle of liquid polling at the bottom of the pool. Speaking of which, it’s quite therapeutic to massage the cabbage. *lol*

Fermented Cabbage Sauerkraut

4. Taste the cabbage. If you feel that it’s not salty enough, add in more salt. If the brine is still very little, add in more salt and massage until there’s enough brine to cover the cabbage. If it’s already VERY salty but still not enough brine to cover the cabbage, you can add some lemon juice. If you have shredded your cabbage finely enough, you will usually have enough brine.

5. Grab the cabbage and start stuffing them down the fermentation jar. As you do that, use your stick or spoon to push the bits down to make sure there aren’t any air pockets. This stick that I bought from Daiso to roll my pastry dough is just nice for the job.

Fermented Cabbage Sauerkraut

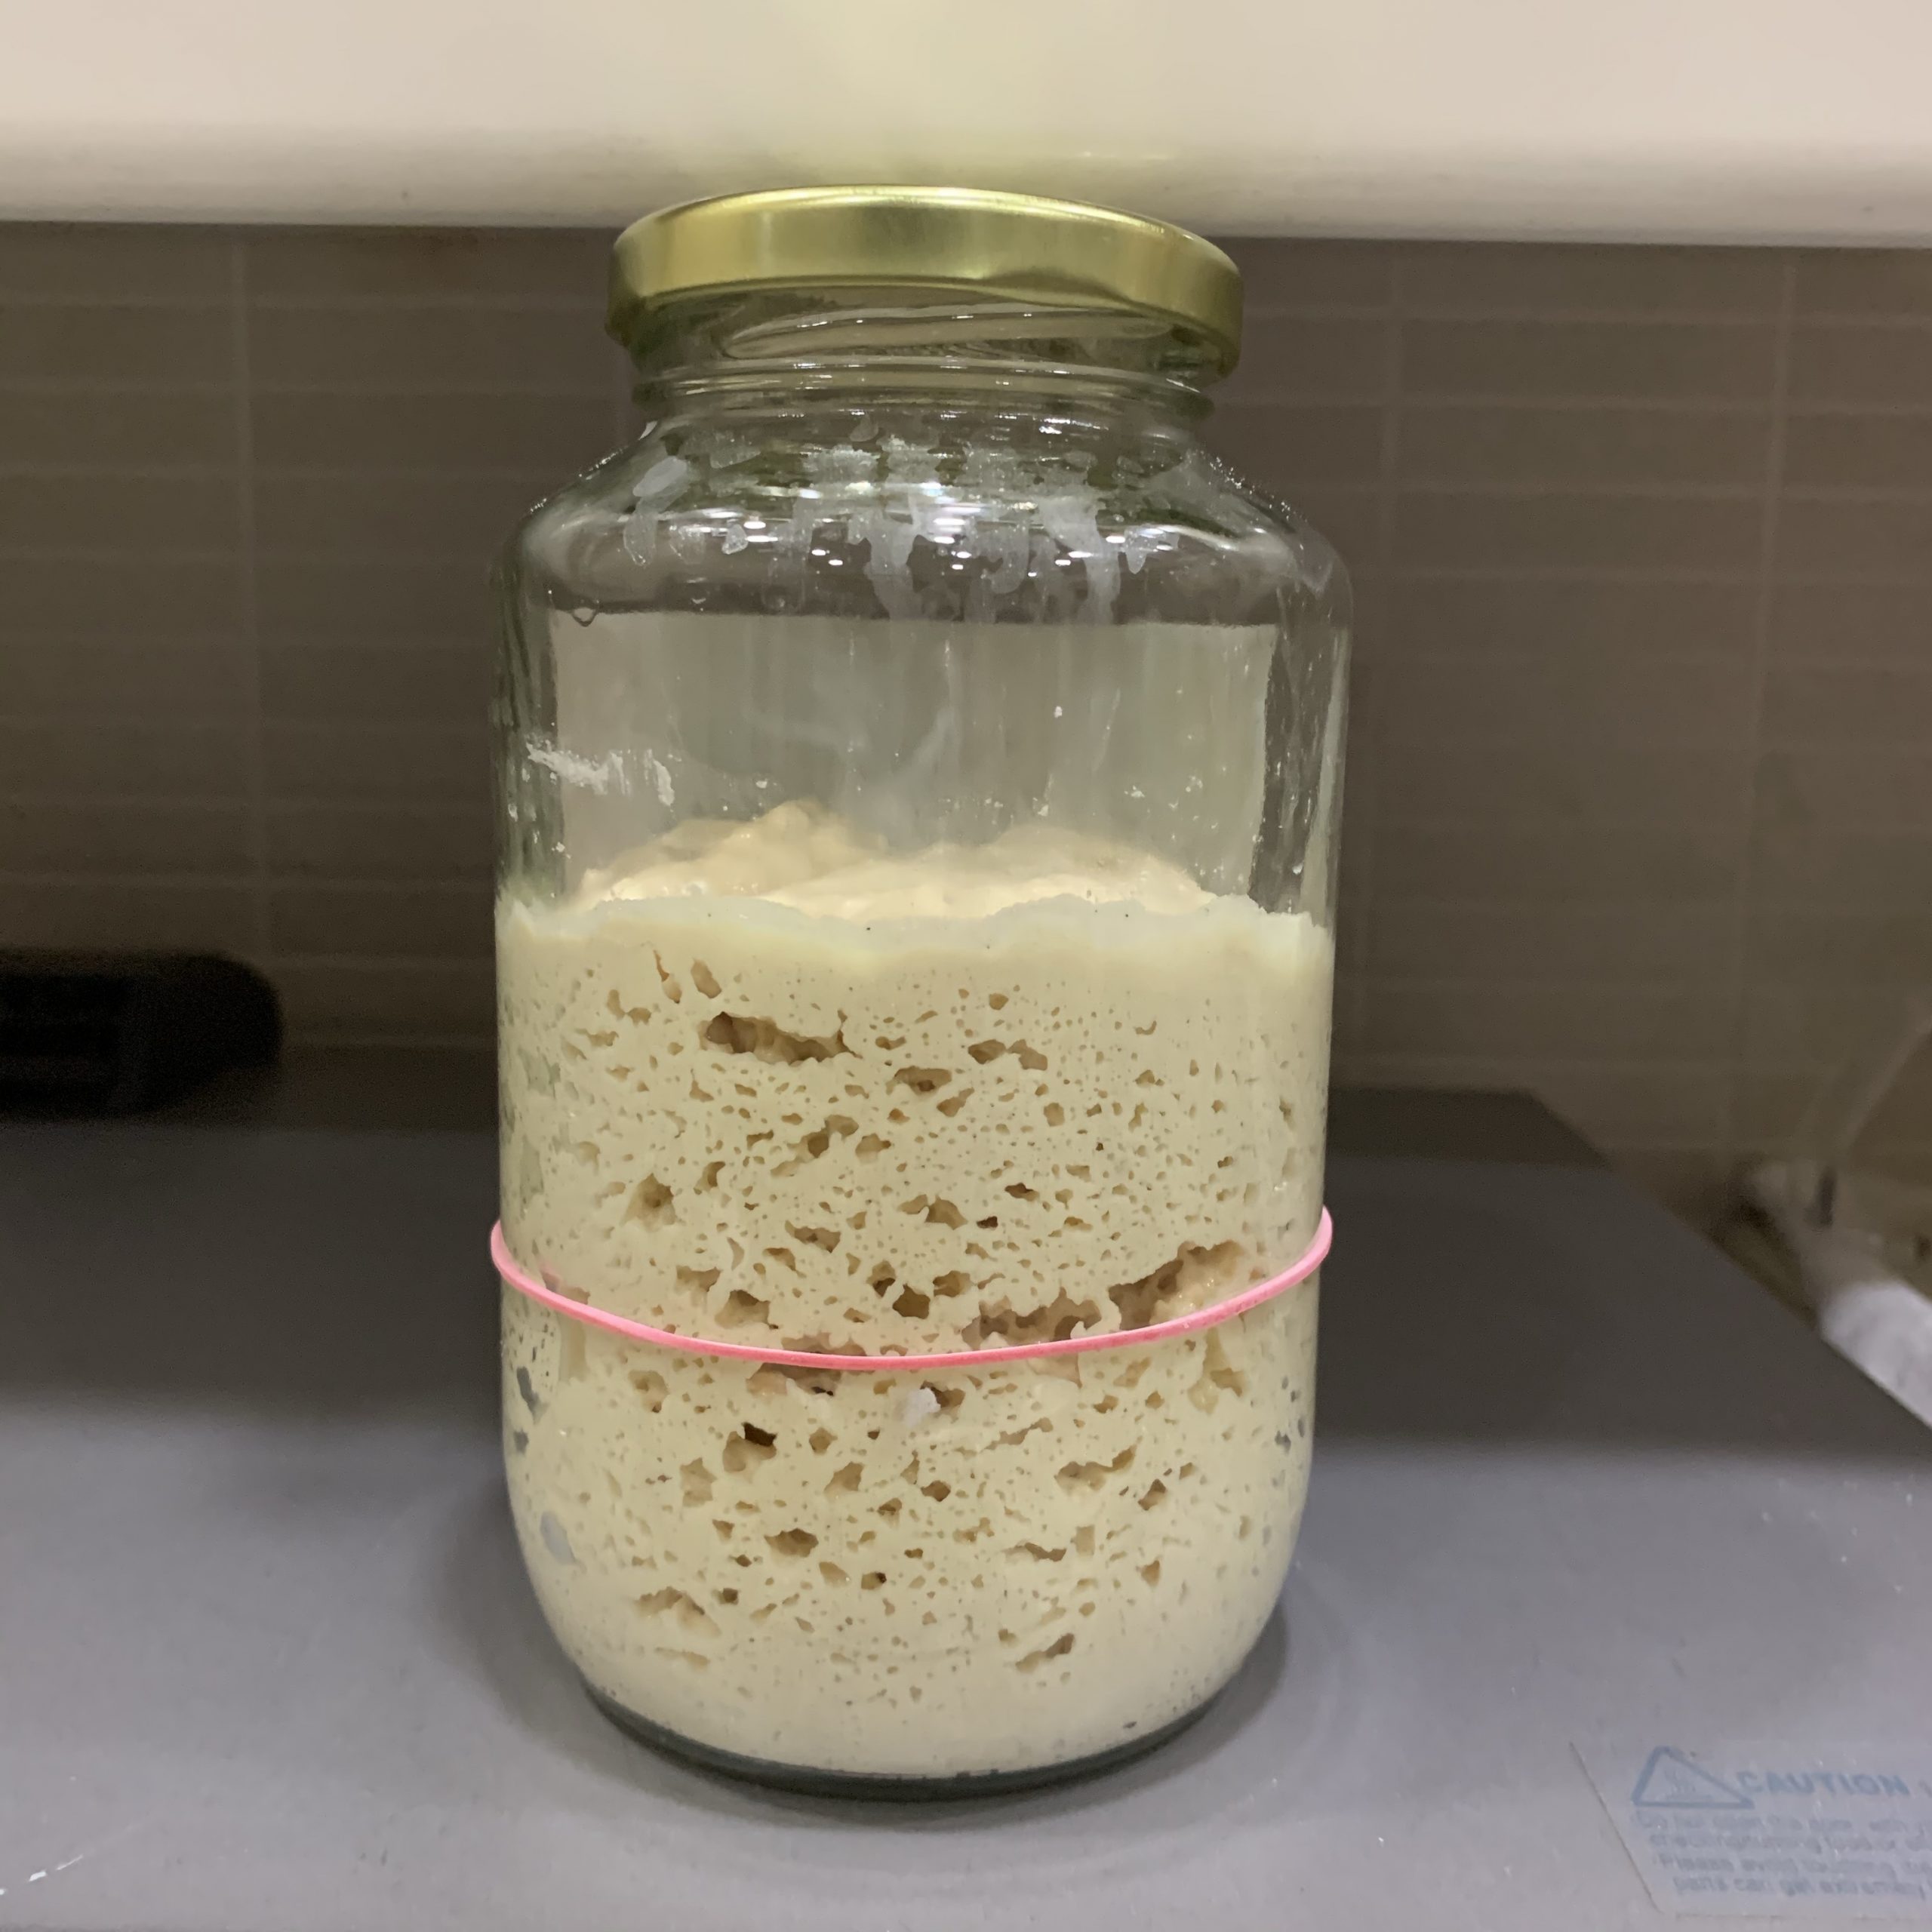
6. Once you have filled your jar, put your big cabbage leaf or leaves over them and press down so that all the bits remain below the brine. I use a clean glass jar, filled with water, to weigh down the leaves. I am buying some glass weights from Amazon. Hope they come soon! Then I capped it with my air lock lid. If you do not have this, you can cover it with a cloth and snap a rubberband over the opening. Or you can just cover the lid loosely over so that air can escape.

Fermented Cabbage Sauerkraut


Fermented Cabbage Sauerkraut

7. I put my precious jar in a dark corner of my kitchen. The best temperature for fermentation is between 20-24 degree C. So that the cabbage has time to ferment nicely and not turn out to be too tart.

Fermented Cabbage Sauerkraut

How do you know if it’s done? Typically, it’s done if it reaches 4.6pH or lower. I keep a stack of ph paper at home to test for new ferments. Usually for old ferments, I would know the estimated amount of time. Alternatively, do the eye-taste-smell-touch test, which I usually do!

Eye – should look a little yellowish

Taste – nicely sour and a little picklelike (if there’s such a word), but not to the extent of becoming vinegar….

Smell – Sour

Touch – firm or slightly soft but not slimy. Slimy = bad news

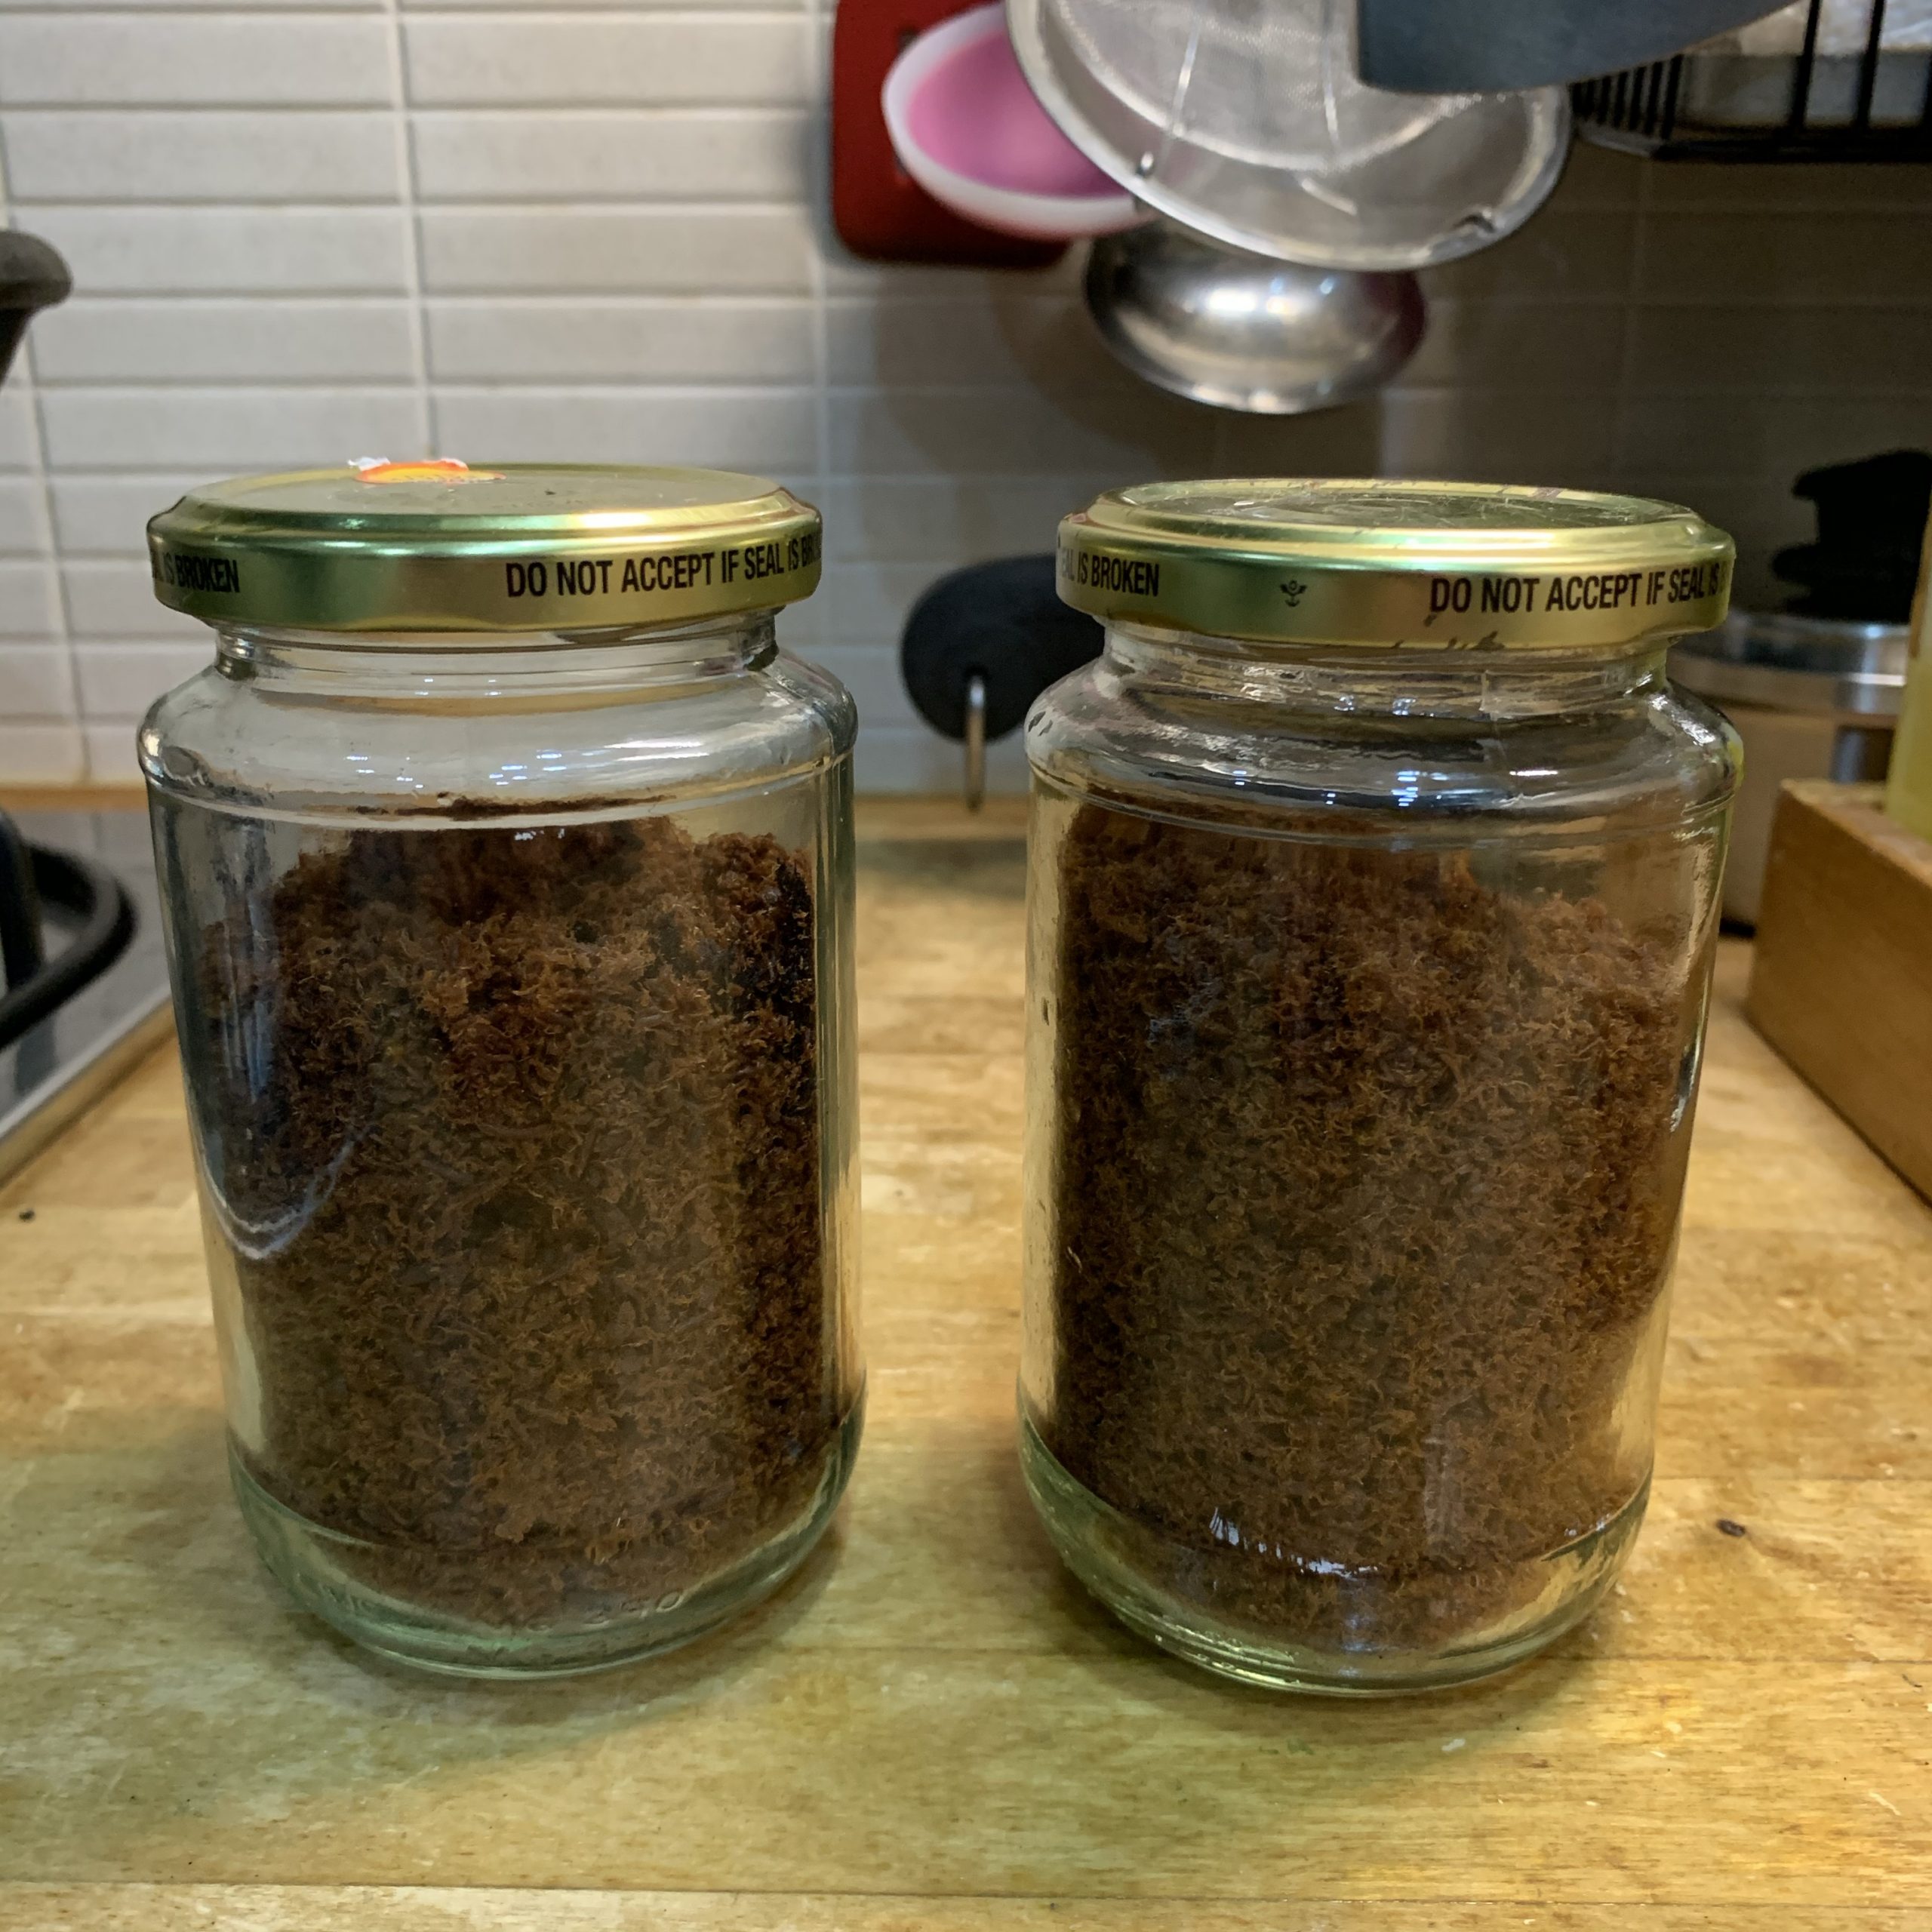
Once you feel that the ferment is ready, you can bottle them and keep them in the fridge to hibernate the bacteria so that you can stop the fermentation process.

Fermented Cabbage Sauerkraut


The best thing is – it puts good microbes into your body which boosts your immune system which is extremely important during times like this. Take that, Coronavirus!!! AND most importantly, you will have some food at home and you don’t have to fight with the long queues of hoarders at the supermarkets!! Right now, the supermarkets are the most dangerous places in Singapore – what with the long queues and close proximity to dunno-who-is-already-infected.

Besides, I’m trying to work in more fermented food into our diets as these prove to be beneficial to my 宝贝 who is battling the eczema monster!!